Godot 101 - Part 8: Tweens and Timers
Sat, Mar 18, 2017![]()
This is part 8 of “Godot 101”. In this installment, we’ll learn about two of the simplest yet most useful nodes in Godot: the Tween and the Timer. If you haven’t already read through the previous parts, please start with Part 1.
About this series
Godot 101 is an introduction to the Godot game engine and how it works. If you’ve never used a game engine before, or if you’re just new to Godot, this is the place to start. If you’re new here, a quick note about this website: we’re called KidsCanCode because we teach programming and game development to kids, but if you’re an adult you’re welcome here, too. We don’t believe in dumbing-down the material for kids, and game development is hard - so it will probably be challenging no matter what your age.
You can watch a video version of this lesson here:
Adding visual appeal
In game design circles, it’s sometimes called “juice” - the little visual effects that make the difference between a game that’s boring and a game that feels great to play.
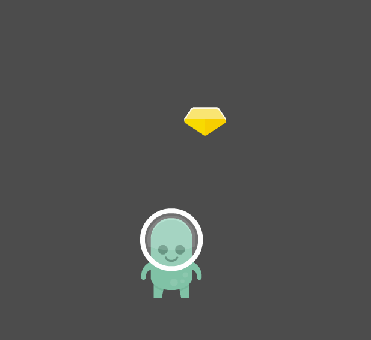
Collecting the gems is a perfect example of a place where we could add a little juice. It’s not very visually appealing to see the gems just vanish like they do now. Instead, we’re going to use a Tween to juice things up. Add a Tween to the gem scene and name it 'effect'.
For a great example of how Tweens work, have a look at this page: Easings.net. “Easing” is another word that’s sometimes used in place of “tweening”. Essentially, a tween is a way to change some value over time (from a start value to an end value) using a particular function. Hover over the different functions on this page to see how they work.
When choosing a tween, you have two choices to make: 1) which function to use (examples: Sine or Bounce) and 2) which direction to apply that function (examples: In or In-Out).
Interpolating properties
“Interpolation” means calculating the value(s) between two points. In this case, we want to alter some of the properties of the gem’s sprite node. Specifically, the scale. You can find Godot’s name for a node’s properties by hovering over the property name in the Inspector:

This tells us that we will be modifying the property transform/scale. We will use the tween’s interpolate_property() function to define the animation:
extends Area2D

onready var effect = get_node("effect")
onready var sprite = get_node("sprite")

signal gem_grabbed

func _ready():
    effect.interpolate_property(sprite, 'transform/scale',
        sprite.get_scale(), Vector2(2.0, 2.0), 0.3,
        Tween.TRANS_QUAD, Tween.EASE_OUT)

func _on_gem_area_enter( area ):
    if area.get_name() == "player":
        emit_signal("gem_grabbed")
        clear_shapes()
        effect.start()

func _on_effect_tween_complete( object, key ):
        queue_free()
interpolate_property() takes a number of arguments:
- target object: the
sprite - target property:
transform/scale - starting value: the current value obtained from
get_scale() - ending value: we want to scale up to 2x
- duration (in s): 0.3s because we want a quick effect
- tween function: feel free to try other ones besides
TRANS_QUAD - tween “ends”: you can also use other settings like
EASE_IN
Now that the effect is set up, we use start() to start it when the gem is touched. However, we don’t want the gem to still be detecting collisions during the animation time, so we use clear_shapes() to remove the collision detection. Finally, we connect the tween’s tween_complete signal to actually delete the node. Now our animation looks like this:
This is good, but we can do even better by interpolating another property as well: the opacity. Tweens get really powerful when you apply them to multiple properties at once. Add this to the gem’s _ready():
effect.interpolate_property(sprite, 'visibility/opacity',
    1, 0, 0.3,
    Tween.TRANS_QUAD, Tween.EASE_OUT)
Now at the same time we’re scaling the sprite larger, we’re changing the opacity from 1 (fully visible) to 0 (fully transparent). Now it looks even nicer:

Timers
Next we’re going to use the Timer node to give our game a goal: collect as many gems as you can before the time runs out!
Create a Timer node and call it 'game_timer'. While you’re at it, add another Label to the HUD to display the countdown - call it 'time_label'.
A Timer node is also very simple, with only a few properties - set them as follows:

Wait Time: how long the timer should run, in secondsOne Shot: if this isfalse, the timer will restart every time it reaches zeroAutostart: if this is ‘true’, the timer will start automatically when the node enters the tree
Here is the code we need to add to main.gd:
onready var time_label = get_node("HUD/time_label")
onready var game_timer = get_node("game_timer")

func _process(delta):
    time_label.set_text(str(int(game_timer.get_time_left())))

func _on_game_timer_timeout():
    get_node("player").set_process(false)
Don’t forget to connect the timeout signal. Here, we’re just disabling the player when the time runs out. You might want to also add a “Game Over” label, setting it to hidden when the game starts, and then showing it at game end.
Wrapping Up
These two nodes are incredibly useful for many, many situations. You should try to use tweens whenever possible - they just make everything look better. Also, note that you can create these nodes directly in code as an alternative to adding them to the scene tree:
func _ready():
    var tween = Tween.new()
    add_child(tween)
Feel free to use timers all over your projects as well. They can be used to measure durations, create regular repeating effects, and lots more.