Procedural Generation in Godot - Part 1: Mazes
Tue, Aug 28, 2018In this series, we’ll explore the applications of procedural generation to game development. While we’ll be using Godot 3.0 as our platform, much of the concepts and algorithms related to this subject are universal, and you can apply them to whatever platform you may be working on.
You can watch a video version of this lesson here:
What is Procedural Generation?
In game development, procedural generation (“procgen” for short) is a method of creating game content via automated, rather than manual, means. In practice, it can cover a wide range of applications, from simple: such as random mazes or character names, to more complex: dungeons (including keys, locks, bosses, etc.) or spaceships, to the ultra-complex: like Dwarf Fortress, where everything in the world is generated - environmental and cultural history, weather, biology, personality traits, and much, much more.
If you don’t know about Dwarf Fortress, I highly recommend checking it out. Even if you don’t play the game - and the learning curve is tough - it can be fascinating and entertaining to read about. Start here
You can learn a lot about procgen and its applications at the Procedural Generation Wiki.
For this series, we’ll start by looking at one of the most popular applications of procgen: mazes. Maze generation is a well-explored area, and there are many algorithms you can use, depending on the type of maze you need.
You can read an overview of maze generation here:
Wikipedia: Maze Generation Algorithm
Making mazes
For this part, we’ll use the “Recursive Backtracker” algorithm. This is also known as “depth-first search”, and is one of the easiest maze algorithms to implement.
It works by exploring a grid (technically it works on a graph, which doesn’t have to be grid-shaped, but for this demo we’ll stick to a standard square grid) cell-by-cell, connecting each cell, but never crossing over.. In mathematical terms, it produces a spanning tree, meaning there are no loops and only one path from any one point to another.
The algorithm
The recursive backtracker algorithm works like this:
- Set all cell walls to solid and mark each cell unvisited
- Pick a starting cell and mark it visited
- If any neighboring cell has not been visited
- Pick a random neighboring cell that has not yet been visited
- Remove the wall between the two cells
- Add the current cell to the stack
- Make the chosen cell the current cell and mark it visited
- If the current cell has no unvisited neighbors, take the top cell from the stack and make it current
- Repeat from #3 until there are no more unvisited cells
Data representation
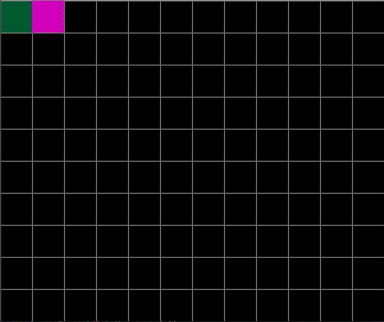
First we need to decide how to represent the maze data. We’ll be using a Godot’s TileMap node which, like our maze itself, will be based on a grid. Each cell of the grid has four walls, which can be either open or closed:
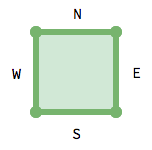
With two states (open or closed), we can use a single bit to represent the state
of each wall: 0 for open and 1 for closed. That means that a 4-bit (i.e. 4
digit) number can represent any given cell. We can do this in any order, but I’m
going to use the order WSEN. So a cell with walls 1001 (9 in decimal) for
example, would mean the N and W walls are present.
As a result, we can use the decimal numbers 0-15 to represent all of the possible cell configurations, and therefore all of the possible tiles:

A tile can be placed next to any tile that has the matching side value. This means you can use any tileset that matches this arrangement. For this demo I’ll be using Kenney’s Road Textures pack, which contains the following tiles following our pattern:
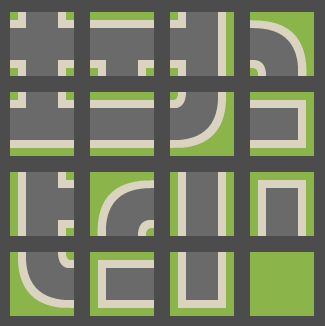
If we make these into a TileSet in Godot, with the tile id matching the wall
pattern, we can use the TileMap data to record our maze data as well. This is
really nice, because we won’t need a separate data structure to store information
about the walls.
Download the Starting Project.
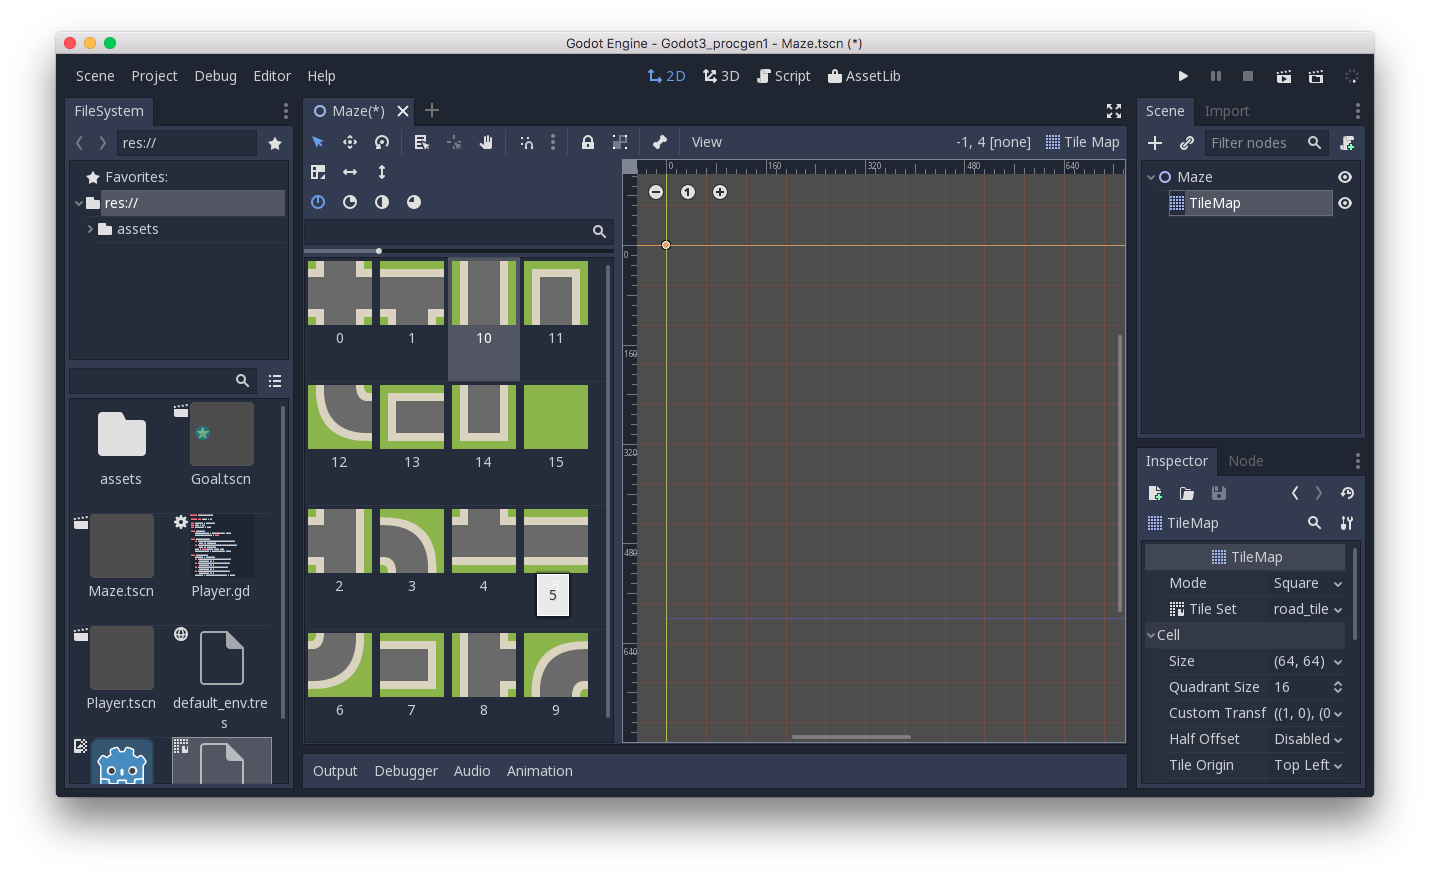
When you download the starting project, you’ll find I’ve created a TileSet for
the 16 tiles we need, along with collision polygons for the walls (green areas).
The filename for the TileSet resource is road_tiles.tres.
For the starting scene setup, we need a parent Node2D and a TileMap:
The script
A lot of the code we need for this project is very generic: it can apply to many similar types of problems. Keep that in mind as we move forward - what other applications of these algorithms can you think of?
extends Node2D

const N = 1
const E = 2
const S = 4
const W = 8

var cell_walls = {Vector2(1, 0): E, Vector2(-1, 0): W,
                  Vector2(0, 1): S, Vector2(0, -1): N}
We start by defining the four direction values for our tiles. Assigning them to
the compass direction names isn’t strictly necessary, but makes it easier to
reference them. You can see that in the cell_walls dictionary, where we
establish the relationship between the direction vectors and the walls’ values.
Next, we have a few parameters to define:
var tile_size = 64  # tile size (in pixels)
var width = 25  # width of map (in tiles)
var height = 15  # height of map (in tiles)

# get a reference to the map for convenience
onready var Map = $TileMap
The _ready() function is fairly self-explanatory:
func _ready():
    randomize()
    tile_size = Map.cell_size
    make_maze()
Before we can generate the maze, we’re going to need a helper function that, given a cell, returns a list of its unvisited neighbors:
func check_neighbors(cell, unvisited):
    # returns an array of cell's unvisited neighbors
    var list = []
    for n in cell_walls.keys():
        if cell + n in unvisited:
            list.append(cell + n)
    return list
Now, on to our make_maze() function, where the magic happens:
func make_maze():
    var unvisited = []  # array of unvisited tiles
    var stack = []
    # fill the map with solid tiles
    Map.clear()
    for x in range(width):
        for y in range(height):
            unvisited.append(Vector2(x, y))
            Map.set_cellv(Vector2(x, y), N|E|S|W)
    var current = Vector2(0, 0)
    unvisited.erase(current)
First, we’re initializing the map and the variables we’ll need to keep track of unvisited tiles and the stack of tiles to process.
Note: GDScript doesn’t have an actual stack data type, but an Array will work just fine, as long as we use
append()to add items to the end andpop_back()to remove them from the same end.
Then we loop through the map setting all of its tiles to solid ones (N|E|S|W)
and adding each cell to the unvisited list. We’re using the top-left corner as
the start tile, but you can start anywhere in the grid.
NOTE: The
|symbol in GDScript (as in many languages) indicates bitwise OR. Combining the four direction values with|results in1111(decimal:15), or our value for a tile with all four walls present.A full explanation of bitwise operations is beyond the scope of this tutorial, but you can find out more here: Wikipedia: Bitwise operation
Now we can implement the algorithm:
while unvisited:
    var neighbors = check_neighbors(current, unvisited)
    if neighbors.size() > 0:
        var next = neighbors[randi() % neighbors.size()]
        stack.append(current)
        # remove walls from *both* cells
        var dir = next - current
        var current_walls = Map.get_cellv(current) - cell_walls[dir]
        var next_walls = Map.get_cellv(next) - cell_walls[-dir]
        Map.set_cellv(current, current_walls)
        Map.set_cellv(next, next_walls)
        current = next
        unvisited.erase(current)
    elif stack:
        current = stack.pop_back()
If you run this, you should see the map filled out with a nice branching path. If
you want to see the process happen more slowly, add this line at the end of the
while loop:
yield(get_tree(), 'idle_frame')
Pick two random tiles, one for “start” and one for “end”, and you have a solvable maze!
Conclusion
Now that we have a working maze generator, there are a lot of things we can do with it. In the next part, we’ll discuss some variations we can make to this algorithm, as well as some examples of using the maze in a project.
Please comment below with your questions and suggestions.
Download the code for this lesson
Helpful Links
- Download Godot 3.0
- Support Me on Patreon
- Thanks to kenney.nl for the art!