Procedural Generation in Godot - Part 2: Using Mazes
Mon, Sep 10, 2018In this series, we’ll explore the applications of procedural generation to game development. While we’ll be using Godot 3.0 as our platform, much of the concepts and algorithms related to this subject are universal, and you can apply them to whatever platform you may be working on.
In the previous part we explored how to generate a random maze using Godot’s TileMap node. In this part, we’ll look at some ways to use these mazes in your game projects.
You can watch a video version of this lesson here:
Maze applications
In the sections below, we’ll be using the project we built in part 1. You can download the project here.
Note: many of the following features can be combined for even more variety and effect. If you do so, it’s likely that they can be coded in a much more efficient way, but I’ve chosen to demonstrate them separately for clarity.
On random seeds
While using random generation guarantees you’ll get a unique maze every time you run the game, there are times when you want to be able to also get repeatable results. By using the same seed for the random number generator, you can ensure you’ll get the same sequence of “random” numbers every time.
Here is a brief example of how to do this. Add the following to the maze script:
var map_seed = 0

func _ready():
    randomize()
    if !map_seed:
        map_seed = randi()
    seed(map_seed)
    print("Seed: ", map_seed)
    tile_size = Map.cell_size
    make_maze()
Here, we are creating a variable to store the seed for our map. Setting this to
0 indicates we want a random seed. When you run, you’ll see printed a value
something like 111556094. If you make this number your seed, you’ll always
get the same map.
Games such as Minecraft use this technique to allow users to share their randomly generated worlds. They only need to share a single number, their map’s seed, and no matter how far they explore the vast, generated world, both players’ worlds will match.
If you want to use something like this in your game, you can save the seed
value as part of your game’s save file.
Adding loops
The recursive backtracker algorithm we’re using creates “perfect” mazes - meaning there are no loops and only one path between any two points in the maze. However, you might want the map to feel more “natural”, and add more connections allowing the player to explore different paths through the map.
To do this, after the maze generation is complete, we randomly go through the map and remove walls. Depending on how many walls you remove, you can get just a few extra connections, or an almost fully connected grid.
Call this function after the maze generation finishes:
var erase_fraction = 0.2  # amount of wall removal

func erase_walls():
    # randomly remove a percentage of the map's walls
    for i in range(int(width * height * erase_fraction)):
        # pick a random tile not on the edge
        var x = int(rand_range(1, width-1))
        var y = int(rand_range(1, height-1))
        var cell = Vector2(x, y)
        # pick a random neighbor
        var neighbor = cell_walls.keys()[randi() % cell_walls.size()]
        # if there's a wall between cell and neighbor, remove it
        if Map.get_cellv(cell) & cell_walls[neighbor]:
            var walls = Map.get_cellv(cell) - cell_walls[neighbor]
            var n_walls = Map.get_cellv(cell+neighbor) - cell_walls[-neighbor]
            Map.set_cellv(cell, walls)
            Map.set_cellv(cell+neighbor, n_walls)
Spacing out the path
Since we’re using roads, a natural extension would be to also generate decorations, buildings, and other objects in the green areas. However, our maze generating algorithm explores every tile and makes it part of the path. This means that there is not much space between adjacent roads. Let’s space out the road tiles so that there are empty tiles between them.
To begin, we change the cell_walls dictionary to indicate that each cell’s
neighbors should be considered 2 spaces apart.
var cell_walls = {Vector2(0, -2): N, Vector2(2, 0): E,
                  Vector2(0, 2): S, Vector2(-2, 0): W}
In the maze generator, we also need to make sure we only count the even-numbered
tiles or else our unvisited list will never be completed. Change the code at
the start of the make_maze() function as follows:
for x in range(width):
for y in range(height):
Map.set_cellv(Vector2(x, y), N|E|S|W)
for x in range(0, width, 2):
for y in range(0, height, 2):
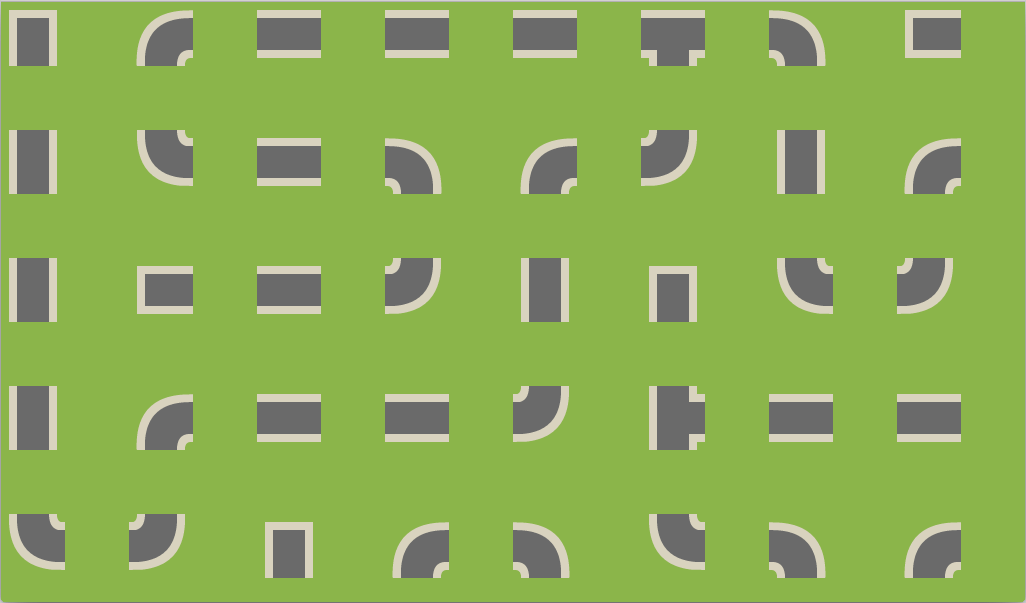
unvisited.append(Vector2(x, y))If we only do this, the map is generated every two spaces, like so:
To keep the path continuous, whenever we remove the wall to a new adjacent cell,
we need to include either a vertical or horizontal tile (tiles 10 and 5 )
between them.
if dir.x != 0:
Map.set_cellv(current + dir/2, 5) # vertical road
else:
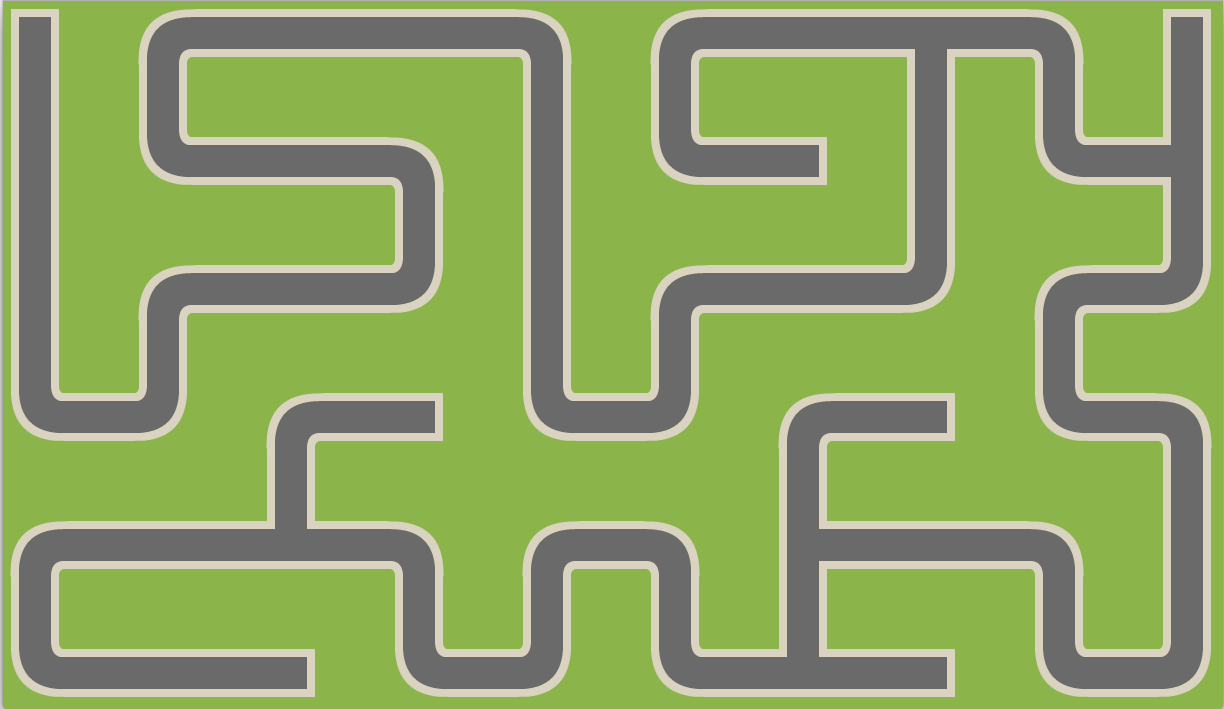
Map.set_cellv(current + dir/2, 10) # horizontal roadNow our path is continuous again, and we have more green space available to place features such as trees, rocks, buildings, etc.
If you’re also using the erase_walls() function above, you’ll need to modify
it to insert the “in-between” tiles as well:
# insert intermediate cell
if neighbor.x != 0:
    Map.set_cellv(cell+neighbor/2, 5)
else:
    Map.set_cellv(cell+neighbor/2, 10)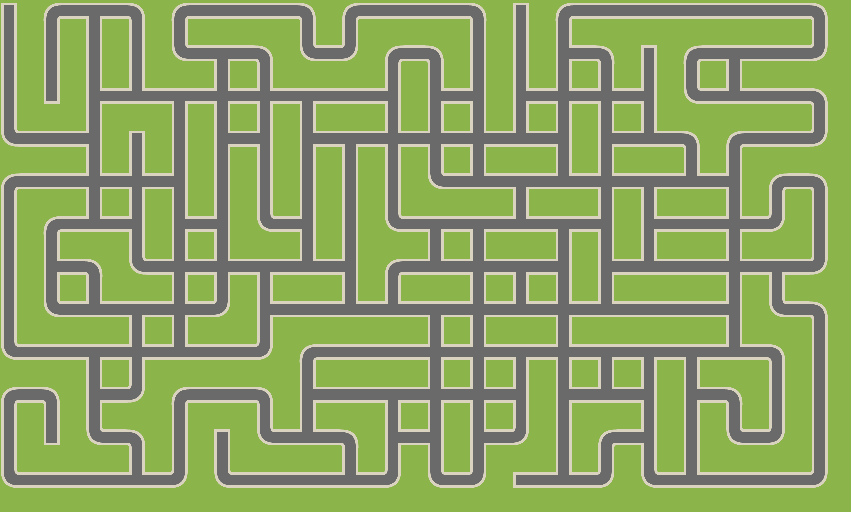
To be more flexible, you could generalize this process to use a spacing
variable, which would allow you to create your map with an arbitrary number of
spaces between paths.
Isometric
One of the coolest things about using this TileMap method to store the map data is that it is independent of the map type (orthogonal or isometric). An isometric version of the road tiles looks like this:
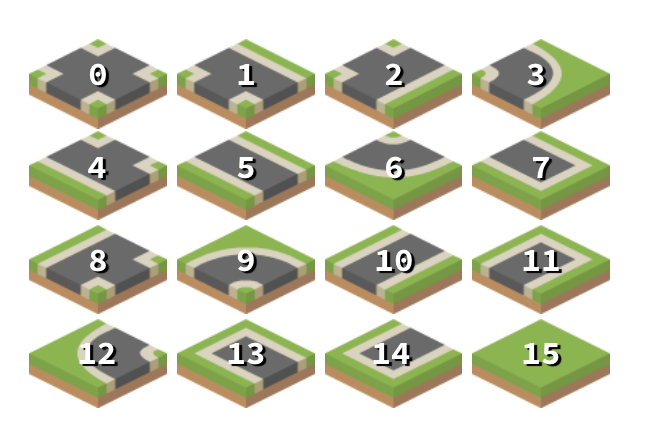
For an isometric map, you only need to change the Mode to “Isometric”, replace
the TileSet with the one above (res://iso_roads.tres in the start project),
and set the cell_size to (100, 50) and the map will be generated in the same
way:

In the next part, we’ll explore mazes a bit further by generating some decorations and other features, as well as make a simple maze-navigation game using our maze generator.
Conclusion
This was just an introduction to the many possibile uses of maze generation in your game projects. In many cases, a maze generator such as the one(s) we’ve explored here is just the start of your content generation. For example, you might be making a dungeon by arranging a set of rooms, and then use the maze generator to fill in the “gaps” between the rooms with twisty corridors. You may see this technique appear again in later installments.
Please comment below with your questions and suggestions.
Download the code for this lesson
Helpful Links
- Download Godot 3.0
- Support Me on Patreon
- Thanks to kenney.nl for the art!