TileMap: using autotile
Problem
You are using a TileMap, and want to use autotiling to more quickly draw your levels.
Solution
For this demo, we’ll be using the following tileset:
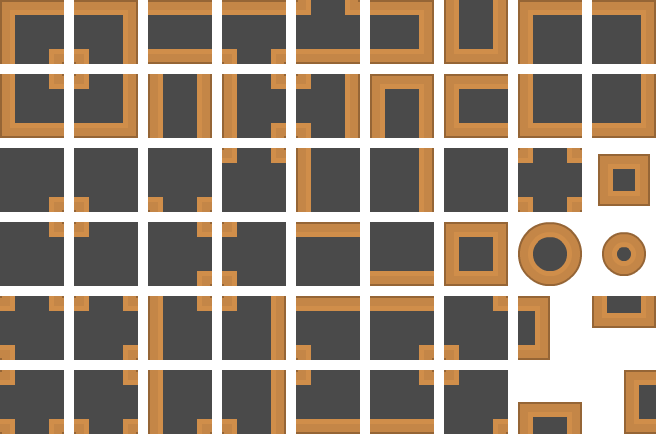
These tiles are from Kenney’s “Topdown Shooter” art pack, which you can find here:https://kenney.nl/assets/topdown-shooter
Creating a map from these tiles, if you were adding them one-by-one, would be a tedious process. You would be constantly changing between tiles to line up corners, intersections, and endpoints.
Using autotiling, you to draw the walls freely, and the autotiling algorithm selects the correct tiles to make everything line up.
Here’s an example:
How autotiling works
The tiles we’re using are designed for a 3x3 (minimal) tiling. Consider a single tile divided into a 3x3 grid:

We can mark the “active” portions of the tile (i.e. the parts that are not the wall):

If we were to do this with each tile, the computer can then make sure that whatever tile is placed adjacent to this one will match up.
In a 3x3 grid there are 512 possible combinations (2^9). We can discard most of these, as they don’t make sense for making continuous walls. It turns out, to properly cover the wall combinations, you need 48 tiles, which we have in our tileset. We’ll be ignoring the 7 tiles in the bottom-right (the ones with the white background).
Making the TileSet
In your TileMap’s Tile Set property, select “New TileSet” and click on it to open. You’ll see the TileSet editor panel open:
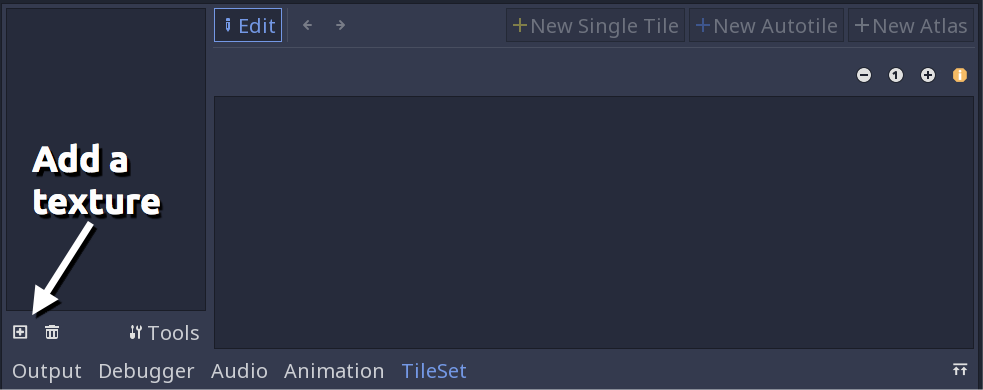
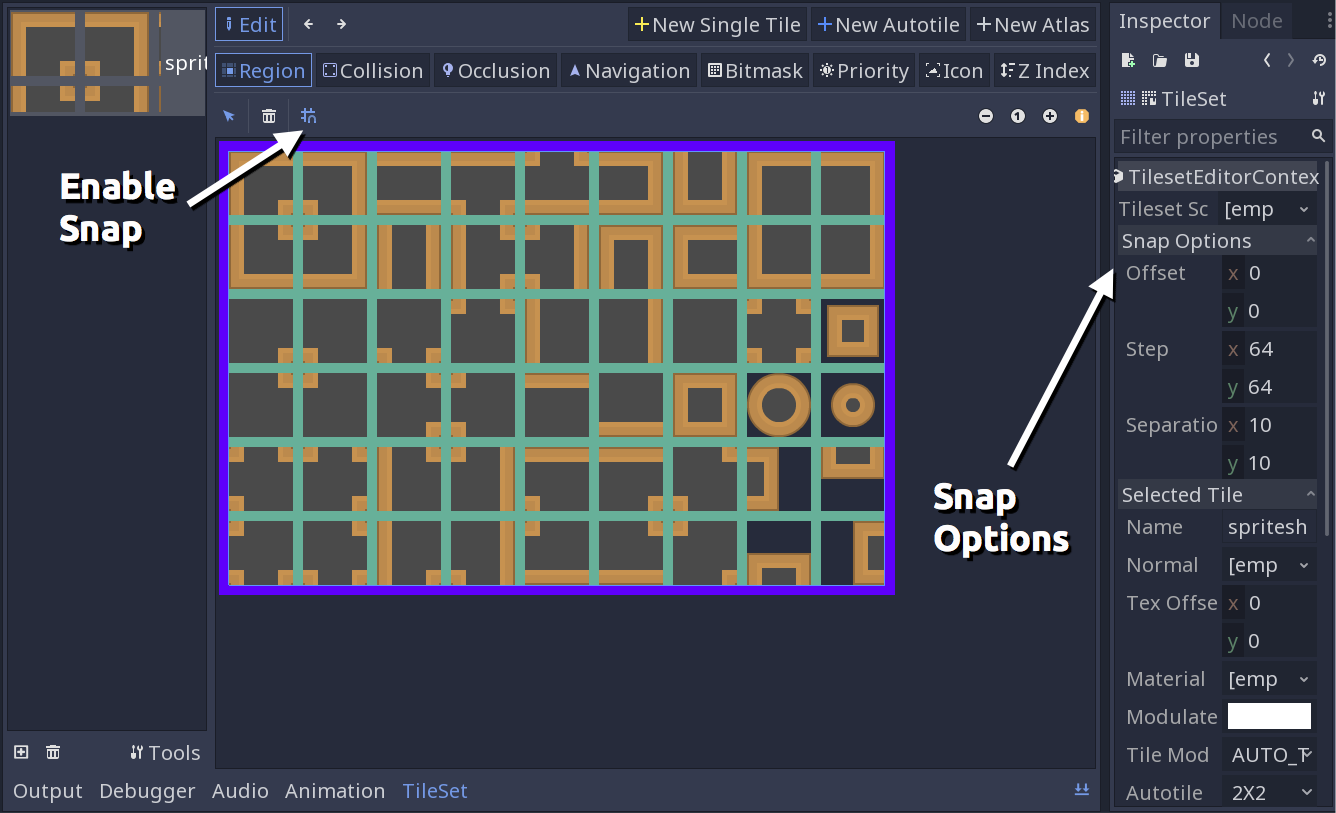
Click the ⊞ button to add a texture, choosing the tile set from above. Then click “New Autotile” and drag to select the whole image. You will probably need to enable snap and adjust the options. The tiles in this tilest are 64x64 and have a 10 pixel separation. If you’re using your own art, you’ll need to enter your own values.
Now that you have selected the set of tiles to make up the autotile group, it’s time to set the bitmasks. Click the “Bitmask” button at the top and start clicking in the tiles. The masked area will appear red. When you’re done it should look like this:
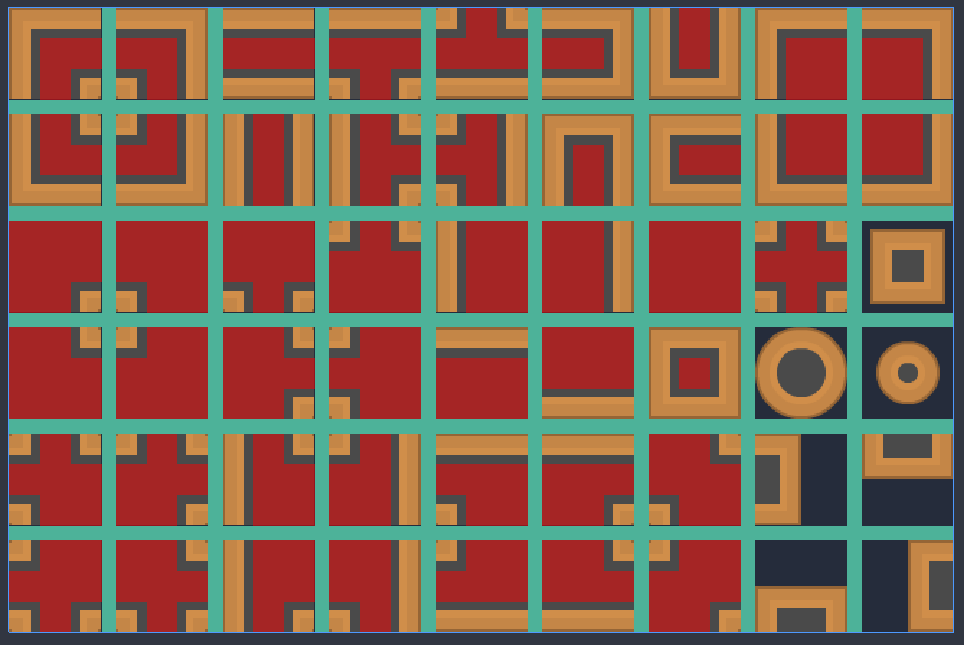
Remember, we’re not using the tiles in the lower-right corner.
Lastly, click the “Icon” button and select a tile you’d like to use as the icon for the autotile group. This is the tile that will show under the cursor as you’re drawing.
Switch back to the TileMap, and you should be able to start drawing. If something is wrong, check your bitmasks and make sure you didn’t miss a square on any of the tiles. Compare with the picture above.
Full TileSet
You can also add collision, navigation, or occlusion to your autotile set. If you download the example project below, you’ll find a complete tileset with polygons defined on all the tiles.