Pathfinding on a 2D Grid
Problem
You have a grid-based environment and you’d like to set up pathfinding to allow navigation.
Solution
Godot provides a number of methods for pathfinding. For this recipe, we’ll consider the A* algorithm.
A* is a widely-used algorithm for finding the shortest path between two points. It can be used in any graph-based data structure, not just a grid.
AStarGrid2D is a specialized version of Godot’s more generic AStar2D class. Because it’s specialized for using with a grid, it’s quicker and easier to set up because you don’t have to manually add all the individual grid cells and their connections.
Setting up the Grid
The most important configuration decision is the size of the cells and the size of the grid itself. We’ll use (64, 64) for this example, and we’ll use the window size to determine how many cells fit on the screen, but everything will work the same regardless of cell size.
Add this code to a Node2D.
extends Node2D

@export var cell_size = Vector2i(64, 64)

var astar_grid = AStarGrid2D.new()
var grid_size

func _ready():
    initialize_grid()

func initialize_grid():
    grid_size = Vector2i(get_viewport_rect().size) / cell_size
    astar_grid.size = grid_size
    astar_grid.cell_size = cell_size
    astar_grid.offset = cell_size / 2
    astar_grid.update()
In this code, we divide the size of the screen by the cell_size to calculate how big the whole grid will be. This lets us set the size property of the AStarGrid2D.
The offset property will come into play when we ask for a path between two points. Using cell_size / 2 means the path will be calculated from the center of each cell rather than the corners.
Finally, we need to call update() after setting or changing any of the AStarGrid2D’s properties.
Drawing the Grid
For the purposes of this demo, we’ll draw the grid on the screen in code. In a game application, you’ll probably have a TileMap or some other visual representation of your world.
Here’s some code to draw the grid:
func _draw():
    draw_grid()

func draw_grid():
    for x in grid_size.x + 1:
        draw_line(Vector2(x * cell_size.x, 0),
            Vector2(x * cell_size.x, grid_size.y * cell_size.y),
            Color.DARK_GRAY, 2.0)
    for y in grid_size.y + 1:
        draw_line(Vector2(0, y * cell_size.y),
            Vector2(grid_size.x * cell_size.x, y * cell_size.y),
            Color.DARK_GRAY, 2.0)
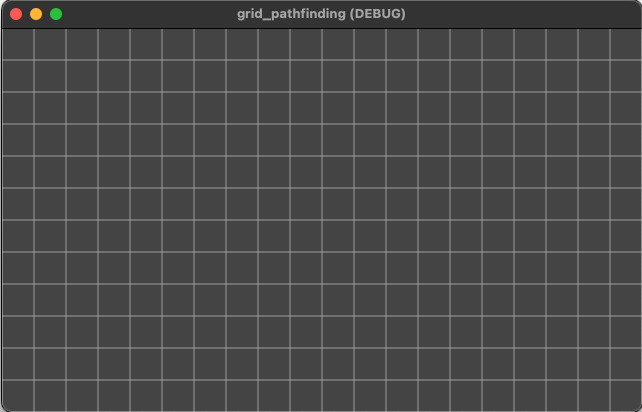
This gives us a nice visual of the grid:
Drawing the Path
In order to find a path, we need a start and end point. Add these variables at the top of the script:
var start = Vector2i.ZERO
var end = Vector2i(5, 5)
And a couple of lines in _draw() to show them:
    draw_rect(Rect2(start * cell_size, cell_size), Color.GREEN_YELLOW)
    draw_rect(Rect2(end * cell_size, cell_size), Color.ORANGE_RED)
We can find the path between the two points using the get_point_path() method, but we also need to visualize it. We can use a Line2D, so add one to the scene.
Here’s how we can get the path, and add the resulting points to the Line2D:
func update_path():
    $Line2D.points = PackedVector2Array(astar_grid.get_point_path(start, end))
Here’s the result:
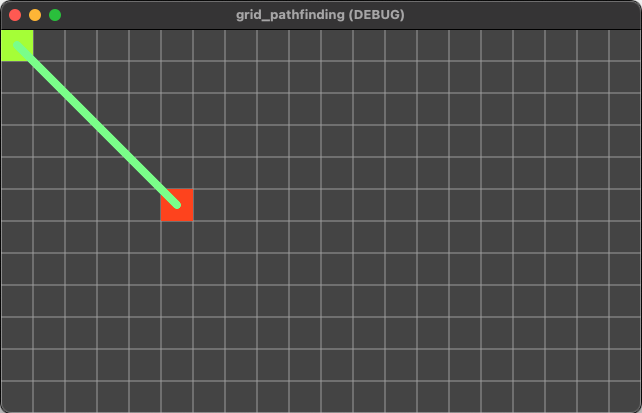
Note that we have a diagonal line between the two points. This is because, by default, the path will use diagonals. This can be modified by changing the diagonal_mode:
DIAGONAL_MODE_ALWAYS- The default value, uses diagonals.DIAGONAL_MODE_NEVER- All movement is orthogonal.DIAGONAL_MODE_AT_LEAST_ONE_WALKABLE- This allows diagonals, but prevents the path going “between” diagonally placed obstacles.DIAGONAL_MODE_ONLY_IF_NO_OBSTACLES- This allows diagonals only in “open” areas, not near obstacles.
Modifying this property can give you very different results, so make sure to experiment based on your setup. Let’s add this in the initialize_grid() function:
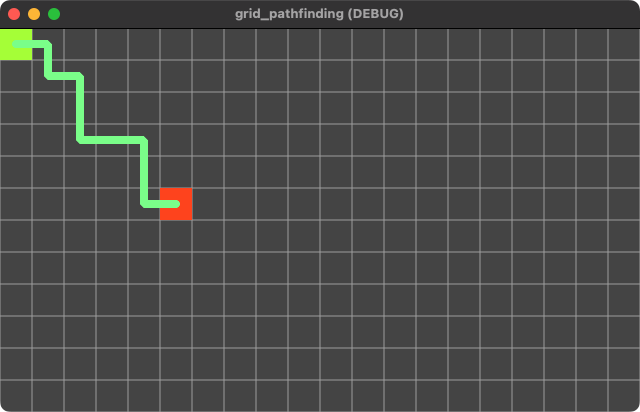
astar_grid.diagonal_mode = AStarGrid2D.DIAGONAL_MODE_NEVER
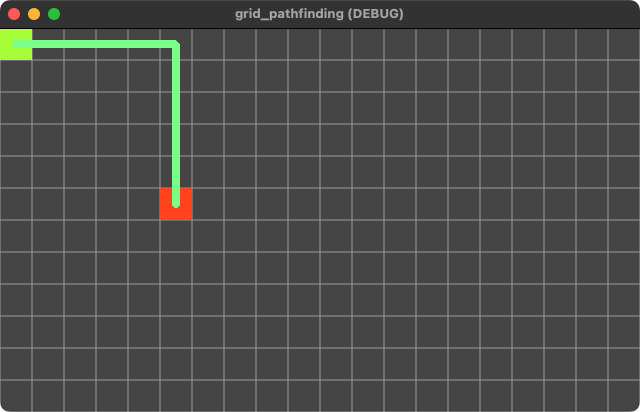
Now we only have orthogonal moves:

Adding Obstacles
We can also add obstacles to the grid. By marking a cell as “solid”, the path will not include that cell. A cell can be toggled solid/not solid by using the set_point_solid() function.
Let’s add some code to draw our walls (when they exist), by finding any solid cells and coloring them in:
func fill_walls():
    for x in grid_size.x:
        for y in grid_size.y:
            if astar_grid.is_point_solid(Vector2i(x, y)):
                draw_rect(Rect2(x * cell_size.x, y * cell_size.y, cell_size.x, cell_size.y), Color.DARK_GRAY)
Call this function in _draw().
Then, we can use the mouse to click on cells and toggle their state:
func _input(event):
    if event is InputEventMouseButton:
        # Add/remove wall
        if event.button_index == MOUSE_BUTTON_LEFT and event.pressed:
            var pos = Vector2i(event.position) / cell_size
            if astar_grid.is_in_boundsv(pos):
                astar_grid.set_point_solid(pos, not astar_grid.is_point_solid(pos))
            update_path()
            queue_redraw()
Note that we’re checking is_in_boundsv() first - this will prevent errors from being thrown if we click outside the grid boundaries.
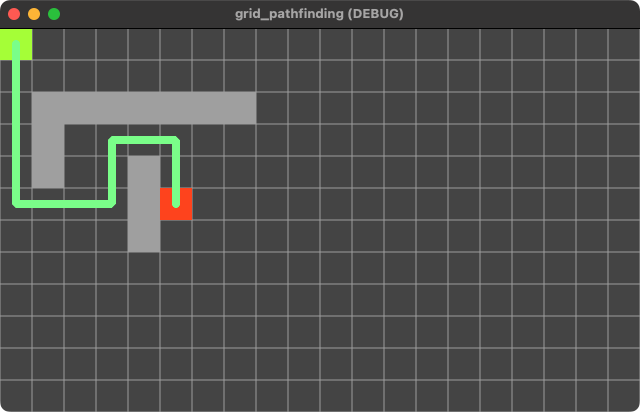
Now we can see the effect of obstacles on the path:
Choosing a Heuristic
A big factor that affects the resulting path is what heuristic you choose to use. The term “heuristic” refers to a “best guess”, and in the context of pathfinding just means: what direction should we try first when moving toward the goal?
For example, the Euclidean distance uses the Pythagorean theorem to estimate the path to try:
While Manhattan distance only considers distance in N/S or E/W directions:
And the Octile heuristic results in a path like this:
You can choose the heuristic using this property:
astar_grid.default_estimate_heuristic = AStarGrid2D.HEURISTIC_OCTILE
Which of these works best (results in the most pleasing paths) depends on the nature of your environment. Is it mostly wide-open spaces with few obstacles scattered around? Or is it a maze of twisty passages? Make sure to experiment with your specific project.
Download the example project below to experiment with this setup yourself. In addition to placing walls, you can use the right/middle mouse buttons to move the end/start locations.
Download This Project
Download the project’s example code here: https://github.com/godotrecipes/grid_pathfinding