Importing Assets
Problem
You’ve downloaded (or created) a set of 3D assets, including rigged and animated characters, and you want to import it into Godot.
Solution
For this example, we’ll assume you’ve downloaded the art packs linked in the section description and unzipped them.
Before copying the files into your Godot project, notice that there are multiple versions of the assets in different file formats: OBJ, FBX, and GLTF. There are also some extra files such as examples and separate textures in case you want to modify them. We don’t need all of that, and GLTF is the preferred import format for Godot. So make sure you’re only dragging the gltf folder or .gltf files (or .glb, which is the binary version of the same) into your project folder.
Here, I’ve taken the gltf folder from the “Dungeon” pack and the characters folder from the “Adventurers” pack and dragged them into my project.
There are a lot of files in the Dungeon pack - Godot may take a little time to read them all!
Importing a Character
Select the knight.glb file in the FileSystem tab, then click the Import tab at the top left.
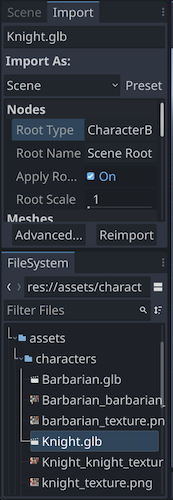
Here you’ll find some basic import settings, but we can go into more detail. Click Advanced button and you’ll see a new window appear:
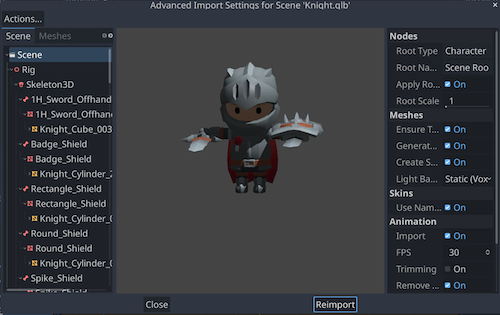
One the left you’ll see all the data that is contained in the GLTF scene, including textures and animations. Note all the weapon options attached to the character and the extensive list of animations.
There’s a preview of the character in the middle, and a set of options on the right side where you can adjust how the selected item is configured.
Since we will code our player as a CharacterBody3D, we can go ahead and specify that node type here. Click on the Scene Root and on the right set the Root Type to CharacterBody3D.
Animations
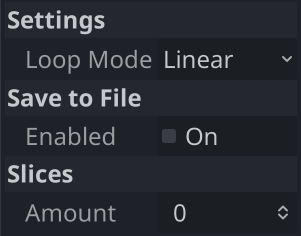
Scroll down to the list of animations. You’ll see that there are many, but while some we’ll only want to play once, such as attacks, others like “Idle” and “Running”, we’d like to be looping. For any animation like this, select the animation name and set the Loop Mode to “Linear”. Do this for all of the “Walking”, “Running”, and “Idle” variations. When you’re done, click the Reimport button at the bottom.
If you are making your own characters, you can skip this step by ensuring that your animations’ names end with "-loop". For details on this and other import hints, see Import Hints in the Godot documentation.
Right click knight.glb in the FileSystem and choose New Inherited Scene.
In this scene you’ll see all the models and the AnimationPlayer where you can test out the animations.
Importing World Items
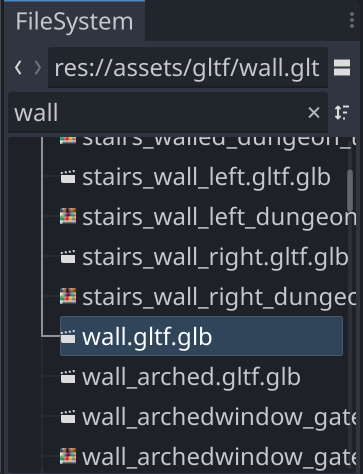
Importing objects for the environment will be a similar process. As an example, let’s use one of the dungeon walls. There are a lot of files in the dungeon pack, so type “wall” in the file filter to help find it:
We’ll want our dungeon walls to be solid, and it would be painful to manually create a StaticBody3D and collision shape for each one. Fortunately, when importing, Godot can do this for us.
In the import window, select the mesh object. On the right side, check the Physics box, and set the Shape Type to “Simple Convex” (feel free to check out the other options too).
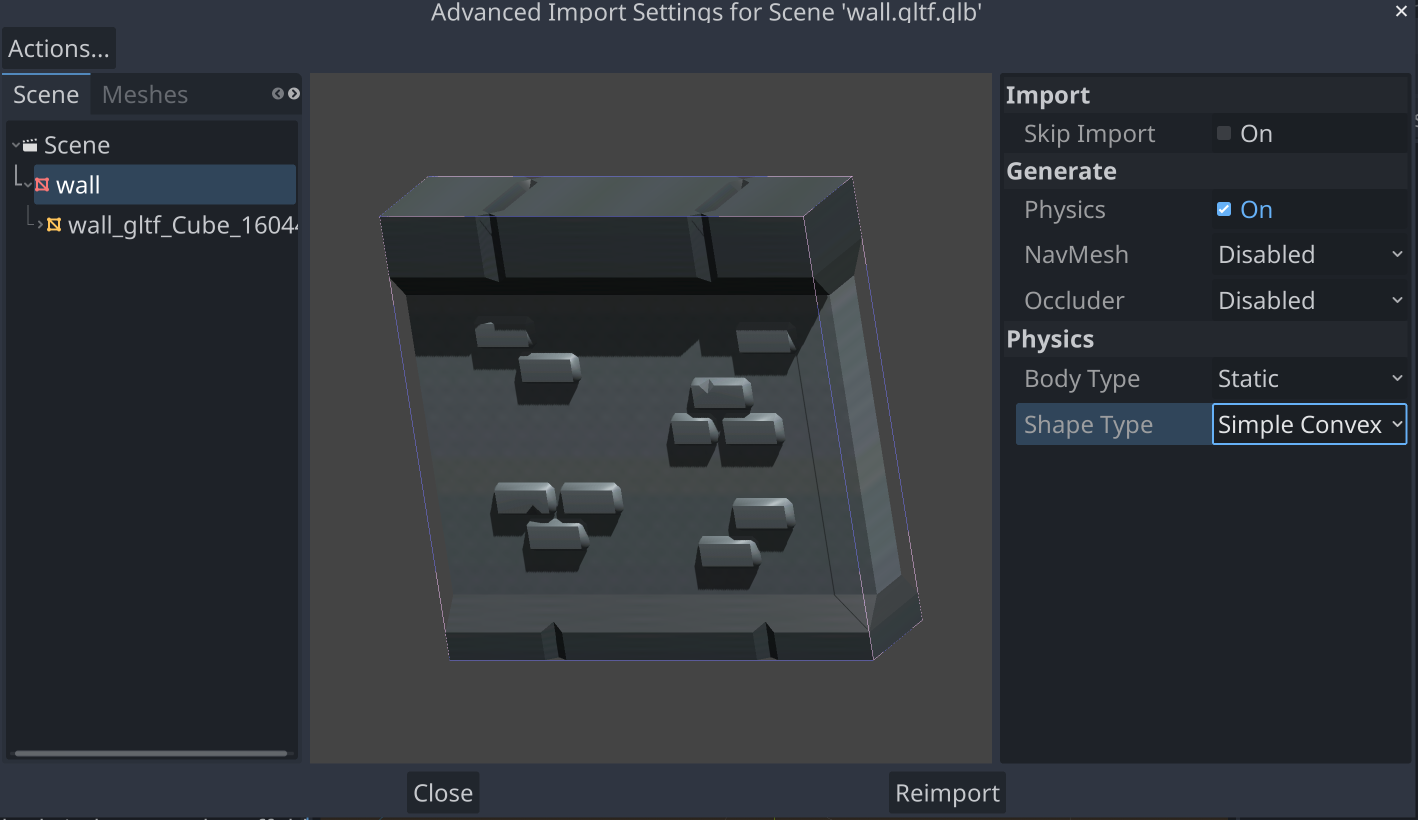
Click Reimport. Now when using this in the game, Godot will automatically create a StaticBody3D with a collision shape to match.
As above, there is an import hint for collision shapes as well. In your Blender project, appending -col (or some other variations) will let the importer know to do this step automatically. See the import hints link for details.
Automating Imports
While adding import hints is the preferred method when making your own assets, it’s not something you can do when downloading an asset pack like the one we’re using.
It is possible to write an import script that can run on every imported node of a particular type. For example, we could automate the creation of the static collision we did above.
As an example, the following script will loop through all the nodes of the imported object and create a static collision on each mesh it finds.
@tool
extends EditorScenePostImport

func _post_import(scene):
    iterate(scene)
    return scene

func iterate(node):
    if node != null:
        if node is MeshInstance3D:
            node.create_trimesh_collision()
        for child in node.get_children():
            iterate(child)
In the Import tab, you can set this as the Import Script, and when you click Reimport, the collisions will be created.
Wrapping up
That concludes the overview of importing 3D assets into Godot.
See the section description for examples of working with the 3D assets you’ve imported.