CharacterBody3D: Movement
Problem
You need a player-controlled 3D character body.
Solution
For this recipe, we’ll be using this adorable tank model:
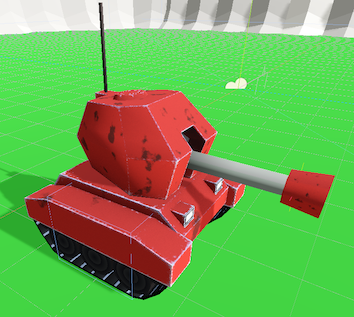
You can grab this model on Itch.io: https://gtibo.itch.io/mini-tank or use any other model you’d like. We won’t be doing anything that’s tank-specific here.
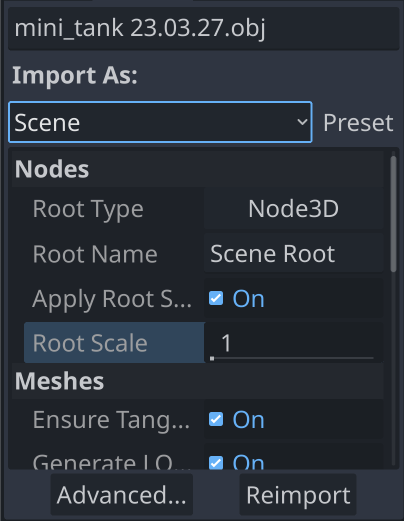
In the case of this asset, the download includes an OBJ file, and we’ll find it more convenient if we import it as a scene:
We can add the model to the scene, but we’ll need a couple of additional nodes:
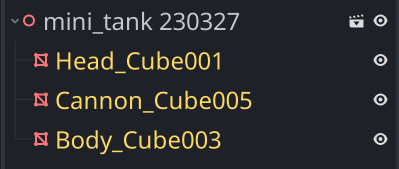
For the collision shape, we’re just going to use a BoxShape aligned and sized with the tank’s treads. CamPos is a Position3D we’ll use to place our following camera. It’s placed behind and above the tank, angled down.
We’ve also rotated the individual MeshInstance nodes 180 degrees around the Y axis. This is because they were modeled facing towards +Z, but -Z is the forward direction in Godot, and we don’t want our tank to look like it’s backwards.
Before we add a script, open the “Project Settings” and add the following inputs on the “Input Map” tab:
| Input Action | Key |
|---|---|
| forward | W |
| back | S |
| right | D |
| left | A |
Now let’s add a script, starting with the required variables:
extends CharacterBody3D

@export var speed = 4.0
@export var turn_speed = 0.8
speed is the tank’s movement speed (forward and back), while rot_speed defines how fast it can turn.
Declaring properties with @export makes it easy to adjust them in the Inspector.
Using the move_and_slide() method makes our movement code quite simple:
func _physics_process(delta):
    velocity.y -= gravity * delta
    get_input(delta)
    move_and_slide()
With this code, we add the downward acceleration of gravity to the current velocity, get the user’s input (more about that below), and call move_and_slide().
Next we need to define get_input(), where we’ll process and apply the input actions:
func get_input(delta):
    var vy = velocity.y
    velocity = Vector3.ZERO
    var move = Input.get_axis("back", "forward")
    var turn = Input.get_axis("right", "left")
    velocity += -transform.basis.z * move * speed
    rotate_y(turn_speed * turn * delta)
    velocity.y = vy
Let’s examine this more closely. Player input should affect horizontal movement: forward/back along the ground, and rotation around the tank’s center. Movement in the Y direction should only be affected by gravity, which means we don’t want to set it to 0 every frame. This is why we’re using the vy variable to temporarily hold that value while we assign a new velocity vector for the horizontal movement, then add it back in at the end.
For the forward and back movement, we’re using transform.basis.z so that we’ll move in our body’s local forward direction.
Here’s the tank in action. We’ve made a test scene with a StaticBody3D plane for the ground and an Camera3D using the Interpolated Camera recipe.
Wrapping up
This is the basis of movement for any kind of kinematic character. From here you can add jumping, shooting, AI behavior, etc. See the related recipes for examples that build on this recipe.
Download This Project
Download the project’s example code here: https://github.com/godotrecipes/characterbody3d_examples