Importing 3D Objects
In the last part, we started a 3D project and looked at how to navigate and create 3D objects. In this part, you’ll learn how to import existing 3D objects that you’ve made or downloaded and how to use more of Godot’s 3D nodes.
Importing 3D Objects
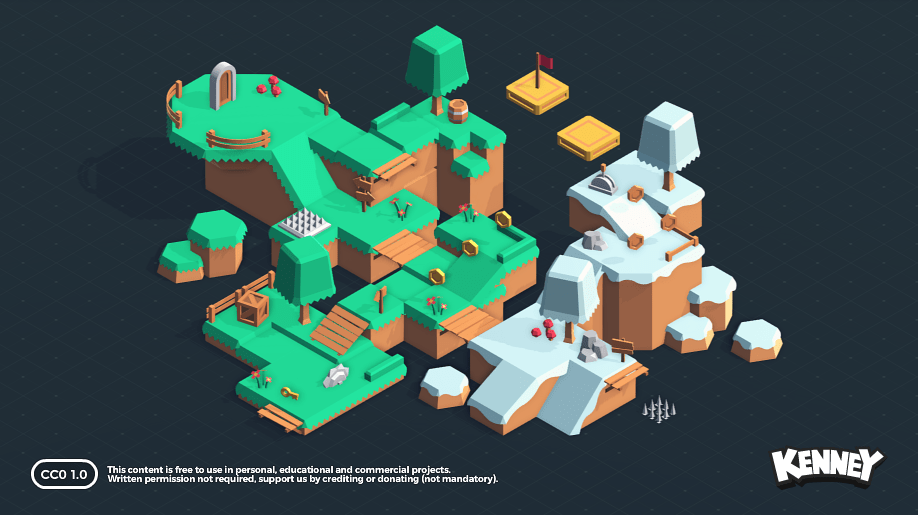
If you’re familiar with 3D modeling software such as Blender, you can make your own models to use in your game. If not, there are many sources where you can download objects or even collections of objects for particular game types. One of our favorite makers of free game art is Kenney.nl.
For our tutorials, we’re going to use Kenney’s Platformer Kit, which you can download here: https://kenney.nl/assets/platformer-kit
This kit has a wide selection of objects that we can use to practice our Godot 3D skills. Here’s a sample showing what the kit looks like:
Once you’ve downloaded the kit, you’ll find that the objects inside are provided
in a variety of different formats. Godot is able to use several of these, but
since GLTF is available in this pack, it’s preferred over the others. Drop the
GLTF format folder into your Godot project’s folder and rename it to “platformer_kit”.
Whether you create your own models or download the, you’ll need them to be saved in a format that Godot can use. Godot supports the following 3D file formats:
- glTF - supported in both text (
.gltf) and binary (.glb) versions - DAE (Collada) - an older format that is still supported
- OBJ (Wavefront) - an older format that is supported, but the format is limited compared to modern options
- FBX - a commercial format that has limited support
glTF is the recommended format - it has the most features and is very well supported in Godot.
When you switch back to your Godot window, you’ll see progress bar while Godot
scans the folder and imports all of the objects. Let’s click on one of them to
see what’s going on. In the FileSystem tab, double-click on crate.glb:
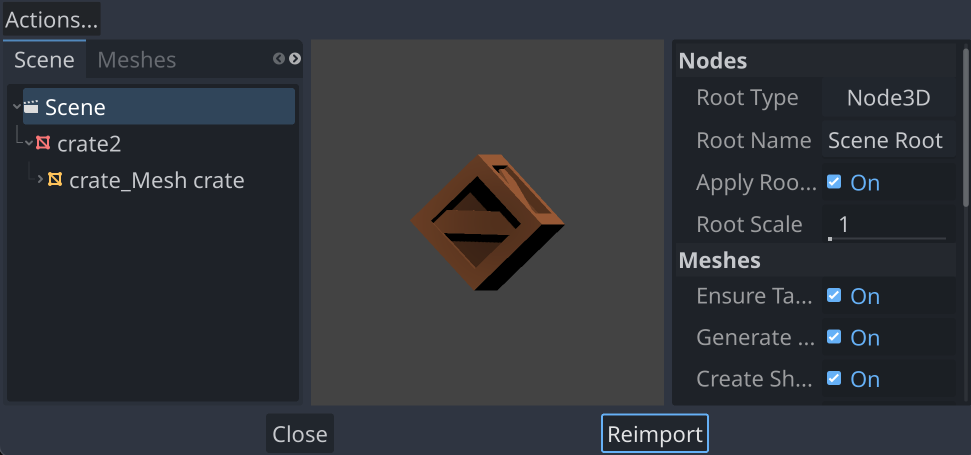
Here you can see the object will be imported as a scene, with its root type
set to Node3D and named “Scene Root”. Let’s change these: set the root type to RigidBody3D and the root name to “Crate”, then click the “Reimport” button.
Now right-click on “crate.glb” and choose New Inherited Scene. Here we have a classic game object: the crate. The root node of the scene is a RigidBody3D named “Crate” just as we wanted.
Finally, we need to add a collision shape to the body. While we could do this by adding a CollionShape3D, as you would typically do in 2D, but there’s a quicker way.
Select the crate2 mesh and you’ll see a Mesh menu appear at the top of the viewport. Click it and select Create Single Convex Collision Sibling. Godot will automatically add a CollionShape3D with a collision shape that matches the mesh.
Now we’re finished setting up the object. Save your Crate scene and let’s
see how we can use it.
Building a 3D Scene
Create a new scene with a Node3D root. The first child we’ll add is one to give us a “ground” to stack some crates on. Add a StaticBody3D called “Ground”, and to that add a MeshInstance3D. In the Mesh property, select “New BoxMesh” and then click it to open its properties. Set Size to (10, 0.1, 10) so that we have a nice large surface. However, it would look better if it weren’t plain white.
Also in the mesh properties is a Material property. Materials are how you define the appearance of an object. Select “New StandardMaterial3D” and then click it to open a large list of properties. To set the color of the mesh, we need the Albedo/Color property. Choose a color, such as brown or dark green.
If we add a crate, it will fall right through the mesh, so we also need to give
it a collision shape. Add a CollisionShape3D to the Ground and choose “New BoxShape3D”. Set the collision box to the same size as the mesh.
Now instance a few crates in the scene and arrange them in a rough stack. Add
a Camera and place it where it has a good view of the crates. Run the scene
and watch your crates go tumbling!
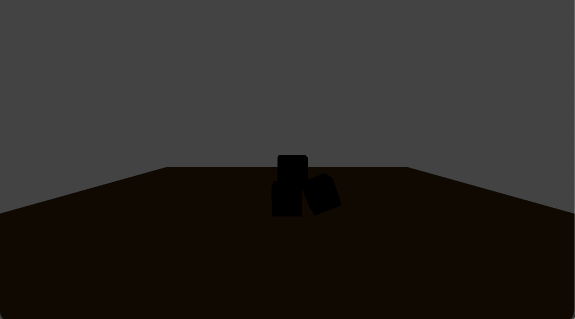
Why is the scene so dark? Because there’s no light! By default, Godot doesn’t add any lighting or environment to your scenes, like it does in the editor viewport. This is great when you want to set up your own specific lighting, but for a quick example scene like this, there’s a shortcut.
Lighting
There are multiple light nodes available in 3D, which you can use to create a variety of lighting effects. But we’re going to start with DirectionalLight3D. However, instead of adding one manually, we’re going to have Godot use the same one it’s using in the editor window. At the top ove the viewport, there are two icons that control the preview lighting and preview environment. If you click the three dots next to them, you can see their settings.
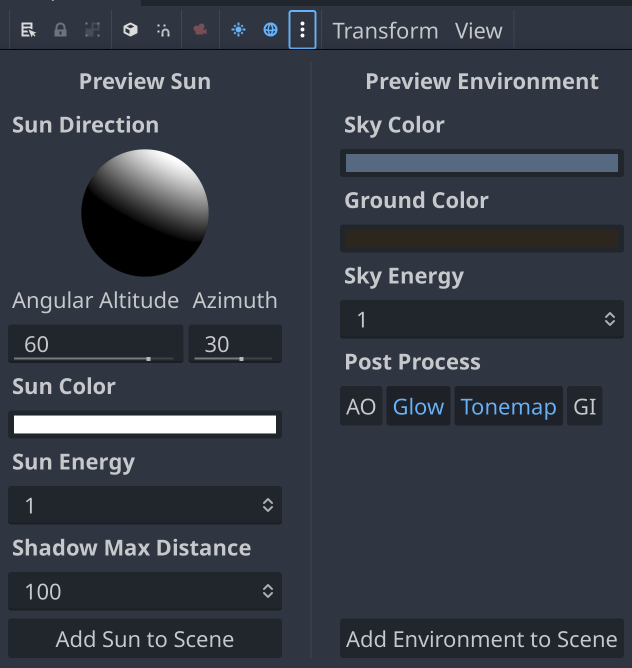
Click the Add Sun to Scene button, and Godot will add a DirectionalLight3D to your scene. Click Add Environment to Scene and it will do the same with the preview sky by adding a WorldEnvironment node.
Run the scene again, and you’ll be able to see your crates falling.
Rotating Camera
Let’s make the camera a little more dynamic by having it slowly orbit around the
scene. Select the root node and add a Node3D, which will be located at (0, 0, 0) and name it
“CameraHub”. In the scene tree, drag the camera to make it a child of this new node. Now, if the CameraHub rotates around the y axis, it will drag the camera along with it.
Add a script to the root node and add the following:
extends Node3D

func _process(delta):
    $CameraHub.rotate_y(0.6 * delta)
Run the scene to see what happens.
Wrapping Up
In this tutorial you learned how to import 3D objects from outside sources, and how to combine them into a simple scene. We also investigated lights and moving cameras.
In the next part, we’ll look at how to build a more complex scene and include a player-controlled character.