Godot 101 - Part 1: Introduction to Godot
Wed, Feb 8, 2017![]()
This is part 1 of “Godot 101”, where we’ll give an overview of what a game engine is in general, and what Godot is in specific.
About this series
Godot 101 is an introduction to the Godot game engine and how it works. If you’ve never used a game engine before, or if you’re just new to Godot, this is the place to start. If you’re new here, a quick note about this website: we’re called KidsCanCode because we teach programming and game development to kids, but if you’re an adult you’re welcome here, too. We don’t believe in dumbing-down the material for kids, and game development is hard - so it will probably be challenging no matter what your age.
You can watch a video version of this lesson here:
Game Engine?
A game engine is sort of an all-in-one software package for making video games. The purpose of most game engines is to make development easier by taking care of all the low level details, leaving the developer free to focus on making the actual game. By “low level details”, we mean things like rendering (producing the graphics), animation, collisions and physics, networking, etc. In other words, the things you need to make your game, but aren’t the actual game itself.
Why Godot?
Most of you reading this have probably heard of Unity, which is the 500 lb gorilla of the game industry. Many companies, large and small, use Unity - you’ve probably played games made with Unity, whether you realized it or not.
Even though it’s popular, Unity has some drawbacks, especially for beginners. For example, Unity is designed for 3D and while it supports 2D, that support is not very good, and is not easy to deal with. We have often said that beginners should start with 2D games, because working in 3D adds yet another layer of complexity. Once you have a strong handle on the 2D fundamentals, it will be much easier to make the step up to 3D.
Godot, on the other hand, is very good at both 2D and 3D, making it a much better learning platform. In addition, while Unity is technically free, it is commercial software, and you are required to pay for a license if your game makes a certain amount of money. One of Godot’s big advantages is that it is 100% free. It is open source (MIT License), which means that you will never pay anything for it, no matter what.
On top of all that, Godot supports all the most popular platforms for games - PC, mobile, and even consoles!
Finally, Godot’s scripting language (GDScript) is very similar to Python (it was based on it). We think Python is a great choice for beginners, so if you’ve been studying Python, Godot will be a smooth transition for you.
For these reasons, we’re big fans of Godot for learning game development.
Now, let’s look at some concepts:
Nodes and Scenes
In Godot, everything is a Node. A node can represent a sprite, an animation, a sound, or just about anything else in your project. Every node has a few things in common:
- Name - each node can be referred to by name
- Properties - every node has a whole set of properties that define how it looks, acts, etc.
- Callback - each has a callback function that can be set to process during every frame
- Extendable - with code, any node can be extended to have additional properties and functionality
Another very important characteristic of Nodes is they can be assigned to other nodes as children, creating a tree structure:
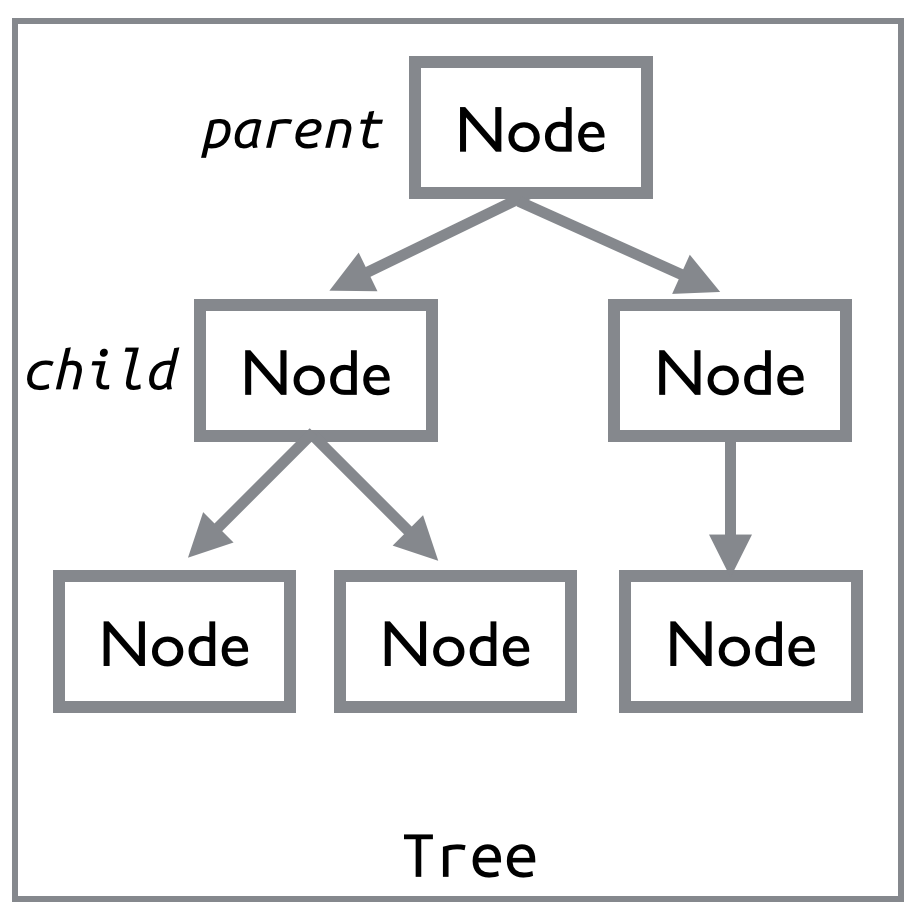
In a tree, every node can have one (and only one) parent and any number of children. A node can inherit behavior and properties from its parent, allowing you to organize them in a logical manner.
A group of nodes arranged in a tree is called a Scene. In Godot, scenes can be saved/loaded, duplicated, and can even spawn other scenes. Running a game means running a scene. All of your work in the Godot editor will be setting up and organizing scenes.
Creating a Godot project
You can download Godot here: http://godotengine.org/
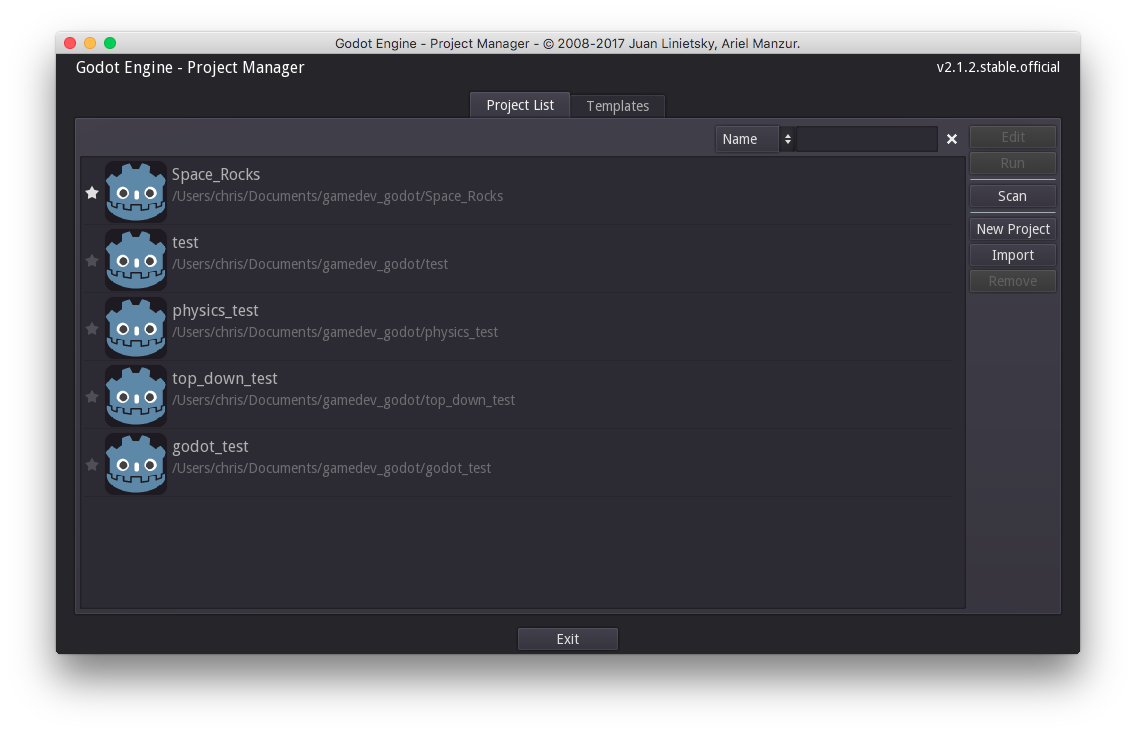
When you first open Godot, you will see the “Project Manager” window:
 Click to enlarge
In this window you can see a list of the Godot projects you may be working on. To start a new project, click “New Project”. Every project in Godot starts with a folder, so we need to create one - just pick a location that’s convenient for you.
 Click to enlarge
Now just click “Edit” to open the project.
A simple scene
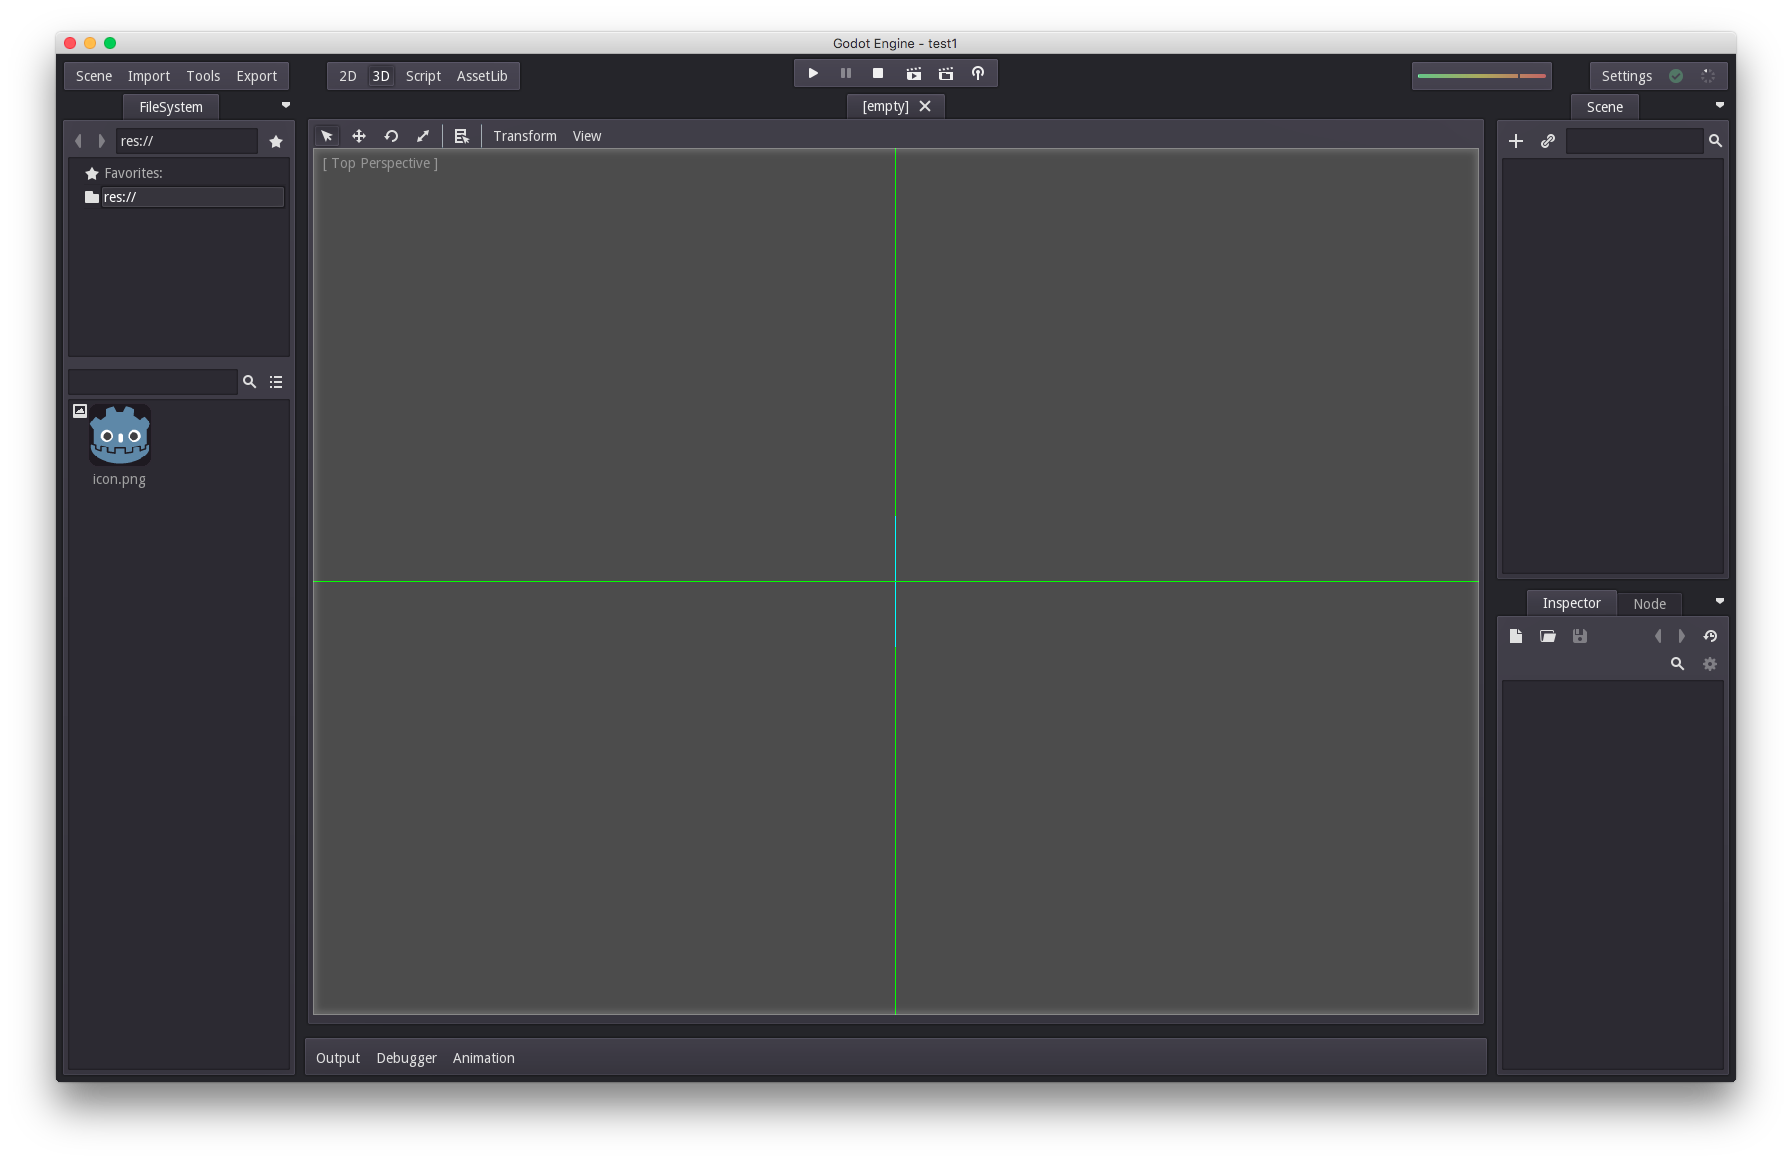
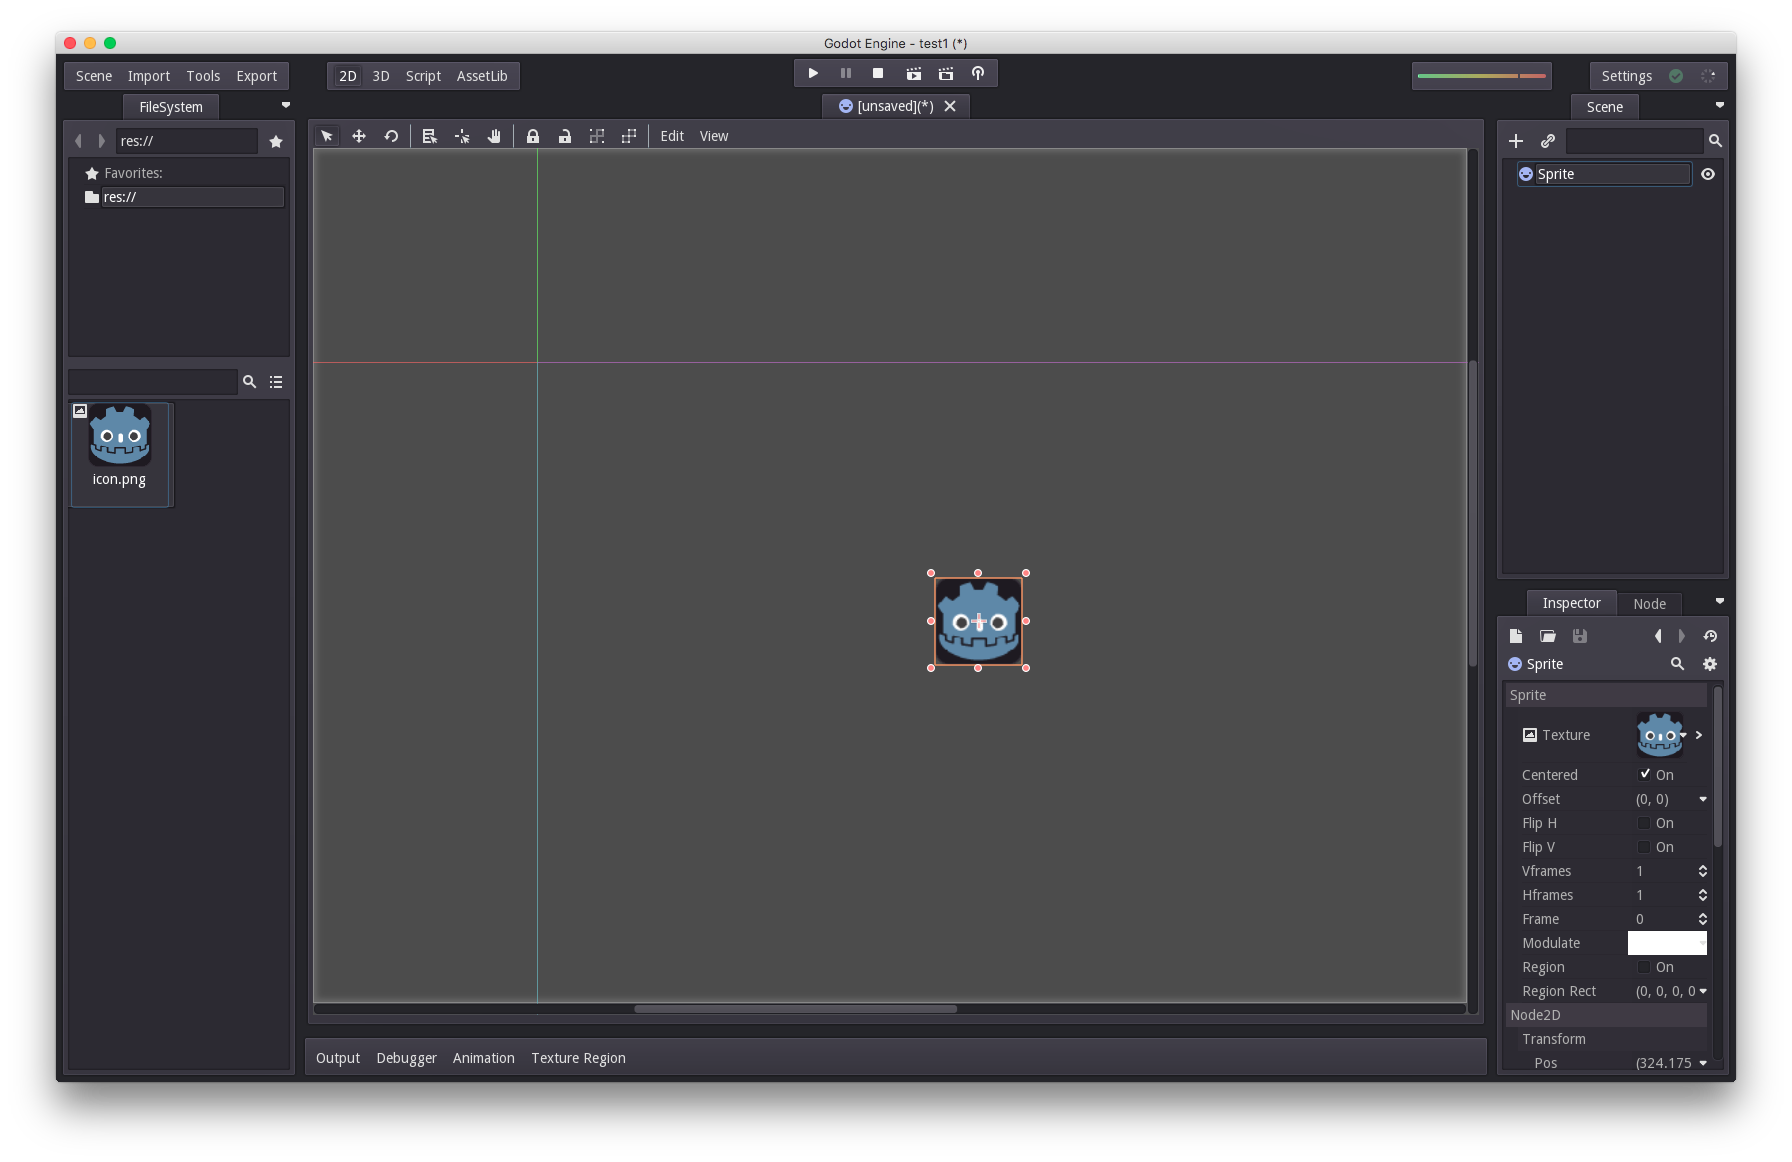
This is the main Godot editor window you will see when you open a new project:
 Click to enlarge
The center of the window is your view of the game. Using the buttons at the top marked “2D” and “3D”, you can change the mode. Let’s stick with “2D” for this one.
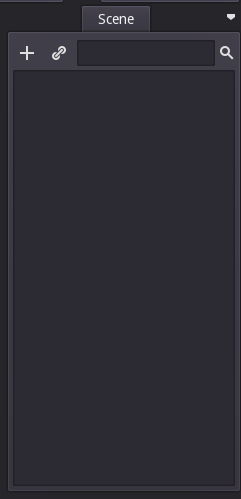
On the right side is a window labeled “Scene”:
 Click to enlarge
This is where we’ll build our Scene (tree of nodes). We can add a node by clicking the + button. Now we can see a (long!) list of different node types to choose from. This can be very overwhelming, but don’t worry - for most projects you may not ever use the majority of these nodes. They are there for you if you need them. The nodes are sorted into a hierarchy - green for UI nodes, blue for 2D nodes, and red for 3D nodes (plus some miscellaneous white and yellow ones).
We’re going to type “sprite” in the search box to narrow the list down to the node we’re looking for ( Sprite) and click “Create”:
 Click to enlarge
Now we have a sprite in our scene, but it’s up in the corner and it doesn’t look very impressive. You can control your view with the mouse: middle-click-and-drag will pan your view around, and the scroll wheel will control zoom.
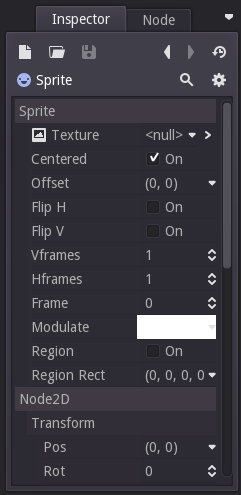
To be able to see our sprite, we need to add a Texture to it. We’re going to use the Godot icon that’s included with every new project. Now, let’s look at the “Inspector” tab in the lower-right:
 Click to enlarge
Every time you click on a node in your scene, the Inspector will show all of that node’s properties - and there are a lot of them! The one we care about is the first one, “Texture”, which is currently showing <null>. To set it, just drag the Godot icon image on top of the spot where you see <null>. Our sprite has an image! Pick it up and drag it to the center of the screen.
 Click to enlarge
Wrapping up
That’s our first simple scene! To finish up, let’s save and run it. To do that, click on the “Play the edited scene” button. You will be asked to save your scene, and then click the button again:
 Click to enlarge
That’s it - your first Godot scene! In later lessons, we’ll explore more nodes, begin writing code, and more. If you have any questions, please post them below.