Godot 101 - Part 4: Instancing Scenes
Wed, Feb 15, 2017![]()
This is part 4 of “Godot 101”, taking our bouncing sprite and showing how to quickly create multiple instances of it. If you haven’t already read through the previous parts, please start with Part 1.
About this series
Godot 101 is an introduction to the Godot game engine and how it works. If you’ve never used a game engine before, or if you’re just new to Godot, this is the place to start. If you’re new here, a quick note about this website: we’re called KidsCanCode because we teach programming and game development to kids, but if you’re an adult you’re welcome here, too. We don’t believe in dumbing-down the material for kids, and game development is hard - so it will probably be challenging no matter what your age.
You can watch a video version of this lesson here:
Instancing
Now that we have a nice animated sprite bouncing around the screen, the natural next question is “how do I make a bunch of them?” If we want, say, 10 sprites bouncing around, we don’t want to have to make 10 separate scenes for them.
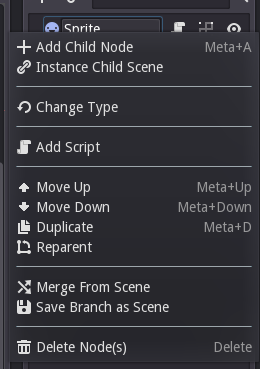
Your first thought might be to duplicate the sprite node by right-clicking on it and choosing “Duplicate”:
 Click to enlarge
However, this won’t work - you get an error message:
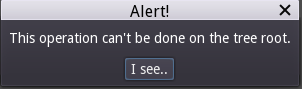
Each scene tree has a root node - the first node you create - and can only have one root node. We could make another sprite as a child of the first one, but that wouldn’t give use what we need - a child node is attached to its parent, inheriting its position, etc. We need to create multiple independent versions of the original sprite.
We’ll start by making a new scene (click on Scene -> ‘New Scene’) and add a node to it. We’re going to use the simplest node available: Node. This is a generic node, with no properties of its own. This will be our main scene’s root node, so let’s rename it “main” by clicking on its name and then save it as “main.tscn”.
Now click the “Play” button at the top and you’ll see this message:
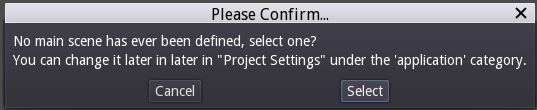
We need to define what scene will be the one that is launched when the project starts. Click “Select” and choose our new main.tscn. Now let’s add a script to the main node. This will be our code to instance a sprite:
extends Node

onready var sprite = preload("res://Sprite.tscn")

func _ready():
    var s = sprite.instance()
    add_child(s)
That first line uses the preload function to load the sprite scene into memory at compile time, so that it’s ready to use. The onready statement ensures that the object is loaded in time for the _ready() call.
A note on resource paths:
Notice how we indicated where to load the sprite scene from: “res://Sprite.tscn” All resources in your project will be under a “res://” path (“res” is short for resource). If we were building a complex project with a large number of files, we might choose to put all our scenes into their own folder to help keep things organized. In this case, the resource path might look like this: “res://scenes/Sprite.tscn”
Now hit “Play”, and you will see a sprite bouncing around the screen. To see what’s going on, click the debugger and you can inspect the live scene tree:
 Click to enlarge
The Remote Inspector tab is very useful to see what’s going on in the game - what scene is active, what nodes are active, and what properties they all have. For example, observe what changes is we add a loop to spawn more sprites:
for i in range(10):
    var s = sprite.instance()
    add_child(s)
Wrapping up
It’s that easy to create instances of scenes you’ve created. In the future, this is how we’ll do things like spawning mobs or bullets - just by instancing them as needed and adding them to the current scene tree. In the next lesson we’ll start looking at some other nodes and how they’re used.