Godot 101 - Part 9: Arcade Physics (KinematicBody2D)
Mon, Apr 3, 2017
This is part 9 of “Godot 101”. In this installment, we’ll learn about how to do simple arcade-style physics using Godot’s built-in physics engine. If you haven’t already read through the previous parts, please start with Part 1.
About this series
Godot 101 is an introduction to the Godot game engine and how it works. If you’ve never used a game engine before, or if you’re just new to Godot, this is the place to start. If you’re new here, a quick note about this website: we’re called KidsCanCode because we teach programming and game development to kids, but if you’re an adult you’re welcome here, too. We don’t believe in dumbing-down the material for kids, and game development is hard - so it will probably be challenging no matter what your age.
You can watch a video version of this lesson here:
New Project and Game Art
For this lesson, we’re going to start by creating a new Godot project and a new scene. The art we will use can be found on OpenGameArt. It contains the images for a few different character animations:
| Idle | Running |
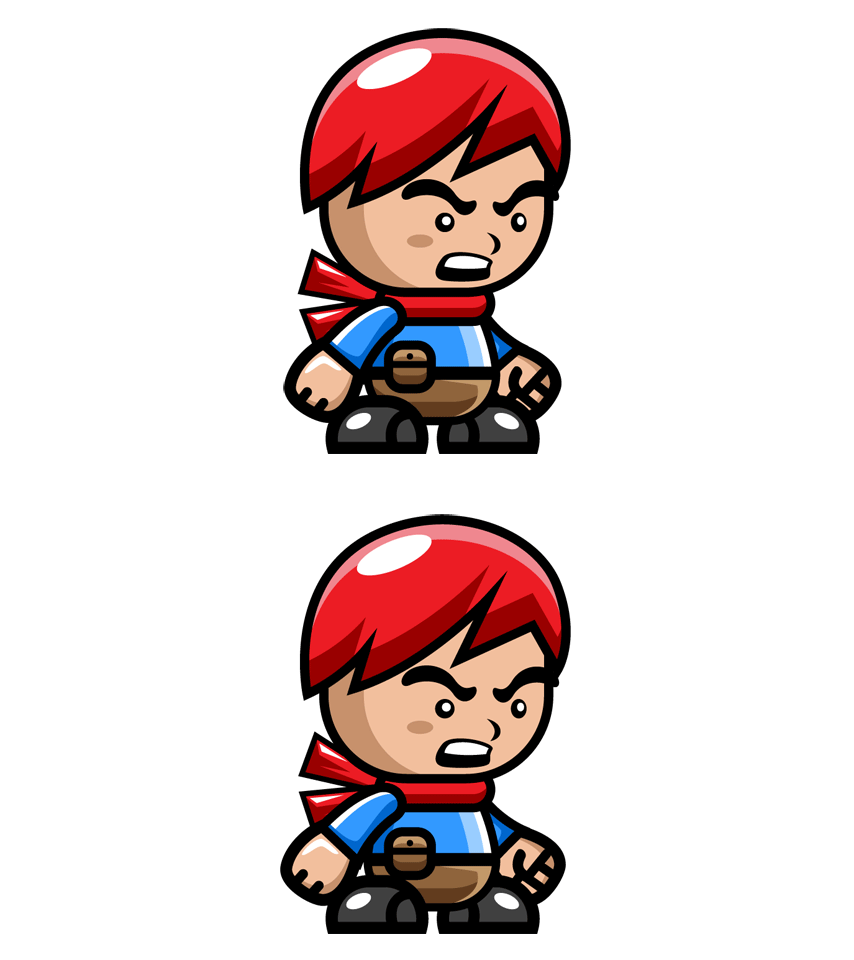 |
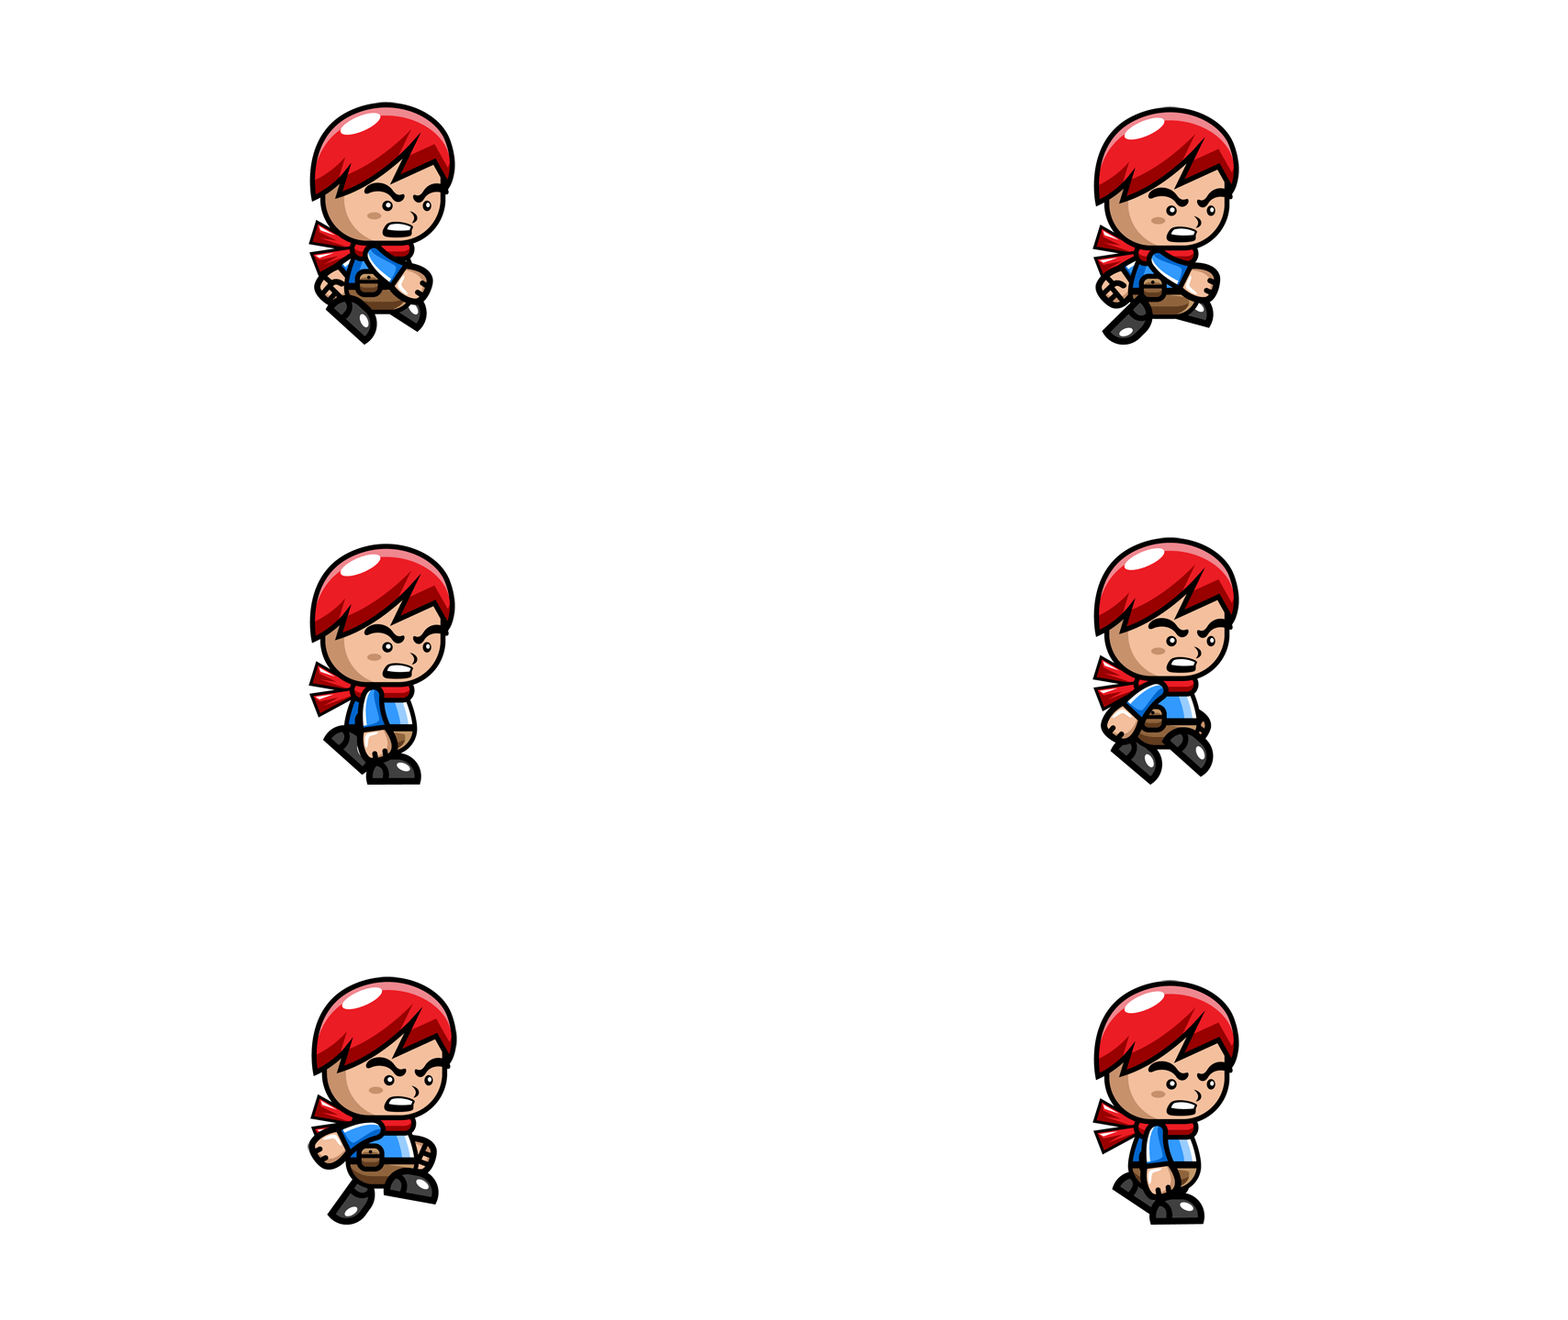 |
Unpack it all into the art folder in your project (I made a player folder to put it all in). We’ll talk about how to use these animations for our player character soon, but first we will create the scene and make the character move.
Setting up the Scene
As we discussed earlier, there are 3 types of PhysicsBody2D in Godot. The one we will use for this project is the KinematicBody2D.
This node type has basic collision physics and movement, and is perfect for arcade-style games where you don’t need accurate, realistic physics. Create the following scene tree and save it as player.tscn:
-
player (KinematicBody2D)-
sprite (Sprite) -
collision (CollisionShape2D)
-
For the sprite texture, drag the first frame of the idle animation (idle-frame-1.png) into the Texture field in the Inspector.
The first thing you’ll notice is that the character is huge. This art was created at a very high resolution (which is nice - but it’s way too big for our screen). Scroll down to the Scale property and set it to (0.2, 0.2) for a much more reasonable size.
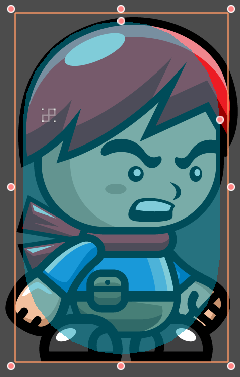
Now we can create the collision shape. There are many different ways you can set up your collisions with different shapes, but for this exercise we’re going to choose the CapsuleShape2D, which is a common choice for platformer characters. Drag the size handles so that it looks like this:
Now we’re ready to write some code, so right-click on the player node and choose “Add Script”.
Simple Physics
Here’s our starting point for the player script:
extends KinematicBody2D

const ACCEL = 1500
const MAX_SPEED = 500
const FRICTION = -500

var acc = Vector2()
var vel = Vector2()

func _ready():
    set_fixed_process(true)

func _fixed_process(delta):
    pass
First, we have 3 constants to adjust the player’s behavior:
ACCELis how fast the player accelerates when a key is pressedMAX_SPEEDis the maximum speedFRICTIONcontrols how quickly the player comes to a stop
Next, we have two Vector2 variables to store the player’s movement.
Finally, we are using the fixed_process() function for per-frame code. This is recommended for physics bodies because the delta time is fixed to 1⁄60 s (0.01667 s) and Godot’s physics engine works best with a fixed timestep.
Now, let’s add the controls:
func _fixed_process(delta):
    acc.x = Input.is_action_pressed("ui_right") - Input.is_action_pressed("ui_left")
    acc.x *= ACCEL
    if acc.x == 0:
        acc.x = vel.x * FRICTION * delta
    vel += acc * delta
    vel.x = clamp(vel.x, -MAX_SPEED, MAX_SPEED)
    move(vel * delta)
We start by getting the direction from the user’s input. Each is_action_pressed() results in either 0 or 1, so we will have a value of 1 if "ui_right" is pressed and -1 if "ui_left" is pressed (these actions are mapped to the arrow keys by default). Note that if both keys are pressed, the result is 0 - they cancel out.
We then multiply this direction value by ACCEL to get the correct magnitude and apply it to vel for the updated speed. The clamp() function is used to keep the value of vel.x from going above or below the MAX_SPEED value.
If the player is not pressing a key (acc.x is 0), then we apply FRICTION, which will slow the player down.
Now, if you followed the earlier tutorials, where we used an Area2D node, you’ll recall we moved the object by using set_pos(). This is not correct for PhysicsBodies, because Godot needs to simulate them moving, not teleporting to a new position. Always use move() to move a PhysicsBody or you may find things not working the way you expect.
Press “Play” and try moving around.
Platforms: Somewhere to Fall
The next logical thing to add would be gravity, but then our player would just fall off the screen, so let’s add a platform to land on. Create a new scene - this time we’re going to use StaticBody2D for the root node. Set up the tree like this:
-
platform-
sprite -
collision
-
We’re using StaticBody2D because it is a PhysicsBody that is optimized for static objects - things that don’t move, but just need to collide with other bodies.
For the sprite, we’re going to use this simple colored square texture:
![]() Save this in your ‘art’ folder
Save this in your ‘art’ folder
Set this image as the sprite’s texture, and then we’ll use the Scale property to size the platform. Set it to (20, 1) and then add a RectangleShape2D to the collision node and size it to cover the sprite.
Adding Gravity
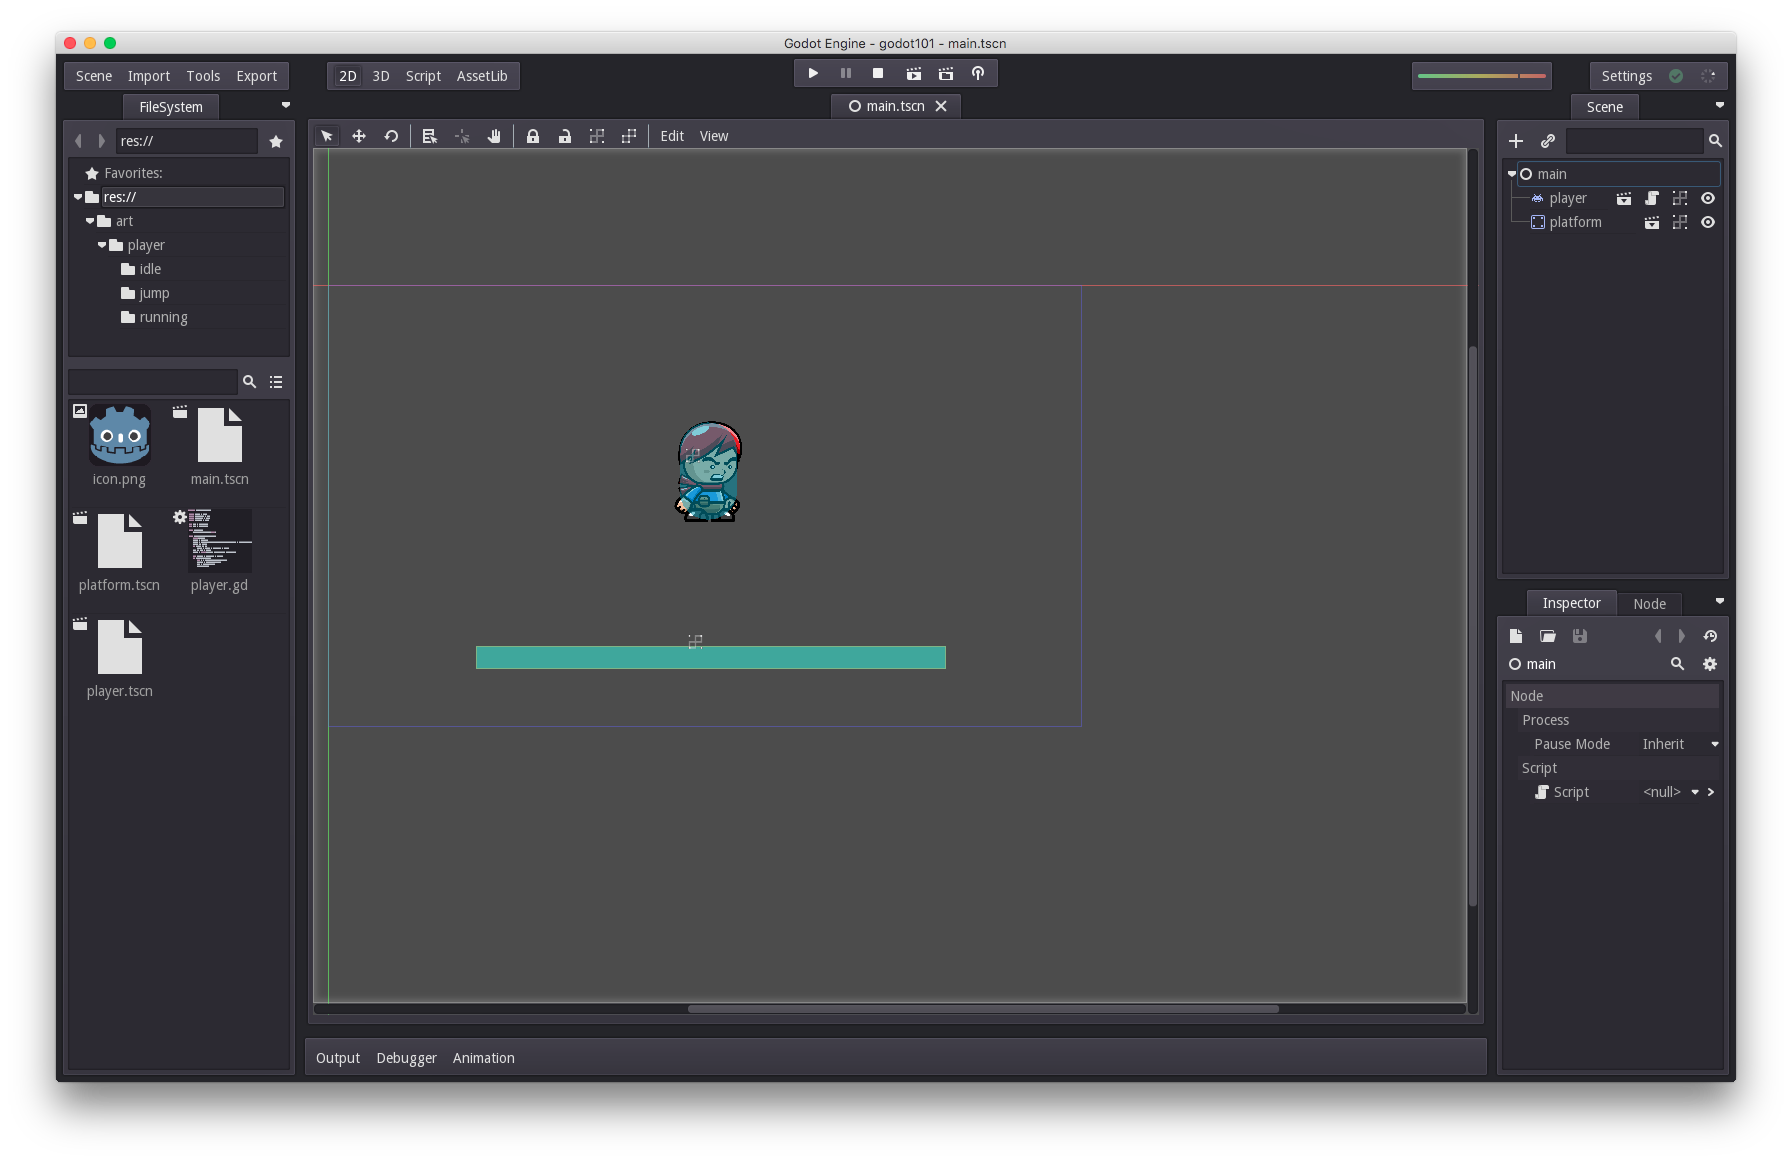
Now let’s put it all together. Create a new scene with a main node and click the Instance button to add an instance of player and platform. Arrange them in the scene like so:
Next, add the following to player.gd and press Play:
const GRAVITY = 2000

func _fixed_process(delta):
    acc.y = GRAVITY
You should see the player fall (due to GRAVITY accelerating downward) and stop when it hits the platform. But now you will find a new problem: the player can no longer move!
Collision Response
The reason for this has to do with how our movement works, and what we do (or don’t do) when a collision occurs. Here is our normal movement situation, when there are no obstacles:
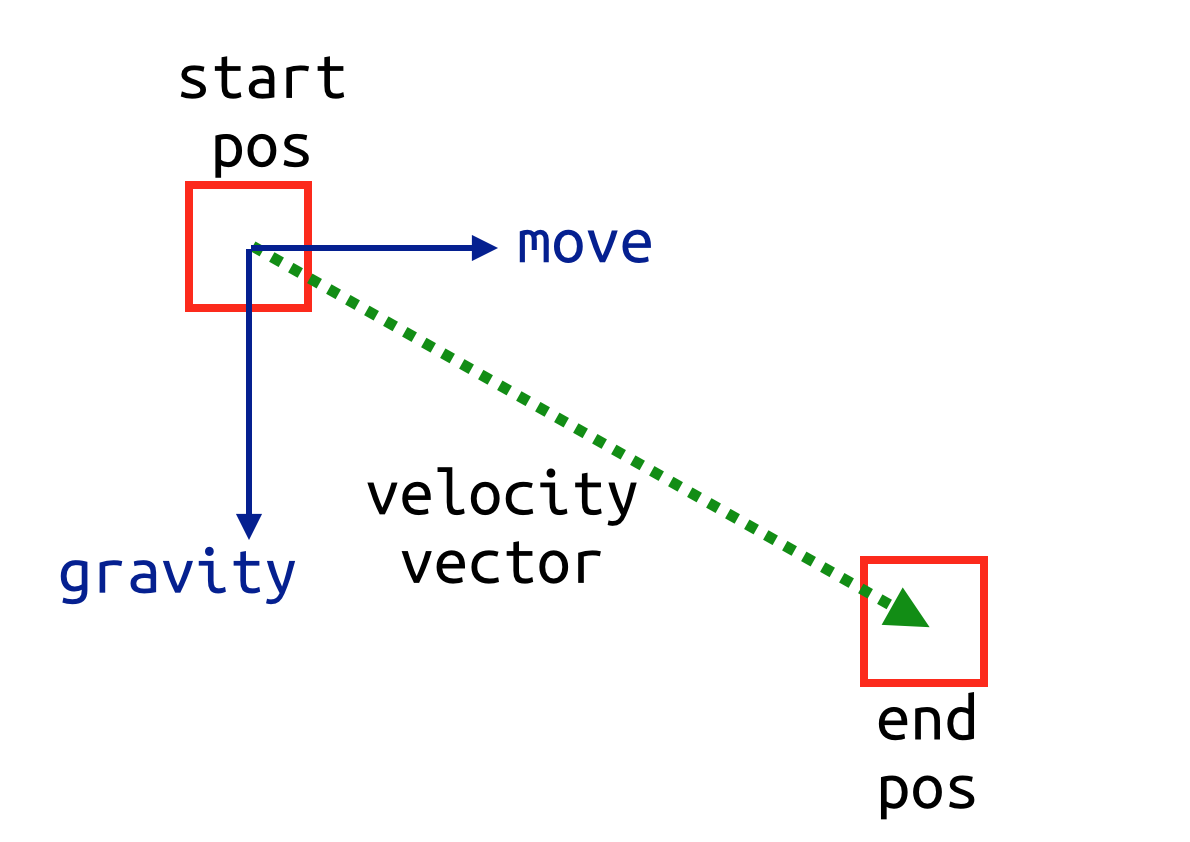
Two forces are acting on the player (gravity, and the movement input) so the result is a diagonal vector. However, if there is an obstacle in the path, we have this:
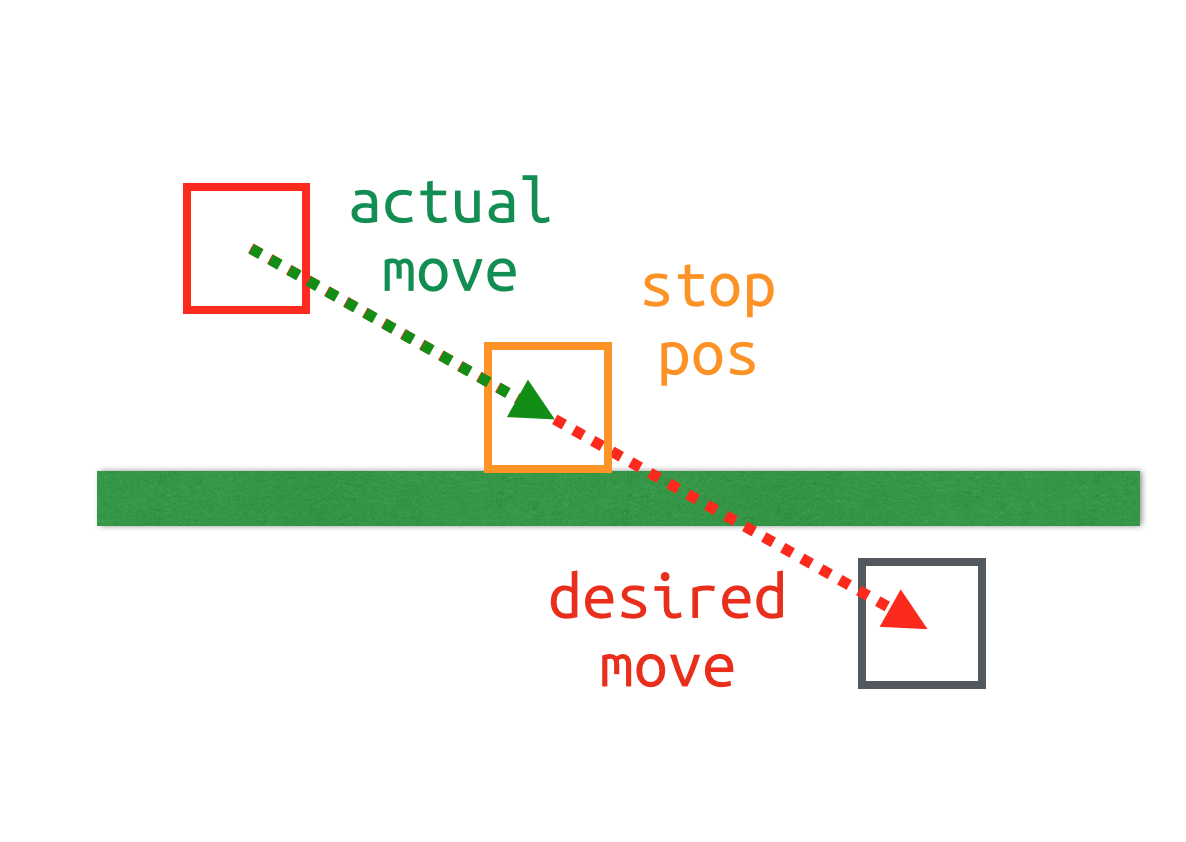
When Godot detects a collision with another PhysicsBody2D, it immediately stops the movement. Note that there is still a remaining portion of the movement vector that is unused. In fact, this situation happens also when the player is standing on the platform:
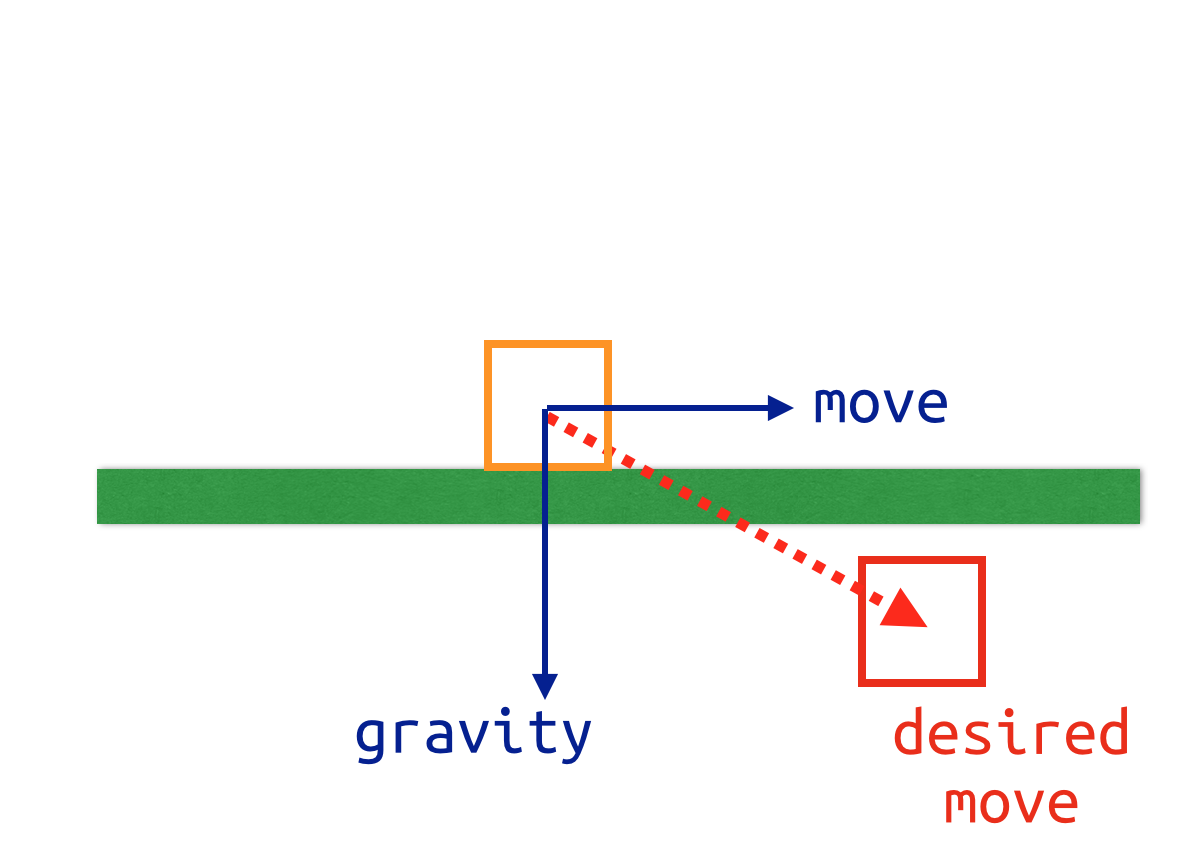
Because the desired movement vector results in a collision, the movement is immediately stopped, even though you may be pressing the arrow keys.
Here is how this problem is solved:
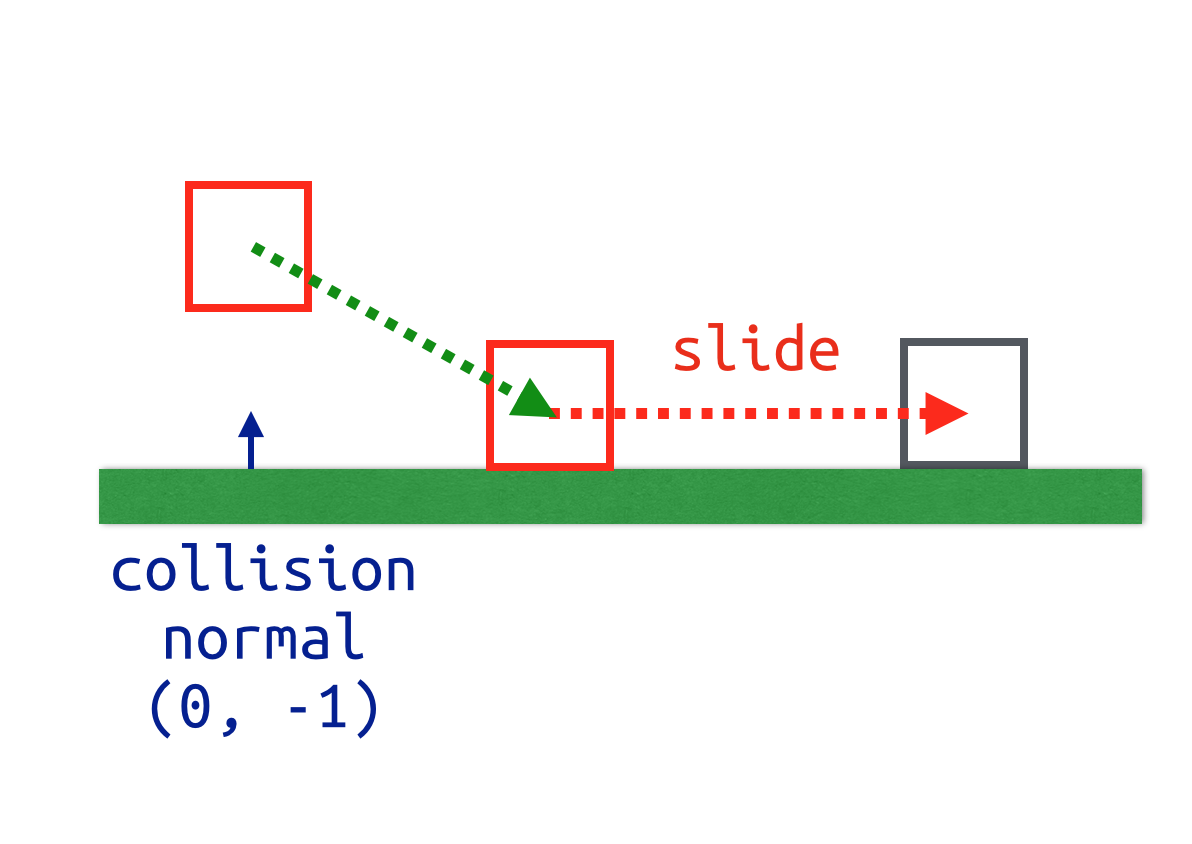
We start by finding the collision normal. A normal is a vector of length 1 that is perpendicular to a surface. It essentially tells us which way the surface is oriented. In the case of our horizontal platform, the normal vector is (0, -1). We can then use that normal to slide the movement vector along the surface.
Add the following code to fixed_process():
var motion = move(vel * delta)
if is_colliding():
    var n = get_collision_normal()
    motion = n.slide(motion)
    vel = n.slide(vel)
    move(motion)
First the move() function we used before has a return value of the remaining movement vector, which we’re calling motion. Next we use is_colliding() to check if a collision has happened. If so, we find the collision normal and slide the motion and vel vectors along it.
Wrapping Up
Those are the basics of using the KinematicBody2D node. In the next installment, we’ll add jumping to the player.

