Godot Engine in the Classroom: Getting Started
Fri, Nov 10, 2017I began using Godot Engine with a group of students. This is a small group of my most advanced middle schoolers (ages 11-12), with 1+ years of Python experience. I do an “advanced topics” class with them every Thursday after school. They have never used a game engine before.
Here’s how it went.
Introduction
Part of the reason for doing this was to get some real-world experience taking students through the “Dodge the Creeps” tutorial I wrote for the Godot 3.0 documentation. This is designed to be a user’s first experience making a project in Godot, and I wanted to see first-hand where any pain points might be.
This means we are using the Godot 3.0 alpha. It’s very stable at this point, so I feel fairly confident that students won’t run into any showstopping bugs along the way. Fortunately, these kids are happy to be guinea pigs.
First steps
We started with an introduction to the engine UI and an overview of the concept of scenes and nodes - the fundamental building blocks of Godot. Since they are very familiar with Python’s object model, they were able to relate the ideas of a Godot node and a Python object.
Most of the students have at heard of Unity, so there was some discussion of what a game engine is, closed- versus open-source, and why a developer might choose one option over another.
Two of the students either didn’t hear or were too excited, and didn’t click “Create folder” when making the new project. That means the project was created in their home folder. Fortunately, that wasn’t too tough to correct, but I’m going to suggest a feature that warns when creating a new project in an non-empty folder.
As always with students, file management (moving the art assets into the project folder) was more painful and frustrating than any of the coding ever is.
Some first reactions:
- “Whoa, this looks complicated!”
- “Cool! It’s all black!”
Creating the player
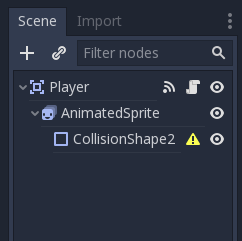
The first part of the tutorial is setting up the Player scene. This is an
Area2D with
AnimatedSprite
and CollisionShape2D
children.
Adding the children led to a couple instances of this:

Students must be reminded to click on the desired parent node before clicking on “Add Node”.
Adding the frames to the AnimatedSprite
went smoothly, but it was when adding the collision shape that some problems
started to appear.

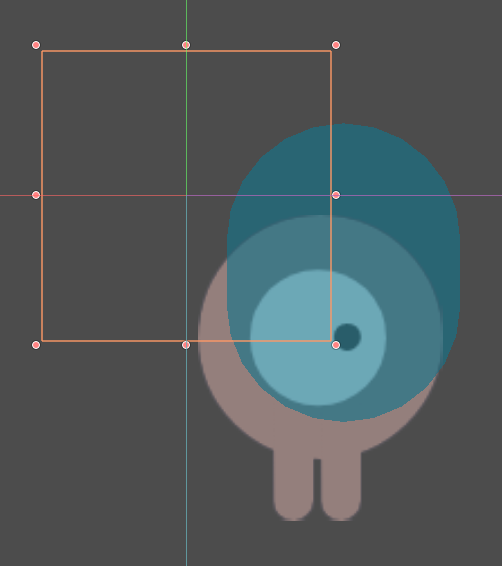
It is far too easy and unnoticeable to wind up with the children offset and/or scaled relative to the parent. Nearly every student had trouble with this in one way or another. When looking at the collision shape, it is much too tempting and easy to grab the rectangular handles and move/stretch it. When scaling the capsule shape, if you don’t click exactly on the size handle, you wind up moving the shape instead.
I think that it must be emphasized before adding a child that you probably want to click the “lock children” button (which has a very mystifying icon, by the way).

Scripting
Once the player scene was created, it was time to add a script for movement. This
part went very smoothly. I spent a couple of minutes talking about the minor
differences between GDScript and Python (using var to declare variables, and
func instead of def mainly), and we were off.
The kids really liked the IDE. At the beginner level in my Python class, I don’t like to have them use autocompletion, so this was a big plus for them. One student declared that she’s never going to type a whole function name again! They also liked the real-time error checking.
Nothing in the code itself was a problem for them. Checking for key inputs, normalizing velocity, and clamping to the screen were all familiar concepts. It was a big help that I spend a lot of time in my Python class getting them used to working with vectors, so I didn’t need to explain any of that.
Wrapping up Week 1
At this point we were out of time, so adding the enemies and the UI will have to wait for next week’s class. They really didn’t want to stop, which I expected, and they’re all excited for next week. I asked them what they thought so far and they were all happy with the Godot experience.
Long term, my goal with these students is to work through a couple of projects together and then turn them loose to develop their own games. Two of the girls really like working together and I expect they’ll want to collaborate on a game, so we may even touch on some source control and project management topics.
Pain points for me
- Dark UI
Dark UIs are great, I love them. But in the classroom, it means I did have to turn the lights off in order for it to be at all visible using the projector.
- Resolution
The Godot editor really likes to have a lot of screen space. My projector has a native resolution of 1280x800, and that makes things pretty tight, especially in the code editor. Adding a keyboard shortcut to toggle “Distraction Free Mode” was a must.
