Topdown Tank Battle: Part 1
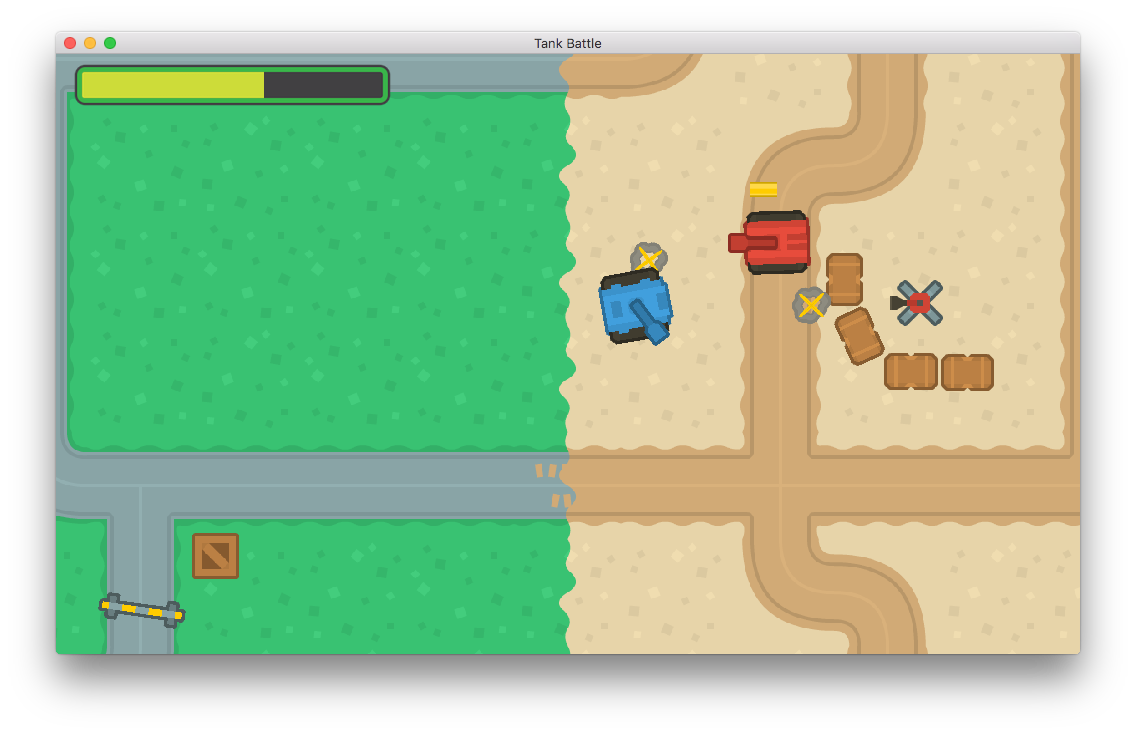
Mon, Apr 2, 2018In this tutorial series, we’ll walk through the steps of building a 2D top-down tank game using Godot 3.0. The goal of the series is to introduce you to Godot’s workflow and show you various techniques that you can apply to your own projects.
You can watch a video version of this lesson here:
Note: I’ll try to keep the written versions in sync with the video tutorials as much as possible, but the writeups tend to take quite a bit longer and generate a fraction of the response and feedback.
Introduction
Here are a few of the features we have planned:
- User and AI controlled tanks that move and shoot
- Keyboard/mouse and touch controls
- Tile-based level maps
- Game UI including HUD and menus
- Multiple levels/maps
- Upgrades and powerups
- Bosses/boss levels
- Visual effects such as screen-shake, particles, and shaders
This list will very likely change over time, as other ideas are suggested or just seem to make sense. It’s exploratory programming at its finest.
Note that this game is being developed as we go, so expect the occasional mistake or development dead-end requiring some backtracking. Refactoring is a useful technique of its own, and we’ll likely need to make use of it liberally along the way.
The latest code for the project will always be available at https://github.com/kidscancode/topdown_tanks, with releases for each part available here: https://github.com/kidscancode/topdown_tanks/releases.
Project Setup
Open Project -> Project Settings and in the Rendering/Quality section set Use Pixel Snap to “On”. In Display/Window set Mode to “2d” and Aspect to “keep”. We’ll see later how these settings work when resizing the game window.
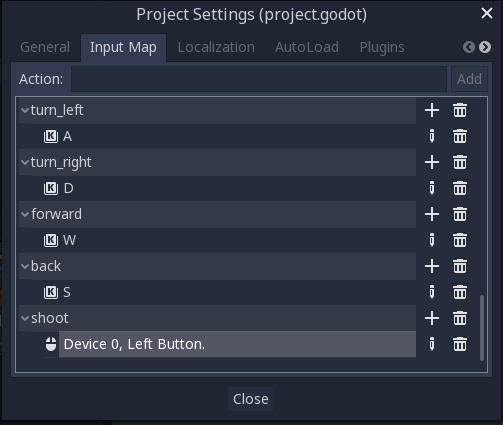
The control scheme will be WASD for movement, and mouse for aim/shoot. We’ll define these inputs by clicking on the “Input Map” tab in Project Settings and adding the following actions:
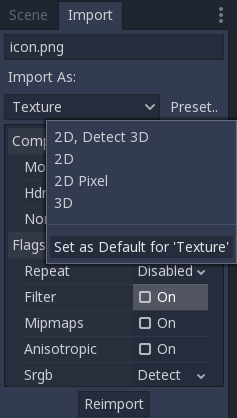
We also need to change the default import settings for textures. By default, “filtering” is on, which results in a blurred effect, especially when using pixel art. If we change the defaults before downloading the game assets, they’ll be imported with the right settings.
Click on the Godot icon (icon.png) and click the “Import” tab next to “Scene” in the upper-right. From the “Preset” menu, select “2D Pixel” and “Set as Default for ‘Texture’”, then click the “Reimport” button.
Whenever you make changes to a resource’s import settings, you have to reimport the resource for them to take effect.
Now we can download the assets and unzip them in the project folder.
Assets
For this project, we’re using Kenney’s Top-down Tanks Redux art pack. You can download it there, or get it directly from my project here: https://github.com/kidscancode/topdown_tanks/tree/master/assets
If you look closely at my version of the texture atlas, you’ll notice we’ve made one small change from the original download. In the “assets” folder you’ll find a texture atlas called “onlyObjects_retina_rotated.png”. In the original art pack the tanks (and many of the other assets) are all drawn facing downwards. Because Godot’s 2D orientation uses the x-axis (facing right) as the zero angle, we’d have to rotate all our sprites when adding them. Instead, with the original atlas rotated, we can use them as they are.
Tank Scene
Eventually there will be several kinds of tank: player-controlled tanks, enemy tanks, boss tanks, etc. They’ll likely share a lot of properties and functionality, so using inheritance is probably a good idea. However, since we’re just starting out, rather than try and assume all the functionality we’ll eventually need, we’re going to start simple and refactor if necessary when we add more complex behaviors.
Create the tank scene with the following nodes:
- KinematicBody2D (“Tank”)
- Sprite (the tank’s body)
- CollisionShape2D
- Sprite (“Turret” - the tank’s gun)
- Position2D (“Muzzle” - the spawn point for bullets)
- Timer (“GunTimer”) - the cooldown for shooting
Save this scene in a folder called “tanks”. This is where you’ll save all the tank-related scenes and scripts.
Tank script
This code will be shared between all the different kinds of tanks. Switch to the
Script editor and click File -> New. Set the script to extend KinematicBody2D
and save it in the tanks folder.
extends KinematicBody2D

signal health_changed
signal dead

export (PackedScene) var Bullet
export (int) var speed
export (float) var rotation_speed
export (float) var gun_cooldown
export (int) var health

var velocity = Vector2()
var can_shoot = true
var alive = true

func _ready():
        $GunTimer.wait_time = gun_cooldown

func control(delta):
        pass

func _physics_process(delta):
        if not alive:
                return
        control(delta)
        move_and_slide(velocity)
The code and variables should be pretty self-explanatory. The control() function
is where the specific code will go for each type of tank. For example, the player
will use input actions to set its velocity, while an enemy tank will use some sort
of pathfinding AI.
Player Scene
Create the player scene by clicking Scene -> New Inherited Scene and choosing
Tank.tscn. Rename the root node “Player” and save the scene. You now have a player
scene with all the necessary nodes ready to go.
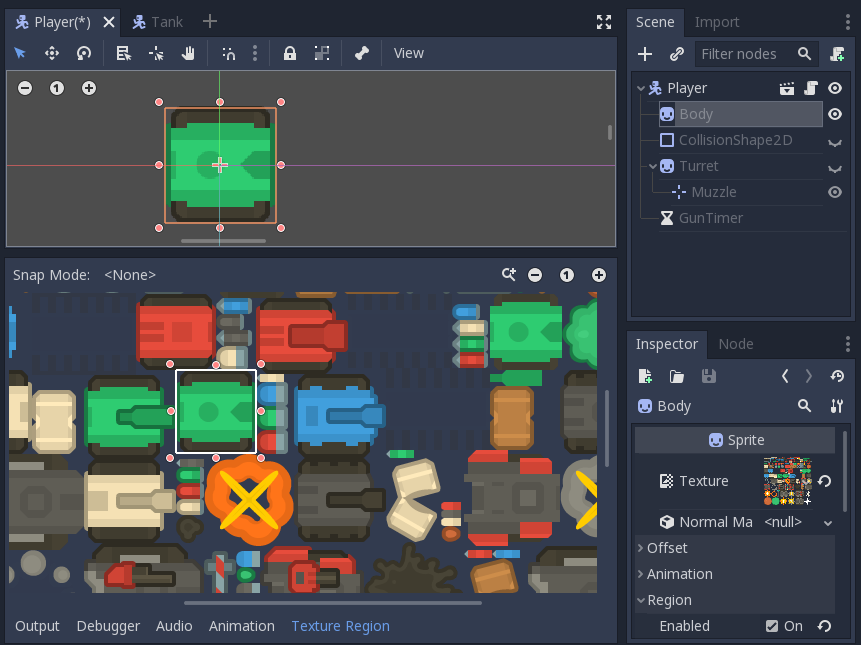
The first thing you need to do is add textures to the sprite nodes. Drag res://assets/onlyObjects_retina_rotated.png from the FileSystem dock and drop it in the body sprite’s Texture property.
To select a subset of the atlas (a region) click the Region property to “On”, then click “Texture Region” at the bottom of the window to open the region selection panel.
In this window you can select the portion of the image you want to use for your sprite. Choose one of the tank bodies that doesn’t have a gun attached. You may find it helpful to enable “Pixel Snap” at the top of the window.
Do the same thing with the Turret sprite to select a gun image for your tank.
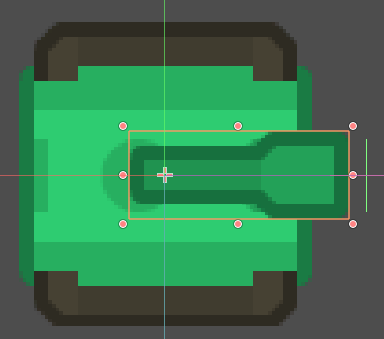
The only problem with the turret is that if rotated, it will rotate around its center, which doesn’t look correct. Select the Turret and increase the x value of its Offset. For the example here, (20, 0) works well, but if you chose a different gun image you may have to adjust.
Next, move the Muzzle marker to a position just in front of the barrel of the gun. This is the spawn point for bullets. A Position of (60, 0) works well with this particular barrel texture.
Finally, add a rectangular collision shape to the CollisionShape2D and scale it to cover the tank’s body. Remember to use the size handles on the shape itself, not the outer Node2D indicator.
Player script
Attach a script to the Player node and next to the Inherits field, click the folder icon and choose res://tanks/Tank.gd.

Add the following code to the new script:
extends "res://tanks/Tank.gd"

func control(delta):
	$Turret.look_at(get_global_mouse_position())
	var rot_dir = 0
	if Input.is_action_pressed('turn_right'):
		rot_dir += 1
	if Input.is_action_pressed('turn_left'):
		rot_dir -= 1
	rotation += rotation_speed * rot_dir * delta
	velocity = Vector2()
	if Input.is_action_pressed('forward'):
		velocity = Vector2(speed, 0).rotated(rotation)
	if Input.is_action_pressed('back'):
		velocity = Vector2(-speed/2, 0).rotated(rotation)
Since we’re inheriting the code from “Tank.gd” we only need to define the control() function to make things work. The key inputs rotate the tank and move it forward/backward in the facing direction. Meanwhile, the turret will always point at the mouse pointer by using look_at().
Run the scene and try driving your tank around!
Conclusion
That wraps up Part 1 of this series. In the next part, we’ll lay out a basic level using TileMaps.
Please comment below with your questions and suggestions.