Topdown Tank Battle: Part 3
Thu, Apr 12, 2018In this tutorial series, we’ll walk through the steps of building a 2D top-down tank game using Godot 3.0. The goal of the series is to introduce you to Godot’s workflow and show you various techniques that you can apply to your own projects.
This is Part 3: Enemy tank movement
You can watch a video version of this lesson here:
Introduction
If you’ve been following the previous sections, you now how have a map with a player tank that can drive around and aim its turret. Now we’re going to add an enemy tank and give it a “patrol” behavior so it will drive around the scene following a given path.
Enemy tank scene
We’re going to start by making another Inherited Scene from Tank.tscn, like we did previously with the player tank. Add a texture to the body and turret sprites. I chose the red tank:
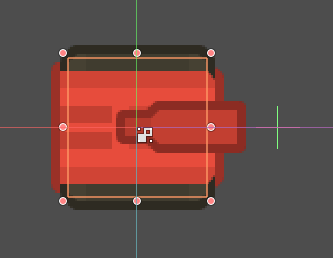
Remember you’ll have to set the Offset of the turret sprite so that it will rotate around the correct point (depending on which texture you use).
We’ll attach a script extending res://tanks/Tank.gd so that we get all the
common tank code. Again, for the tank’s movement, we need to supply the code in
the control() function.
There are many possible movement behaviors we could implement for the enemy tank,
such as path following, chasing, flocking, etc. In fact, later we’ll probably
want to have different tanks using different ones. To begin, however, we’re going
to use path following: the tank will “patrol” around a given predefined path using
Path2D and PathFollow2D.
Since we want to be able to assign other behaviors to the tank, we’ll check to see if it has been attached to a PathFollow2D, and use the pathfollow code only in that case.
extends "res://tanks/Tank.gd"

onready var parent = get_parent()

func control(delta):
    if parent is PathFollow2D:
        parent.set_offset(parent.get_offset() + speed * delta)
    else:
        # other movement code
        pass
Now if we add an enemy tank to a path, it will automatically follow it. Don’t forget to set the Tank’s Speed in the Inspector.
Creating paths
Path2D lets you draw a curve that a node can follow. Add a “Paths” Node2D
to the map to hold them (we will eventually add a bunch of these), and add a Path2D to that.
Hopefully you’ve used Path2D before. If you haven’t, there’s a great example of using and drawing them in the official Godot tutorial, which I also have a video series about._
Draw a path that circles around part of your map, like so:
Note that the light blue color of the path in the editor is very hard to see against the road/grass tileset. While you’re drawing, you can darken the map by changing its Modulate property.
Now add a PathFollow2D node to the path. By changing this node’s offset property, you
can move it along the path. Then add an instance of the EnemyTank as a child of the
PathFollow2D.

Hit play on the scene and check it out. The tank moves along the path, but there’s a problem at the corners:
The sudden direction change looks very unnatural, so we need a way to smoothly turn around corners.
Smoothing the path
Let’s redraw the path, this time cutting across the corners diagonally:
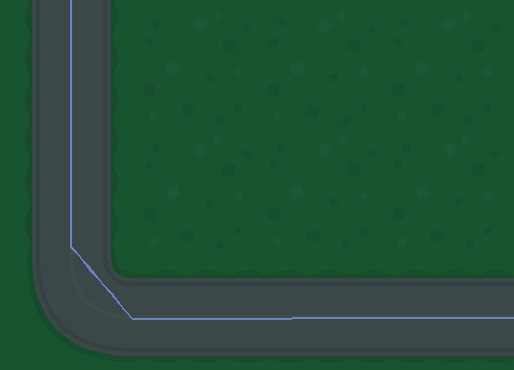
This is an improvement, but we can do a lot better.
Select the path and in the toolbar, click the “Select Control Points” button:

Then click and drag from any point on the path to create a control point you can use to curve the line. If you’re careful, you can align the path along the road’s centerline.

Collisions
Now that we have the tank moving around the path correctly, we can address a different problem. Play the game and position your player tank on the path in front of the enemy tank. It will stop moving when it hits, but then something very unexpected will happen:
What’s happening is that the PathFollow2D is continuing to move, even though the tank can’t. As a result, the tank is getting offset from the path. We need to make sure the tank always sticks with the path follower.
func control(delta):
    if parent is PathFollow2D:
        parent.set_offset(parent.get_offset() + speed * delta)
		position = Vector2()
Enemy turret
The next thing we need the enemy to do is rotate its turret to aim at the player. However, we don’t want the enemy to have an infinite range, so we need a way to only detect the player when it’s in range.
Detecting the player
Add an Area2D to the enemy called “DetectRadius” and give it a CollisionShape2D.
Don’t assign a shape, though - we’ll do that in code so it can be customized per
enemy.
Add variables to set the turret rotation speed and the DetectRadius’ side, as well
as one to track its target. Then in _ready() we’ll create the collision circle.
export (float) var turret_speed = 1.0
export (int) var detect_radius = 400

var target = null

func _ready():
    var circle = CircleShape2D.new()
    $DetectRadius/CollisionShape2D.shape = circle
    $DetectRadius/CollisionShape2D.shape.radius = detect_radius
1 and 400 are good default values to start with. Turn on “Visible Collision
Shapes” in the Debug menu and run the game to verify that your collision circle
is being set.
To detect the player, connect the DetectRadius’ body_entered and body_exited
signals.
func _on_DetectRadius_body_entered(body):
    if body.name == 'Player':
        target = body

func _on_DetectRadius_body_exited(body):
    if body == target:
        target = null
Now the tank can acquire and lose the player target.
Aiming at the player
Aiming the turret can now be done by comparing the direction to the target to the
turret’s current direction and moving it at the turret’s speed. We can use
Vector2’s linear_interpolate method for that.
func _process(delta):
    if target:
        var target_dir = (target.global_position - global_position).normalized()
        var current_dir = Vector2(1, 0).rotated($Turret.global_rotation)
        $Turret.global_rotation = current_dir.linear_interpolate(target_dir, turret_speed * delta).angle()
Run the game and check that the aiming is working. Try using different values of turret_speed to
see what the effect is. Higher values make the enemy tank very quick!
Conclusion
To sum up, here’s the full “EnemyTank.gd” script:
extends "res://tanks/Tank.gd"

onready var parent = get_parent()

export (float) var turret_speed
export (int) var detect_radius

var target = null

func _ready():
    var circle = CircleShape2D.new()
    $DetectRadius/CollisionShape2D.shape = circle
    $DetectRadius/CollisionShape2D.shape.radius = detect_radius

func control(delta):
    if parent is PathFollow2D:
        parent.set_offset(parent.get_offset() + speed * delta)
        position = Vector2()
    else:
        # other movement code
        pass

func _process(delta):
    if target:
        var target_dir = (target.global_position - global_position).normalized()
        var current_dir = Vector2(1, 0).rotated($Turret.global_rotation)
        $Turret.global_rotation = current_dir.linear_interpolate(target_dir, turret_speed * delta).angle()

func _on_DetectRadius_body_entered(body):
    if body.name == 'Player':
        target = body

func _on_DetectRadius_body_exited(body):
    if body == target:
        target = null
That’ll do it for Part 3 of this series. In the next part we’ll add a projectile and give the player and enemy tanks the ability to fire.
Please comment below with your questions and suggestions.