Godot 101: Intro to 3D, Part 2
Sat, Mar 9, 2019![]()
In the previous tutorial, we started a 3D project and looked at how to navigate and create 3D objects. In this part, you’ll learn how to import existing 3D objects that you’ve made or downloaded and how to use more of Godot’s 3D nodes.
About this series
A word of warning: 3D development can be quite a bit more complex than working in 2D. While many of the same principles apply - such as working with nodes, writing scripts, and handling logic/data - 3D brings with it a number of other considerations. For this reason, it’s a good idea to stick to 2D for your first few projects, moving to 3D once you have a good understanding of the game development process. This tutorial will assume you have completed at least an introductory Godot 2D project.
You can also find a video version of this lesson here:
Importing 3D Objects
If you’re familiar with 3D modeling software such as Blender, you can make your own models to use in your game. If not, there are many sources where you can download objects or even collections of objects for particular game types. One of our favorite makers of free game art is Kenney.nl.
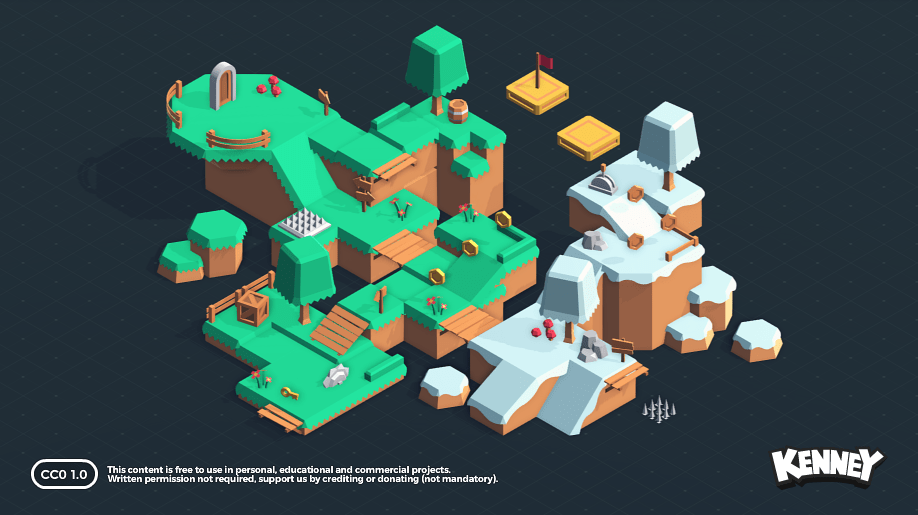
For our tutorials, we’re going to use Kenney’s Platformer Kit, which you can download here: https://kenney.nl/assets/platformer-kit
This kit has a wide selection of objects that we can use to practice our Godot 3D skills. Here’s a sample showing what the kit looks like:
Once you’ve downloaded the kit, you’ll find that the objects inside are provided in a variety of different formats. Godot is able to use several of these, but since GLTF is available in this pack, it’s preferred over the others. Copy the “GLTF Format” folder into your Godot project’s folder and rename it to “platformer kit”.
If you’re interested in the differences between the formats, here’s a brief summary: OBJ files are the simplest, each representing a mesh which you can load into a
MeshInstancenode. This is likely the most common file type you’ll find online. DAE (Collada) files are more robust - Godot loads them as individual scenes, and they can include additional data along with the mesh such as animations. GLTF files are similar, but represent a more modern format with additional features.
When you switch back to your Godot window, you’ll see progress bar while Godot scans the folder and imports all of the objects. Let’s click on one of them to see what’s going on. In the “FileSystem” tab, select the “crate.glb” and then click on the “Import” tab:
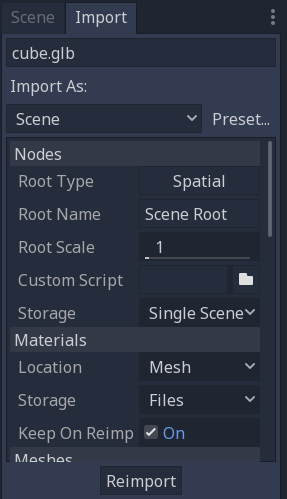
Here you can see the cube object will be imported as a scene, with its root type
set to Spatial and named “Scene Root”. Let’s change these: set the root type
to RigidBody and the root name to “Crate”, then click the “Reimport” button.
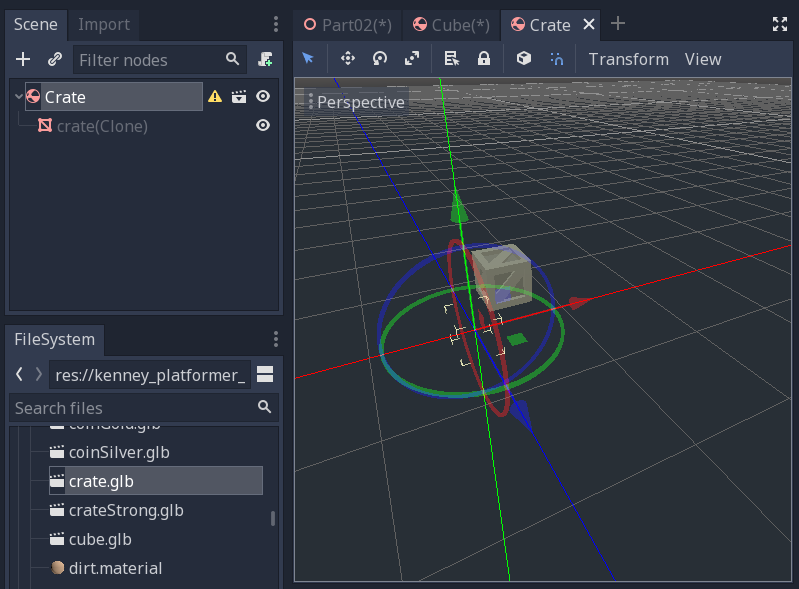
Now double-click on “crate.glb” and confirm that you want to make a new inherited
scene. Here we have a classic game object: the crate. The root node of the scene
is a RigidBody named “Crate” just as we wanted. However, there’s one small
problem: it seems Kenney exported this model with an offset:
It would much better if the crate were centered relative to the parent node, so
that when the RigidBody rotates about its center, so will the mesh. To fix
this, select the MeshInstance node and set its Translation property to
(-0.5, -0.25, 0.5).
Finally, we need to add a collision shape to the body. Add a CollisionShape
node as a child of the Crate. In its Shape property, choose “New BoxShape”.
Use the three handles (they look like orange circles) to size the box to fit
the mesh. You can also set the extents directly in the Inspector:
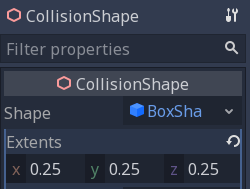
Note that since the crate is 0.5 units wide, the Extents, which represent the distance from the center, becomes 0.25 units.
Now we’re finished setting up the object. Save your Crate scene and let’s
see how we can use it.
Building a 3D Scene
Create a new scene with a Spatial root. The first child we’ll add is one to
give us a “ground” to stack some crates on. Add a StaticBody called “Ground”,
and to that add a MeshInstance. In the Mesh property, select “New PlaneMesh”
and then click it to open its properties. Set Size to (10, 10) so that we
have a nice large surface. However, it would look better if it weren’t plain
white.
Also in the mesh properties is a Material property. Materials are how you define the appearance of an object. Select “New SpatialMaterial” and then click it to open a large list of properties. To set the color of the mesh, we need the Albedo property. Choose a color, such as brown or dark green.
If we add a crate, it will fall right through the mesh, so we also need to give
it a collision shape. With the crate, we added a CollisionShape node and
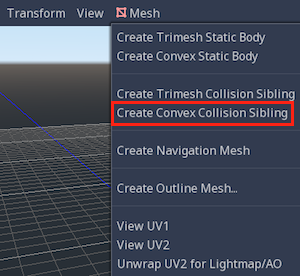
assigned a shape. That’s one way to add collision, let’s look at another:
select the mesh and in the menu at the of the viewport, choose “Create
Convex Collision Sibling”. This will automatically create a CollisionShape
node as a sibling of the mesh and assign it a shape that matches the mesh.
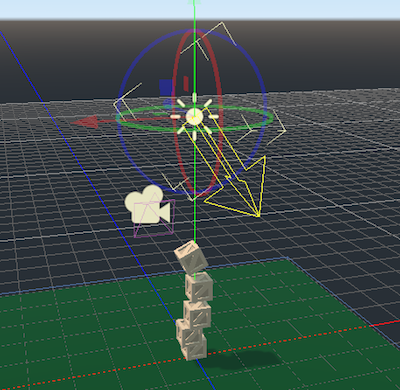
Now instance a few crates in the scene and arrange them in a rough stack. Add
a Camera and place it where it has a good view of the crates. Run the scene
and watch your crates go tumbling!
Rotating Camera
Let’s make the camera a little more dynamic by having it slowly orbit around the
scene. Add a Spatial, which will be located at (0, 0, 0) and name it
“CameraHub”. In the scene tree, drag the camera to make it a child of this new
Spatial. Now, if the Spatial rotates around the y axis, it will drag
the camera along with it.
Add a script to the root node and add the following:
extends Spatial

func _process(delta):
    $CameraHub.rotate_y(0.01)
Run the scene to see what happens.
Lighting
There’s another thing we can add to the scene to improve how it looks: light.
There are multiple light nodes available in 3D, but we’re going to start with
DirectionalLight. Add one to the scene and use the green (Y) arrow to
pull it up into the air.
A DirectionalLight simulates an infinite number of parallel rays of light, as
if from a distant source like the sun. It will not cast shadows by default; to
add shadows, click Enabled in the “Shadow” section. There is also a
“DirectionalShadow” section, which contains a number of advanced properties for
fine-tuning the shadow appearance. For full details see this document.
Note that it really doesn’t matter where you place the node - only the direction of the light arrow matters.
Wrapping Up
In this tutorial you learned how to import 3D objects from outside sources, and how to combine them into a simple scene. We also investigated lights and moving cameras.
In the next part, we’ll look at how to build a more complex scene and include a player-controlled character.
Next: Godot 101: Intro to 3D, Part 3
Support these lessons: 