Project setup
Where to start? Depending on the game, and how fleshed-out your idea is, the answer might be very different. In our case, I’ve cheated a little bit by making a prototype of the game already and working out a few of the ideas ahead of time. Still, it diverged a bit from my initial idea, and so might this series - time will tell.
In a bigger project, you might start with design document, which could be as simple as a page of notes or as complex as a 500-page treatise laying out every detail of your game’s world, plot, and mechanics. We’ve no need of anything so involved here, so let’s just go over the gameplan.
Gameplan
In this game, the player controls a “character” that jumps from circle to circle. Jumping is initiated by a click or touch, and if you don’t hit another circle, you lose. The score is related to how long you survive, and the difficulty will increase over time with circles that move, shrink, and/or expire. The idea is fast-paced, short games with a “top that” feel. As much as possible, the art will remain simple and clean, with visual and audio effects to add appeal.
We’ll be using GLES 3 to start. It’s not yet clear what if any impact this will have. Once we get to the mobile testing phase, we’ll see if a switch to GLES 2 is warranted.
You can also follow this project on Github.
Getting started
Let’s start with the project settings. We need to define our screen size/ behavior. We want this to be a mobile game so it’s going to need to be portrait mode and able to adjust to variable screen sizes, since there are so many phone resolutions available.
Open Project Settings and find the Display/Window section. Set the screen size to (480, 854), the Handheld/Orientation to “Portrait”, the Stretch/Mode to “2d”, and the Stretch/Aspect to “Keep”.
Next, in Input Devices/Pointing enable “Emulate Touch From Mouse”. This will let us write the code only using screen touch events, but still play by using the mouse on PC platforms.
Project organization
To keep things organized, we’re going to make a folder to hold the game objects (objects) and one for UI (gui). The game assets (images, audio, etc.) will go in an assets folder. You can download the starting assets here:
Download the project file here: circle_jump_assets.zip
Once we have the folders and the assets set up, we’re ready to start coding!
Game Objects
We have two game objects to make: the player (“jumper”) and the circle.
Jumper
For movement and collision, we’re going to use a Area2D. To be fair, we could use KinematicBody2D here too, and it would work just as well. However, we don’t really need collision in this game, we just need to know when the jumper contacts a circle. Let’s add the following nodes:
Area2D(“Jumper”)SpriteCollisionPolygon2DVisibilityNotifier2D
Save the scene in res://objects/ and drag the circle image (res://assets/images/jumper.png) into the Sprite’s Texture. Note that all the game images are flat white. This will make it easier for us to dynamically color them later.
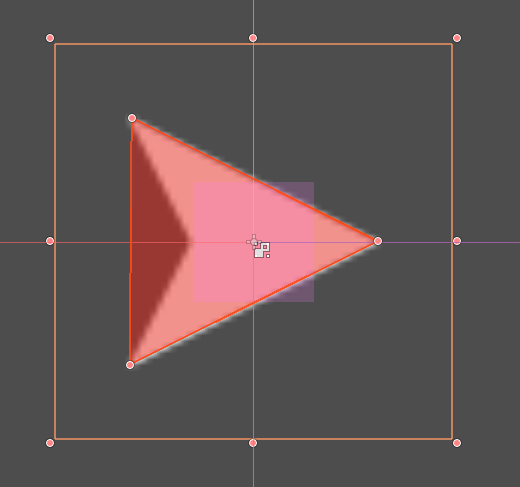
Since the art is drawn pointing upwards, set the Sprite’s Rotation property to 90.
Select the CollisionPolygon2D and add three points to cover the jumper’s triangular shape.
Now let’s add a script to the body and start coding its behavior:
First, the signals and variables:
extends Area2D

var velocity = Vector2(100, 0)  # start value for testing
var jump_speed = 1000
var target = null  # if we're on a circle
Next we’ll detect the screen touch and, if we’re on a circle, call our jump method:
func _unhandled_input(event):
    if target and event is InputEventScreenTouch and event.pressed:
        jump()
Jumping means leaving a circle and traveling forward at our jump speed:
func jump():
    target = null
    velocity = transform.x * jump_speed
We’ll detect hitting a circle with the area_entered signal, so connect it. If we hit a circle, we’ll stop moving forward.
func _on_Jumper_area_entered(area):
    target = area
    velocity = Vector2()
If we are captured by a circle, we want to rotate around it. We’ll add a pivot on the circle, and match its transform so our orientation will always be facing outwards. Otherwise we move forward in a straight line.
func _physics_process(delta):
    if target:
        transform = target.orbit_position.global_transform
    else:
        position += velocity * delta
Color Shader
See the Shaders section for help getting started using shaders.
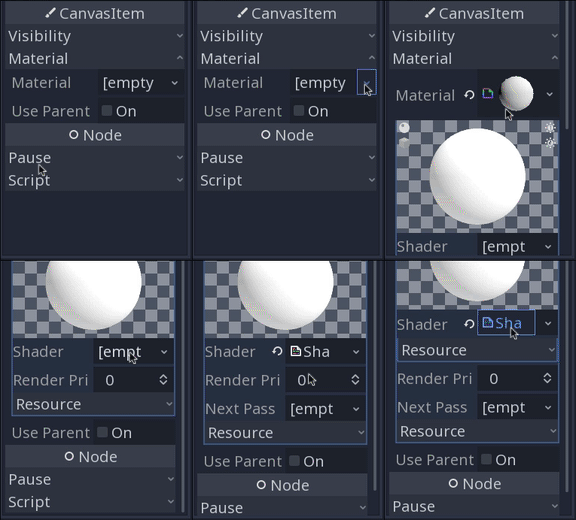
We’re going to use a small shader to the Sprite so that we can customize its color. Select the Sprite and then in the Material property add a new ShaderMaterial. Click on that, and in Shader select “New Shader”, then click on that. The shader editor panel will open at the bottom.
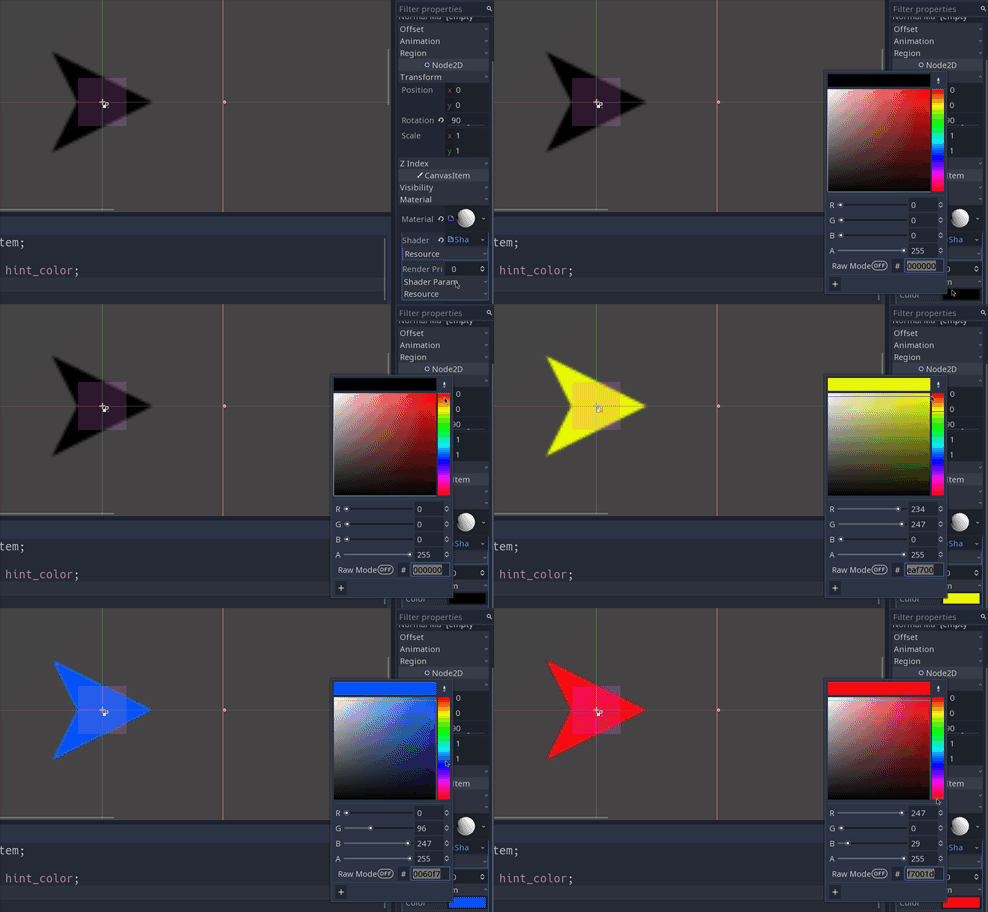
Here is the code for our color shader. It uses a uniform variable for the color, which allows us to choose a value from the Inspector or from our game script. Then it changes all the visible pixels of the texture into that color, preserving the alpha (transparency) value.
shader_type canvas_item;

uniform vec4 color : hint_color;

void fragment() {
    COLOR.rgb = color.rgb;
    COLOR.a = texture(TEXTURE, UV).a;
}
You’ll now see a Shader Params section in the Inspector where you can set a color value:
We’ll want to use this same shader elsewhere, so in the Shader property, choose “Save” and save this as res://objects/color.shader.
Circle
The second game object is the circle, which will be instanced many times as the game progresses. Eventually, we’ll add a variety of behaviors such as moving, shrinking, etc., but for this first iteration, we just want it to capture the player.
Here’s the starting node setup:
Area2D(“Circle”)SpriteCollisionShape2DNode2D(“Pivot”)Position2D(“OrbitPosition”)
The “Pivot” node is how we’ll make the player orbit the circle. The “OrbitPosition” will be offset by whatever the size of the circle is, and the player will follow it.
Use res://assets/images/circle1_n.png as the Sprite’s texture. While we’re here, add a ShaderMaterial and choose “Load” to use the saved color.shader we made earlier.
Add a circle shape to the CollisionShape2D and attach a script to the root node.
extends Area2D

onready var orbit_position = $Pivot/OrbitPosition
var radius = 100
var rotation_speed = PI

func _ready():
    init()

func init(_radius=radius):
    radius = _radius
    $CollisionShape2D.shape = $CollisionShape2D.shape.duplicate()
    $CollisionShape2D.shape.radius = radius
    var img_size = $Sprite.texture.get_size().x / 2
    $Sprite.scale = Vector2(1, 1) * radius / img_size
    orbit_position.position.x = radius + 25

func _process(delta):
    $Pivot.rotation += rotation_speed * delta
In the init() function, we’re setting up the size of the circle, based on the given radius. We need to size the collision shape as well as scaling the texture to match.
Try running the scene with different values of radius to test. (Later we’ll stop calling init() in _ready()).
Main Scene
Now we can test out the interaction.
Create a “Main” scene using a Node2D and instance both the Jumper and the Circle in it. Arrange them so the jumper will hit the Circle (Jumper’s default velocity is (100, 0)).
Try running. You should see the jumper get captured by the circle and start orbiting it. Clicking the mouse should then send the jumper flying off in whatever direction it’s pointing.
Follow this project on Github:
https://github.com/kidscancode/circle_jump


