Spawning Circles
In the previous part, we created the Jumper and Circle object that make up
the bulk of the game. Now we need to add the progression: a continuous series of spawned circles as long as the player doesn’t miss.
Expanding the Main scene
Let’s add some more nodes to Main:
Position2D (“StartPosition”)
This will mark the starting position for the game. Place it near the bottom-center of the screen.
Camera2D
The camera will follow the player as it moves.
Let’s also configure the camera. Set its Offset to
(0, -200)- this will ensure we can see more of the world ahead of us. Also set Current to “On”.
Scripting the Main scene
Remove the jumper and circle instances we manually created. We’ll add them in code moving forward.
Add the following to Jumper.gd:
signal captured
We’ll emit this signal when the jumper hits a circle:
func _on_Jumper_area_entered(area):
    target = area
    velocity = Vector2.ZERO
    emit_signal("captured", area)
And let’s change the init() function on the circle to also accept a position:
func init(_position, _radius=radius):
    position = _position
Now let’s add a script to the Main scene:
extends Node

var Circle = preload("res://objects/Circle.tscn")
var Jumper = preload("res://objects/Jumper.tscn")

var player
We need references to both objects so that we can instance them when needed.
func _ready():
    randomize()
    new_game()
This is temporary - later we’ll have a UI with a start button to call the new game function.
func new_game():
    $Camera2D.position = $StartPosition.position
    player = Jumper.instance()
    player.position = $StartPosition.position
    add_child(player)
    player.connect("captured", self, "_on_Jumper_captured")
    spawn_circle($StartPosition.position)
The new_game() function initializes the game - spawning a player and a circle at the start position, and setting the camera.
func spawn_circle(_position=null):
    var c = Circle.instance()
    if !_position:
        var x = rand_range(-150, 150)
        var y = rand_range(-500, -400)
        c.position = player.target.position + Vector2(x, y)
    add_child(c)
    c.init(_position)
Here’s our spawn_circle() function. If it’s passed a position, it’ll use it, otherwise we pick a random one some distance away from the current target. These are temporary numbers - once we’ve got more of the gameplay up and running, we’ll see how much they need to be adjusted.
func _on_Jumper_captured(object):
    $Camera2D.position = object.position
    call_deferred("spawn_circle")
Finally, we need the function that processes the jumper’s captured signal. We’re going to move the camera to the new circle and spawn another. Note that
because this function is called during physics processing, we’ll get an error if we try and add to the scene tree. Using call_deferred() tells the engine to execute that function as soon as it’s safe to do so.
Try it out. You should be able to jump from circle to circle - how many did you get?
One jarring thing is that the camera “teleports” when it moves to the next circle. We can improve this by enabling Smoothing on the camera. The Smoothing/Speed controls how quickly the camera interpolates to the new position. Try something between 5 and 10.
Adjustments
It’s also jarring that when we hit a circle we don’t start rotating at the place we hit. Add this to the jumper’s _on_Jumper_area_entered() function:
target.get_node("Pivot").rotation = (position - target.position).angle()
Let’s also add this to the circle’s init():
rotation_speed *= pow(-1, randi() % 2)
This randomly flips the rotation speed to positive or negative, so we won’t always orbit in the same direction.
Trail
Add these nodes to the jumper:
Node(“Trail”)Line2D(“Points”)
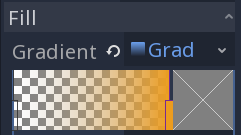
We’re going to use this to make a trail that streams out behind the player. Later we’ll make it more visually appealing, but for now, let’s stick with a simple gradient. In the Fill add a new Gradient, and go from transparent to a color of your choosing:
Now in the jumper’s script, let’s add the following:
onready var trail = $Trail/Points

var trail_length = 25
And then in the _physics_process():
if trail.points.size() > trail_length:
    trail.remove_point(0)
trail.add_point(position)
IMAGE/GIF
Circle animations
Finally, we’ll add some visuals to the circles. First, we’ll add an effect when the player jumps off and the circle disappears. Then, we’ll add a capture effect for when we hit a circle.
Add an AnimationPlayer node to the Circle.
“Implode” animation
Add a new animation called “implode”. Set the length to 0.4 and keyframe two properties of the root Area2D node: Scale at (1, 1) and Modulate at its default ((1, 1, 1, 1)). Then move the scrubber all the way to the end and key the values (0.1, 0.1) and (1, 1, 1, 0) (that’s the “alpha” value of the color).

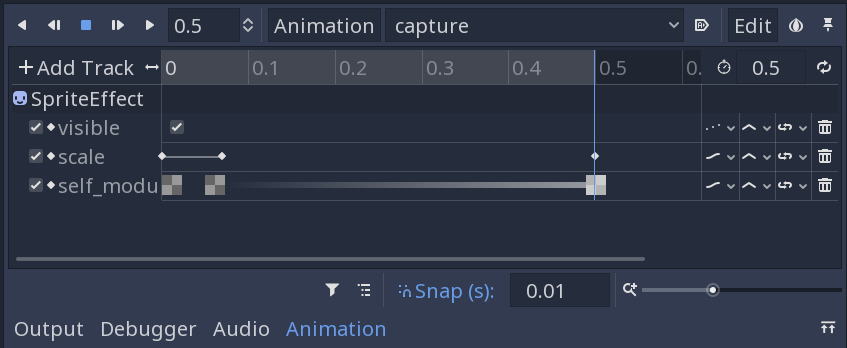
Capture animation
The capture animation is a little more complex. Duplicate the Sprite and call it SpriteEffect. Set its Visible property off. We’re going to animate this second ring zooming in on the main circle.

Here are the functions to add to the circle script:
func capture():
    $AnimationPlayer.play("capture")

func implode():
    if !$AnimationPlayer.is_playing():
        $AnimationPlayer.play("implode")
    yield($AnimationPlayer, "animation_finished")
    queue_free()
And then in Jumper.gd, our jump function becomes:
func jump():
    target.implode()
    target = null
    velocity = transform.x * jump_speed
And in Main, our capture method calls the capture:
func _on_Jumper_captured(object):
    $Camera2D.position = object.position
    object.capture()
    call_deferred("spawn_circle")
GIF
Follow this project on Github:
https://github.com/kidscancode/circle_jump