Path2D & PathFollow2D
Path2D & PathFollow2D
A path is a sequence of points in 2D space, defined by a Curve2D resource. The Path2D is a node that allows you to position a path in 2D space, and do create a new path in the editor.
Paths have a variety of uses. You can make a patrol path for an enemy mob to follow, a winding path for an animated visual effect, a pattern for a moving platform to follow, etc.
About Curve2D
The data of the path is held in this Resource object. It contains the mathematical representation of the curve, and provides some ways to interact with that data. The API Documentation contains the details, but here are a few useful methods that you may want to use:
add_point()/remove_point()/clear_points()
If you need to manipulate the path’s points in code, these functions will help you.
get_closest_point()
This method returns the closest of the path’s points to any given point in space.
get_closest_offset()
Distinct from the above, this method returns the position along the path that’s closest to the given point. Note that this may be in-between two of the path’s defined points.
tesselate()
This method returns a list of points along the curve. These points will be more densely packed in the parts of the path with a higher curvature.
Drawing paths
When you select a Path2D node, some new icons appear on the icon bar:

Selecting one of these icons changes the behavior of the mouse cursor. You can hover over them to see their names.
- Select Points - Lets you move existing points by clicking and dragging.
- Select Control Points - Adds control handles to a point, allowing you to adjust the curve (see below).
- Add Point - Add a point by clicking in empty space.
- Delete Point - Click to delete a point.
- Close Curve - Connects the last point in the curve to the first one, creating a loop.
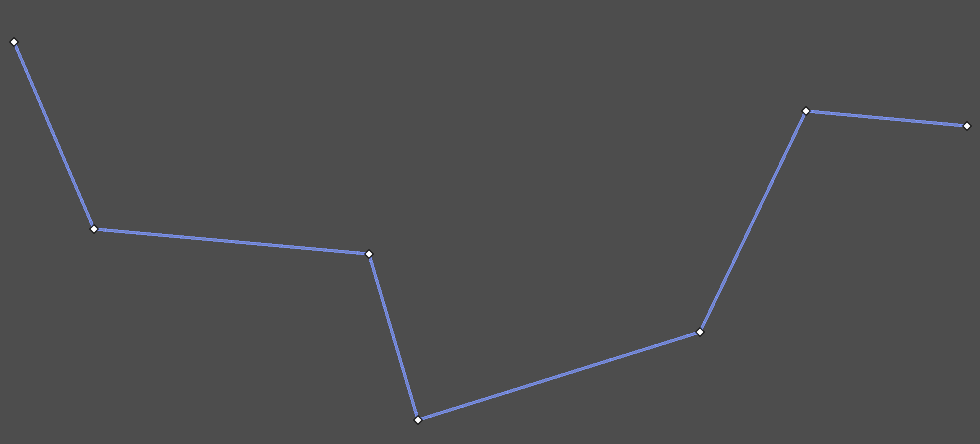
Select “Add Point” and click in the editor window to create points.
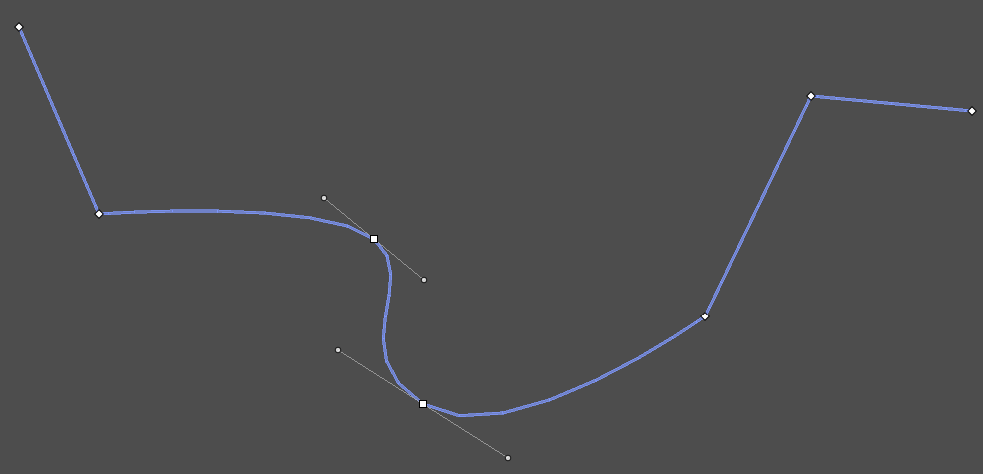
To create a smoother, rounded curve, select “Select Control Points” and drag any of the points in the curve to adjust their “in” and “out” handles:
Following a path
By itself, a Path2D doesn’t have much functionality. In order to move along the path, you need to use a PathFollow2D node as well. This is a node whose function is to move along a parent Path2D.
Most useful properties:
offsetandunit_offset- these properties represent the distance along the path relative to the beginning.offsetis measured in pixels whileunit_offsetis a percentage (eg0is the start,.5is halfway,1.0is the end)rotate- this boolean determines whether the node should rotate as it moves along the path.loop- if this boolean istrue, then offsets greater than the path length will “wrap around”. Use this if you want a repeatable path.
For example, consider this plane moving along a path (you can make the path visible by setting Debug>Visible Navigation):
This is done by making the plane Sprite a child of the PathFollow2D and adding the following to _process():
func _process(delta):
    $Path2D/PathFollow2D.offset += 250 * delta
As the offset is increased, the node moves along the path.
Note the Rotate property of PathFollow2D which keeps the node (and therefore its children) rotated to point along the path as it moves.
Example
Find path direction
Consider this example, from the AI: Context-based Steering recipe:
In this example, the AI agents avoid walls and each other, but also “want” to continue along the track in the correct direction. There is a Path2D drawn along the track, and the agents query it to find out what direction it’s pointing:
func get_path_direction(pos):
    var offset = $Path2D.curve.get_closest_offset(pos)
    $Path2D/PathFollow2D.offset = offset
    return $Path2D/PathFollow2D.transform.x
At any given point along the path, the PathFollow2D’s forward direction (transform.x) points along the path.