RigidBody2D
RigidBody2D
RigidBody2D is the physics body in Godot that provides simulated physics. This means that you don’t control a RigidBody2Ddirectly. Instead you apply forces to it (gravity, impulses, etc.) and Godot’s built-in physics engine calculates the resulting movement, including collisions, bouncing, rotating, etc.
Setting a RigidBody2D’s physical properties, such as position or linear_velocity directly will not work correctly. The physics engine controls these values.
The body’s behavior is also affected by the world, via the Project Settings -> Physics properties, or by entering an Area2D that is overriding the global physics properties.
When used properly, rigid bodies are a powerful tool in your Godot toolkit. Many users get in trouble, however, when they use them for the wrong purposes, or fail to understand exactly how they work.
Node properties
Here are the main properties you’ll need to understand:
- Mode (
mode)
A rigid body can be in one of four modes, which affect its behavior:
- Rigid - This is the default mode. The body behaves like a solid physical object, colliding and responding to forces.
- Static - In this mode, the body does not move, similar to a
StaticBody2D. - Character - In this mode, the body acts the same as in rigid mode, but does not rotate.
- Kinematic - In this mode, the body behaves like a
KinematicBody2D, meaning it can only move via code. NOTE: This does not mean that it gainsKinematicBody2Dhelper functions such asmove_and_slide(). All movement and collision response must be done manually.
- Gravity Scale (
gravity_scale)
This value multiplies the gravity applied to the body. Total gravity is the sum of the “Default Gravity” value from Project Settings and any additional gravity that may applied by Area2D nodes.
- Applied Force (
applied_force)
Using this value you can get or set the total force applied to the body.
- Applied Torque (
applied_torque)
Using this value you can get or set the total torque applied to the body.
- Continuous CD (
continuous_cd)
If your fast-moving body is tunneling through objects, you might need to enable this. Continuous collision detection tries to predict collisions by moving the body continuously along its path, rather than moving and then checking for any collisions. It is more accurate but slower, so use with caution.
Useful functions
To add force to a rigid body, you have two functions to choose from:
add_force()/add_central_force()
Adds a continuous force to the body. Imagine a rocket’s thrust, steadily pushing it faster and faster. Note that this adds to any already existing forces. The force continues to be applied until removed.
apply_impulse()/apply_central_impulse()
Adds an instantaneous “kick” to the body. Imagine hitting a baseball with a bat.
_integrate_forces()
Collision detection
By default, while a RigidBody2D collides and interacts with other bodies in the space, it does not report those collisions.
If you want to get collision information from a rigid body, you must set contact_monitor to true, which enables signals such as body_entered. You can also adjust contacts_reported to set the number of collisions that will be reported.
Controlling Rigid Bodies
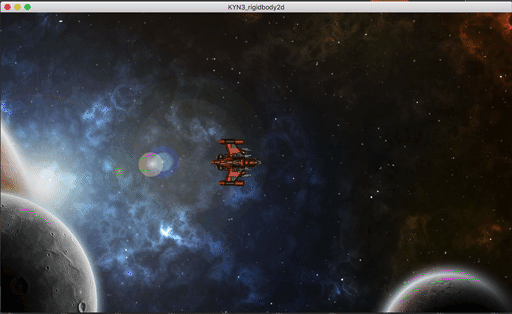
There are cases where you need more direct control of a rigid body. For example, imagine you’re trying to make a version of the classic game “Asteroids”. The player’s spaceship needs to rotate using the left/right arrow keys, and to move forward when the up arrow is pressed.
By default, there is some damping (set in Project Settings), which reduces a body’s velocity and spin. In space there’s no friction, so there shouldn’t be and damping at all. However, for the “Asteroids” feel, we want the ship to coast to a stop and to stop rotating when we let go of the keys. To do that, we set the ship’s Angular/Damp to 5 and Linear/Damp to 1 in the Inspector.
Here’s the code:
extends RigidBody2D

export var engine_thrust = 500
export var spin_thrust = 15000

var thrust = Vector2()
var rotation_dir = 0
var screensize

func _ready():
    screensize = get_viewport().get_visible_rect().size

func get_input():
    if Input.is_action_pressed("ui_up"):
        thrust = transform.x * engine_thrust
    else:
        thrust = Vector2()
    rotation_dir = 0
    if Input.is_action_pressed("ui_right"):
        rotation_dir += 1
    if Input.is_action_pressed("ui_left"):
        rotation_dir -= 1

func _process(delta):
    get_input()

func _physics_process(delta):
    applied_force = thrust
    applied_torque = rotation_dir * spin_thrust
Let’s walk through what this script is doing. The two variables, engine_thrust and spin_thrust control how fast the ship can accelerate and turn. thrust will represent the ship’s engine state: (0, 0) when coasting, or a vector with the length of engine_thrust when powered on. rotation_dir will represent what direction the ship is turning. The screensize variable will capture the size of the screen, which we’ll be using later.
Next, the input() function captures the keystates and sets the ship’s thrust on or off, and the rotation direction (rotation_dir) positive or negative. This function is called every frame in _process().
Finally, physics-related functions should be called in _physics_process(). Here we set applied_force to apply the thrust in whatever direction the ship is facing. Then we set applied_torque to cause the ship to rotate.
Play the scene - you should be able to fly around freely:
The Position Problem
Another feature of “Asteroids” is that the screen “wraps around”. If the player goes off one side, it teleports to the other side. But we already talked above about how you can’t change a rigid body’s position without breaking the physics engine. This presents a huge problem when working with rigid bodies.
You could try to do something like this:
func _physics_process(delta):
    if position.x > screensize.x:
        position.x = 0
    if position.x < 0:
        position.x = screensize.x
    if position.y > screensize.y:
        position.y = 0
    if position.y < 0:
        position.y = screensize.y
    applied_force = thrust
    applied_torque = rotation_dir * spin_thrust
However, it will fail spectacularly, getting stuck on the edges of the screen.
To quote the RigidBody2D documentation:
You should not change a RigidBody2D’s
positionorlinear_velocityevery frame or even very often. If you need to directly affect the body’s state, use_integrate_forces, which allows you to directly access the physics state.
So the answer is to use _integrate_forces() instead of _physics_process(), because in that function you are able to safely modify the body’s Physics2DDirectBodyState. I highly recommend you take a look at the linked document; there is a lot of really useful data provided in the physics state object. For our purposes, the key piece of information is the body’s Transform2D.
So, we change to _integrate_forces() and write the code as follows:
func _integrate_forces(state):
    applied_force = thrust
    applied_torque = rotation_dir * spin_thrust
    if position.x > screensize.x:
        state.transform.origin.x = 0
    if position.x < 0:
        state.transform.origin.x = screensize.x
    if position.y > screensize.y:
        state.transform.origin.y = 0
    if position.y < 0:
        state.transform.origin.y = screensize.y
By adjusting the body’s transform using the physics state, the engine stays happy, and everything works as expected:
