Shaders: intro
Problem
You want to get started coding shaders.
Solution
A shader is a special program that runs on the computer’s GPU (graphics card). The GPU is optimized to perform certain types of math very efficiently. Shader code can be attached to objects to affect how they’re rendered on the screen.
The output of a shader program is the color of the set of pixels of the object. Shaders can be used in 2d (canvas_item shaders) and 3D (spatial shaders).
The most difficult part for newcomers to understand about shaders is that they run in parallel. A shader runs simultaneously on all pixels. This allows for great speed, but also limits what information you have access to in the shader.
To add a shader to an object, find its Material property and select “New ShaderMaterial”. Click the new material to open it, and select “New Shader”. Click that, and you’ll see a shader editor open at the bottom of the screen.
The first line of the shader must specify its type. If the node it’s attached to is a 2D node:
shader_type canvas_item;
Or for a 3D node:
shader_type spatial;
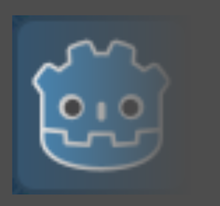
For these first examples, let’s stick to 2D. Add a Sprite node and add shader following the steps above. You can use the Godot icon for its texture.
There are two basic types of shader we’ll discuss here: vertex and fragment.
Fragment shader
Fragment shaders calculate the color of the pixel. Let’s look at an example:
void fragment() {
    COLOR = vec4(1.0, 0.0, 0.0, 1.0);
}
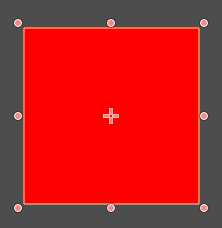
Every pixel is red. COLOR is the output of the fragment shader and is applied to every pixel simultaneously. But what if we want some variation?
UV coordinates
In shaders, the pixel coordinates are specified in UV notation. These are normalized values ranging from (0, 0) (top-left) to (1, 1) (bottom-right).
Shaders use vectors (vec4) to represent RGBA colors. Individual compenents can be accessed using e.g. color.r. Treating colors as vectors allows for a variety of interesting effects based on vector math.
void fragment() {
    COLOR = vec4(UV.x, 0.0, 0.0, 1.0);
}
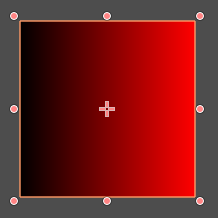
Now the red channel ranges from 0 on the left to 1.0 on the right, varying along with the UV.
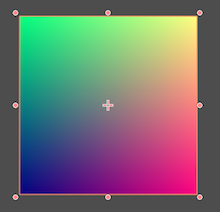
Another example:
void fragment() {
    COLOR = vec4(UV.x, 1.0 - UV.y, 0.5, 1.0);
Textures
Notice that since we’re setting the pixel color directly, we’ve thrown away the Godot icon’s data. You can access that texture data using the TEXTURE input and texture() function:
void fragment() {
    COLOR = texture(TEXTURE, UV);
}
Now we’re back to the original image. Each pixel’s color is being set to the color value of the texture at the same UV position.
It’s also possible to change only one channel of the COLOR output:
void fragment() {
    COLOR = texture(TEXTURE, UV);
    COLOR.a = 1.0 - UV.x;
}
This ramps the alpha channel down, resulting in a fade-out effect.
Varying with time
Another useful built-in shader property is TIME, which gives an ever-increasing value representing the current elapsed time. If we also use the sin() function, which returns a value between -1 and 1, we can produce this effect:
void fragment() {
    COLOR = texture(TEXTURE, UV);
    COLOR.a = abs(sin(TIME * 0.5));
}
Or this one:
void fragment() {
    COLOR = texture(TEXTURE, UV);
    COLOR.a = max(0.0, UV.x - abs(sin(TIME)));
}
Vertex shader
Vertex shaders alter the vertices of the object, allowing for deformations and scaling. Just as fragment shaders run on every pixel, vertex shaders run on every vertex of an object. In a canvas_item shader, this typically means the four corners of the texture. In a spatial shader, it’s each vertex of the mesh.
For example, observe what happens with the following:
void vertex() {
    VERTEX.x += UV.x * 10.0;
}
In this shader, the two left vertices (0, 0) and (0, 1) are unchanged, but the right vertices become (10, 0) and (10, 1).
Varying the vertex positions over time can produce a variety of interesting effects:
void vertex() {
    VERTEX.y += sin(UV.x * TIME) * 10.0;
}
Uniforms
To pass a value to the shader, you need a variable declared with the uniform keyword. Once you do this, the variable appears in the Inspector in much the same way an export variable. However, a uniform’s value can not be changed in the shader!
Uniform values are global to the shader and can be accessed from any function.
Hints
You can also use optional hints to assist in setting the value in the Inspector.
uniform float radius : hint_range(0, 1);
Hints are available for a variety of data types. See the Shader Language Reference for a full list.
Wrapping up
This is just a tiny introduction to what’s possible with shaders. See the rest of the recipes in this section for more examples you can use in your projects.