The 3D Editor
In this tutorial, we’ll look at how to start working in 3D in Godot. You’ll learn how to navigate in the 3D editor, how to create and manipulate 3D objects, and how to work with some of Godot’s essential 3D nodes, such as cameras and lighting.
Are you ready?
A word of warning: 3D development can be quite a bit more complex than working in 2D. While many of the same principles apply - such as working with nodes, writing scripts, and handling logic/data - 3D brings with it a number of other considerations. For this reason, it’s a good idea to stick to 2D for your first few projects, moving to 3D once you have a good understanding of the game development process. This tutorial will assume you have completed at least an introductory Godot 2D project, such as the one in the [official Godot tutorial] (https://docs.godotengine.org/en/stable/getting_started/step_by_step/your_first_game.html).
Getting Started in 3D
One of Godot’s strengths is its ability to handle both 2D and 3D games. While much of what you’ve learned working on 2D projects (nodes, scenes, signals, etc.) applies equally well in 3D, there is also a whole new layer of complexity and capabilities. First, you’ll find that there are some additional features available in the 3D editor window, so we’ll start there:
Orienting in 3D Space
When you first open a new project in Godot, you will see the 3D project view:
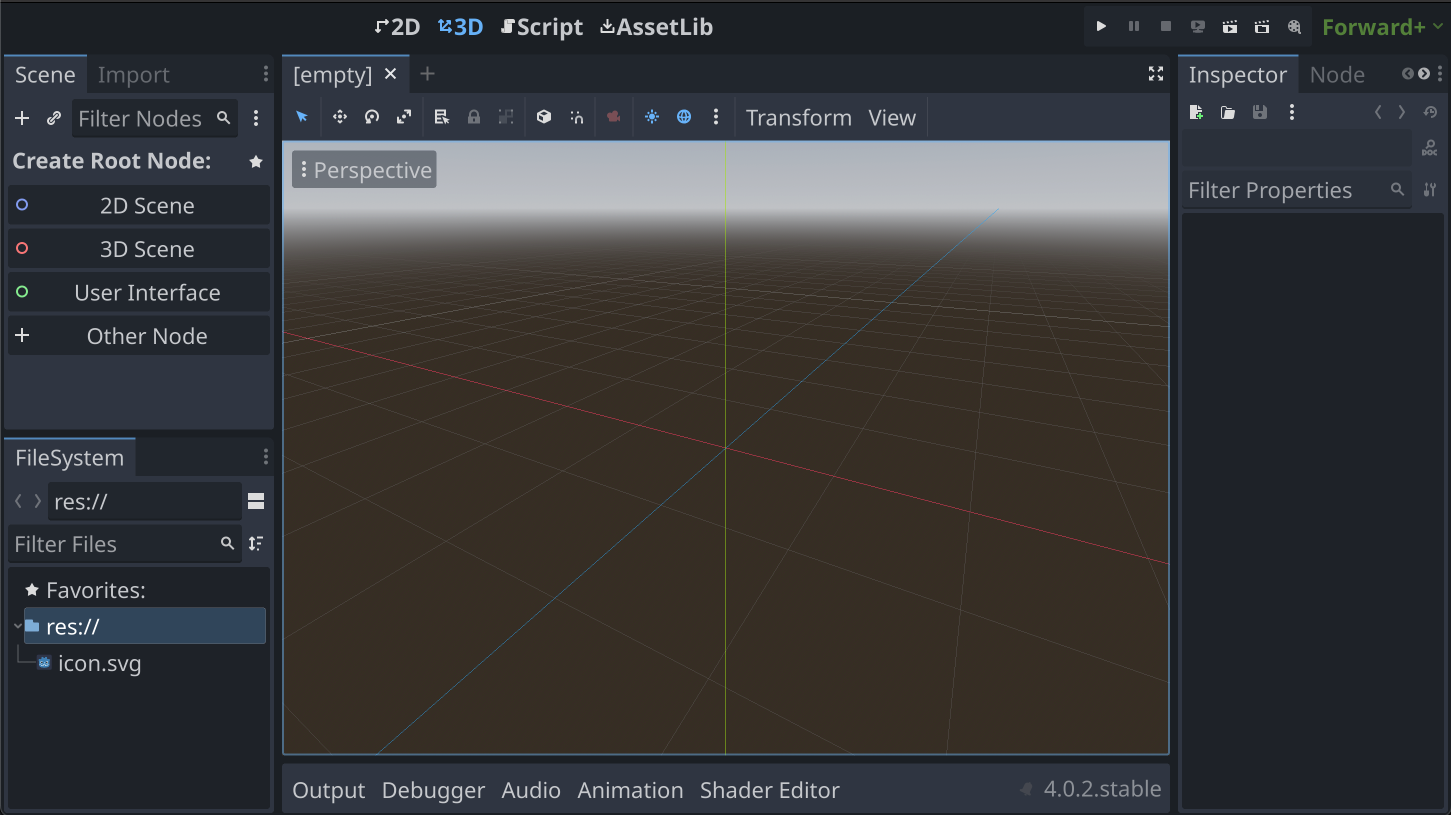
The first thing you should notice is the three colored lines in the center.
These are the x (red), y (green), and z (blue) axes. The point where
they meet is the origin, which has the coordinates (0, 0, 0). You’ll find
that this color scheme will also apply elsewhere in the Inspector.
Different 3D applications follow different conventions for orientation. Godot uses Y-Up orientation, so that when looking at the axes, if x is pointing to the left/right, then y is up/down, and z is forward/back. Some other popular 3D software uses Z-UP. It’s good to keep this in mind when moving between applications.
Navigation in 3D is performed using the mouse and keyboard. Here are the basic controls for the view camera:
- Mousewheel up/down: zoom in/out
- Middle button + drag: orbit camera around current target
- Shift + middle button + drag: pan camera
- Right-click + drag: rotate camera in place
In addition, if you’re familiar with popular 3D games, you might prefer Freelook mode, which you can toggle on/off using Shift+F. In this mode, you can use the WASD keys to fly around the scene while aiming with the mouse.
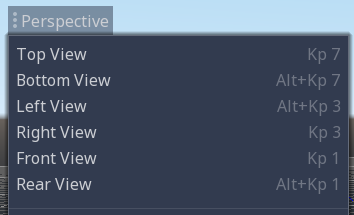
You can also alter the camera’s view by clicking on the [Perspective] label
in the upper-left corner. Here, you can snap the camera to a particular
orientation.
Adding 3D Objects
Now let’s add our first 3D node. Just as all 2D nodes inherit from Node2D,
which provides properties such as position and rotation, 3D nodes inherit
from Node3D, which provides 3D versions of the same properties. Add one to your scene and you’ll see the following object
appear at the origin:
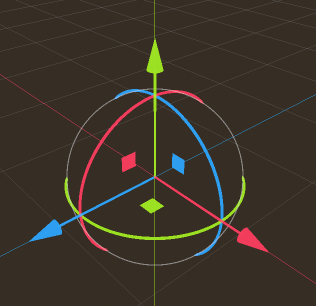
This object is not the node. It is something called a 3D gizmo. Gizmos are tools that allow you to move and rotate objects in space. The three rings control rotation, while the three arrows move (translate) the object along the three axes. Note that the rings and arrows are color-coded to match the axis colors.
Take a few minutes to experiment and get familiar with the gizmo. Use Undo if you find yourself getting lost.
Sometimes you may feel the gizmos are getting in your way. You can
click on the mode icons to restrict yourself to only one type of transformation:
move, rotate, or scale:

Global vs. Local Space
By default, the gizmo controls operate in global space. When you rotate the object, the gizmo’s arrows still point along the axes. However, if you click the Use Local Space button, the gizmo will switch to moving the body in local space.
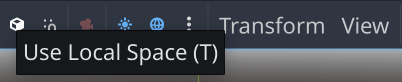
Now when you rotate the object, the gizmo arrows point along the object’s axes and not the world’s. Switching back and forth between Local and World space can make it much easier to place an object exactly where you want it.
Transforms
Look at the Inspector for the Node3D node. In the Transform section, you’ll see properties for Position, Rotation, and Scale. Drag the object around with the gizmo and observe how these values change. Just like in 2D, these properties are relative to the node’s parent.
Together, these properties make up the node’s transform. When changing the node’s spatial properties in code, you’ll access the transform property, which is a Godot Transform3D object. It has two properties: origin and basis. The origin represents the body’s position, while the basis contains three vectors that define the body’s local coordinate axes - think of the three axis arrows in the gizmo when you’re in Local Space mode.
You’ll see how to use these properties later in this section.
Meshes
Just like a Node2D, a Node3D has no size or appearance of its own. In 2D, you would use a Sprite2D to add a texture to the node. In 3D, you need to add
a mesh. A mesh is a mathematical description of a shape. It consists of a
collection of points, called vertices. These vertices are connected by lines,
called edges, and multiple edges (at least three) together make a face.
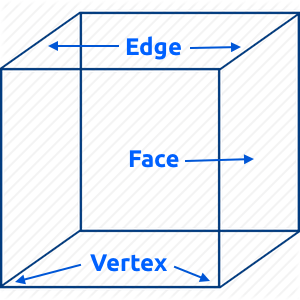
For example, a cube is made up of 8 vertices, 12 edges, and 6 faces.
Adding Meshes
Typically, meshes are created by using 3D modeling software, such as Blender. You can also find many collections of 3D models available for download, if you’re unable to create your own. However, often you just need a basic shape such as a cube or sphere. In this case, Godot provides a way to create simple meshes called primitives.
Add a MeshInstance3D node as a child of the Node3D and in the Inspector, click its Mesh property:
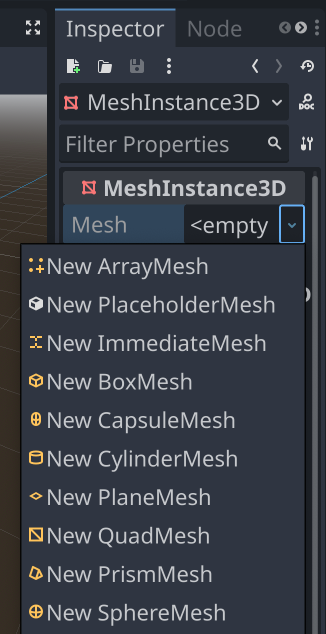
Here you can see the list of available primitives. They represent a handy collection of common useful shapes. Select “New BoxMesh” and you’ll see a plain cube appear on the screen.
Cameras
Try running the scene with your cube object. Did you see anything? In 3D, you
won’t see anything in the game viewport without adding a Camera3D. Add one to the root node and use the camera’s gizmo to position it pointing towards the cube:
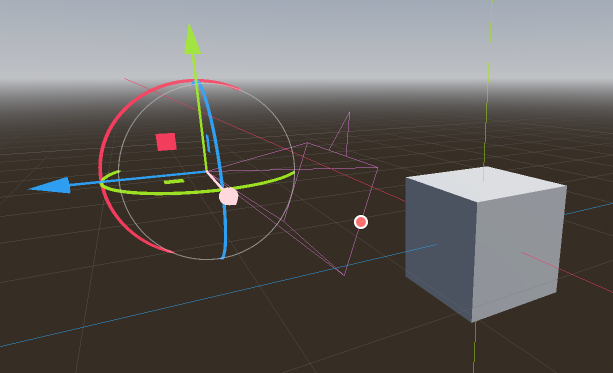
The pinkish-purple pyramid shape on the camera is called the fustrum and represents the camera’s view. Notice the small triangular arrow which represents the camera’s “up” orientation. As you’re moving the camera around, try pressing the Preview button in the upper-left to see what the camera sees. Play the scene to verify everything is working as expected.
Wrapping Up
In this tutorial you learned how to use Godot’s 3D editor, how to add 3D
nodes such as Node3D, MeshInstance3D, and Camera3D, and how to use gizmos to place your objects. You also learned a bunch of new terminology. Hopefully you’re not overwhelmed.
In the next part, we’ll look at how to build a 3D scene by importing 3D assets and how to use more of Godot’s 3D nodes.