Bullet Scene
Now that the player can move around the screen, our next step will be to implement shooting
Reusable objects
The player will fire many “bullets” during the game, but all of them will be identical. A bullet needs to do the following:
- Appear just ahead of the player
- Travel forward until going off the screen
- Detect collisions with enemies
Since all bullets will do these same things, we can save ourselves a great deal of work by designing one “prototype” bullet, and using that as the blueprint for creating as many duplicates as we need. Godot’s scene system is ideal for this.
Bullet scene
Create a new scene by selecting Scene -> New Scene in the menu, or by clicking the + in the tabs on the top of the viewport.
Just like we did with the Player scene, we need to consider what nodes we’ll need to make the bullet work. We can again use an Area2D, since that will allow us to detect the bullet hitting things. This means we’ll need a collision shape, and a sprite to display the bullet image. Finally, we need a way to detect when the bullet goes offscreen so we can automatically remove it.
Here’s the node setup:
Area2D- name thisBulletSprite2DCollisionShape2DVisibleOnScreenNotifier2D
From the asset pack folder, drop the Player_charged_beam (16 x 16).png image on the Texture of the Sprite2D.
As with the ship image, there are multiple versions here, so set the *Hframes to 2 so we’ll only see one at a time.
Set the shape of the CollisionShape2D just like you did earlier in the Player scene.
Bullet script
Attach a script to the Bullet node and let’s start with the movement:
extends Area2D

@export var speed = -250

func start(pos):
    position = pos

func _process(delta):
    position.y += speed * delta
This should look fairly familiar, as it’s similar to the player script. We’re only changing the position.y since the bullet should travel straight up.
Note the start() function we defined. That will let us set the bullet’s starting position, since the player will move around and spawn the bullets at different locations.
Connecting signals
Now select the Bullet node and then click the Node tab next to the Inspector.
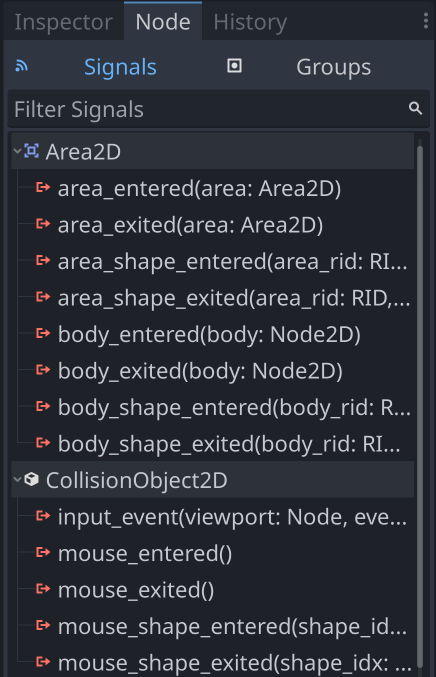
This is a list of all the signals this node can emit. Signals are how Godot lets you know that something has happened. In this case, we can use the area_entered signal to tell us whenever this bullet touches another Area2D node.
Select the area_entered signal and click the Connect… button (you can also double-click the signal name). In the dialog that opens up, just click Connect - we don’t need to change anything there.
You’ll notice that you’re back in the script editor, looking at bullet.gd, and a new function as been added. It has a green “connected” icon next to its name to show that a signal is connected to it. This function will be called whenever the area touches something, so let’s add some code here:
func _on_area_entered(area):
    if area.is_in_group("enemies"):
        area.explode()
        queue_free()
Here we’ll check if the bullet hit an enemy (more about that later), and if it did, we tell the enemy to explode and then delete the bullet.
Do the same thing to connect the screen_exited signal of the VisibleOnScreenNotifier2D.
func _on_visible_on_screen_notifier_2d_screen_exited():
    queue_free()
Next steps
This completes the bullet scene, so now we can go back and add shooting to the player.
| Prev | Next |
|---|