UI and Score
The last main piece of our game is the user interface (UI). We need a way to show the player the score and other information. To do this, we’ll use a variety of Control nodes - the nodes Godot provides for building UIs.
UI scene
Start the scene with a MarginContainer and name it UI.
Containers are Control nodes that are designed to control the size and position of their children. Using them makes it easier to position and move Control nodes without having to do it manually. The MarginContainer makes sure its children don’t get too close to the edge.
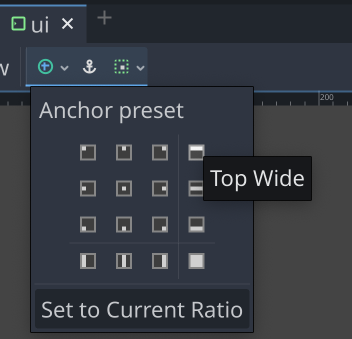
In the Inspector under Theme Overrides/Constants set all four Margin values to 10. Then, in the menu bar at the top of the viewport, set the anchors to the Top Wide preset.
Next, we’ll add an HBoxContainer. This type of container organizes its children horizontally. Under that, add a TextureProgressBar, which will represent our ship’s shield level. Name it ShieldBar.
Unfortunately, there’s not a good image in the art pack to use for a progress bar (there is one, but it isn’t formatted in an easy way to work with). Instead, we’ll use the two images below. One is a green bar and the other is a white outline. Save them in your project folder.


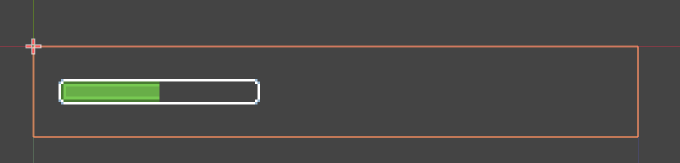
In the Texture section, drag the foreground image to the Progress and the background image to the Under texture. The first thing you’ll notice is that it’s very small. Let’s first under Layout set Custom Minimum Size to (80, 16). You’ll notice that the orange selection rectangle got bigger, but the image didn’t. Well, we don’t want the image to just stretch, or it would look bad. Instead we’ll check the Nine Patch Stretch box, and then set the four Stretch Margin values to 3.
You should now see a long, unfilled bar. To see what it looks like when filled, change the Value property in the Range section to anything between 0 and 100.
On the right side, we’d like to show the score. Now, we could just use a Label node and add a font, but that’s not very fun. The art pack includes a lovely pixel set of digits that we could use instead. We’ll just need to do a little coding to chop it up and show the corect digit(s).
Score counter
Start a new scene and add an HBoxContainer. Name it ScoreCounter then set it to Top Wide and set the Alignment to “End”. Also, set the Theme Overrides/Constants/Separation to 0 (you need to check the box next to the property).
In this container, we’ll have a string of TextureRect nodes showing each digit. We’ll start by adding one and then duplicating it.
Name the TextureRect Digit0. Under Texture, select “New AtlasTexture”, then click the box to open it. Drag Number_font (8 x 8).png into the Atlas property, then set the Region to (32, 8, 8, 8). Set Stretch Mode to “Keep Aspect Centered”.
Select the Digit0 node and press Ctrl-D 7 times to create duplicates of the node. The picture below shows what you should see after this step:
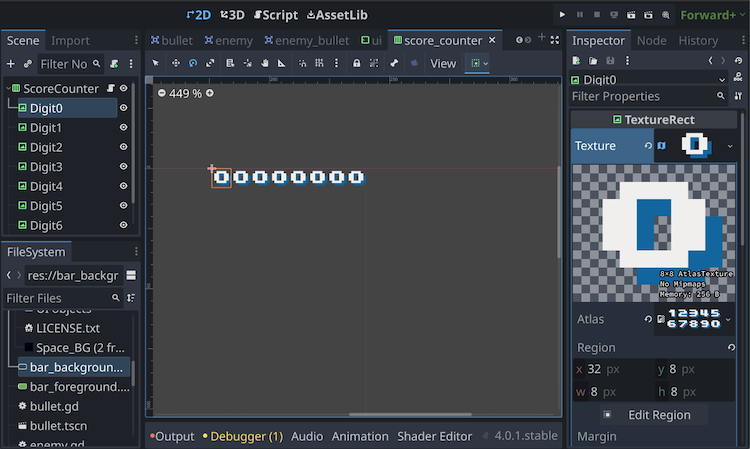
We now have an issue, though. Even though we’ve duplicated the TextureRect to create 8 unique copies, they are all using the same AtlasTexture in the Texture property. This means that when we change the Region to show a different digit, it will change on all the digits.
This is because Resource objects (such as Texture) are loaded into memory and then shared - there’s really only one texture. While this is very efficient, because you don’t waste memory loading the same image multiple times, it means that when we do want things to be unique, we have to specify it.
On each of the nodes, click the down arrow next to the AtlasTexture and select “Make Unique”.

Now we’ll add a script to ScoreCounter that will choose the correct Region values for whichever digit it needs to display.
extends HBoxContainer

var digit_coords = {
    1: Vector2(0, 0),
    2: Vector2(8, 0),
    3: Vector2(16, 0),
    4: Vector2(24, 0),
    5: Vector2(32, 0),
    6: Vector2(0, 8),
    7: Vector2(8, 8),
    8: Vector2(16, 8),
    9: Vector2(24, 8),
    0: Vector2(32, 8)
}

func display_digits(n):
    var s = "%08d" % n
    for i in 8:
        get_child(i).texture.region = Rect2(digit_coords[int(s[i])],
                Vector2(8, 8))
We start by making a list of the coordinates in the image where each digit is found. Then, display_digits() will format the number to an 8 digit number (for example, 258 would become "00000258"). Then, for each digit, we can apply the correct coordinates from the array.
Scripting the UI
Go back to the UI scene and add the ScoreCounter to the HBoxContainer, then add a script to UI.
extends MarginContainer

@onready var shield_bar = $HBoxContainer/ShieldBar
@onready var score_counter = $HBoxContainer/ScoreCounter

func update_score(value):
    score_counter.display_digits(value)


func update_shield(max_value, value):
    shield_bar.max_value = max_value
    shield_bar.value = value
We’ll call these functions from Main whenever we need to update the score or the shield.
Adding the UI to main
Now in the Main scene add a CanvasLayer node, and instance the UI as its child. The CanvasLayer node creates another drawing layer, so our UI will be drawn on top of the rest of the game.
Change this function in main.gd:
func _on_enemy_died(value):
    score += value
    $CanvasLayer/UI.update_score(score)
Run the game and see that your score goes up when shooting enemies.
Player shield
We can also add the shield to the player’s script. Add these new lines at the top of player.gd:
signal died
signal shield_changed

@export var max_shield = 10
var shield = max_shield:
    set = set_shield
This set = syntax tells Godot that we want to call the set_shield() function whenever the shield variable has its value set.
func set_shield(value):
    shield = min(max_shield, value)
    shield_changed.emit(max_shield, shield)
    if shield <= 0:
        hide()
        died.emit()
We can also connect the ship’s area_entered signal so that we can detect when an enemy hits the ship:
func _on_area_entered(area):
    if area.is_in_group("enemies"):
        area.explode()
        shield -= max_shield / 2
And in the enemy bullet, add some damage to the shield when it hits:
func _on_area_entered(area):
    if area.name == "Player":
        queue_free()
        area.shield -= 1
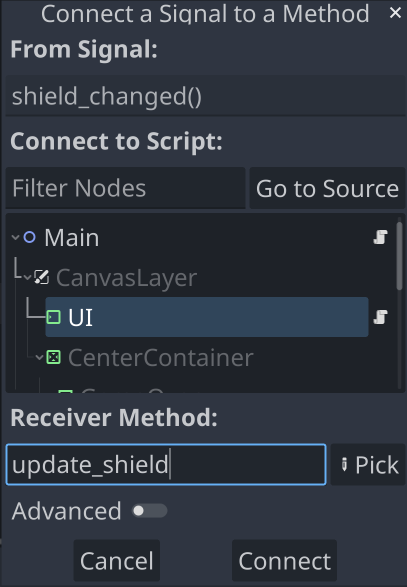
Finally, we need to connect the player’s shield_changed signal to the function in the UI that updates the shield bar. You can do this in the Inspector by selecting the Player node in the Main scene. Under the Node tab, double-click the shield_changed signal to open the “Connect a Signal” window. In this window, select the UI node and type update_shield in the Receiver Method box.
Run the game again and check that your shield depletes when you get hit by a bullet or an enemy.
Next steps
We’re almost done with the basic functionality. We just need a way to start and end the game.
| Prev | Next |
|---|