Topdown Tank Battle: Part 2
Fri, Apr 6, 2018In this tutorial series, we’ll walk through the steps of building a 2D top-down tank game using Godot 3.0. The goal of the series is to introduce you to Godot’s workflow and show you various techniques that you can apply to your own projects.
This is Part 2: adding terrain using TileMap.
You can watch a video version of this lesson here:
Introduction
In the last step we created a player tank and implemented its movement and aiming. In this part we’re going to create the map that the player will drive around on.
To do this, we’ll use the TileMap node.
TileMap
A TileMap node allows you to quickly design levels by “painting” tiles onto a grid.
In order to use a TileMap, you have to assign a TileSet resource. We want to use the tiles from this image:
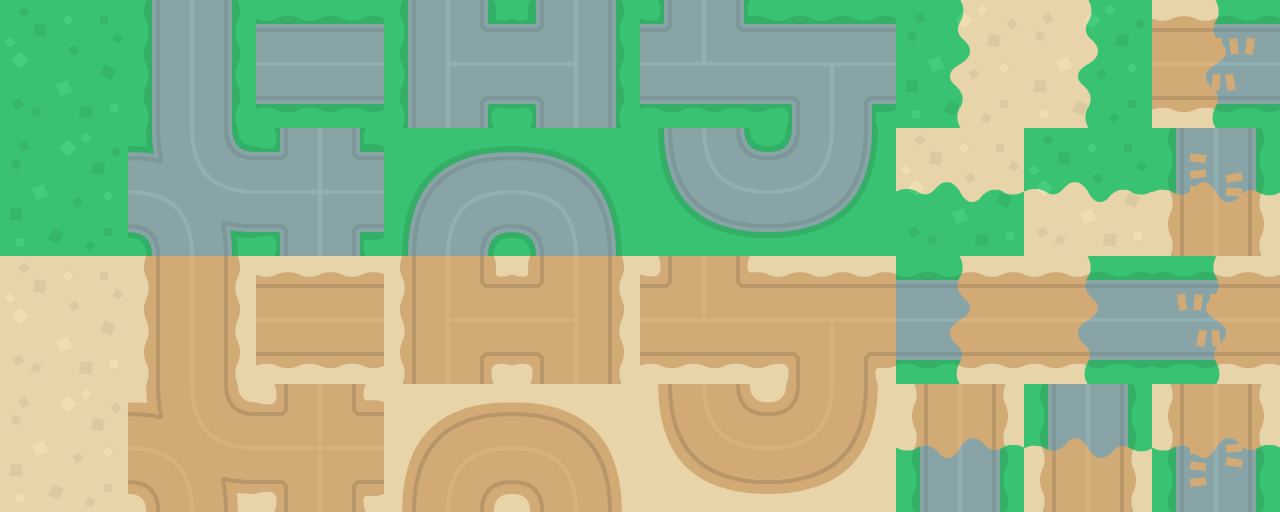
Since these source tiles are laid out in a regular grid, it will be easier to write a brief script to “slice” them into a TileSet than to cut them up manually.
Automatically creating the TileSet
Create a new scene with a Node root and add a Sprite node with the image above as its Texture property. Save it in a new “terrain” folder and call it TileSetMaker.tscn. It’s likely we’ll want to use this script again to generate other TileSets, so this way we can repeat the process by using another texture in this scene.
Add a script with the following code:
extends Node

var tile_size = Vector2(128, 128)
onready var texture = $Sprite.texture

func _ready():
    var tex_width = texture.get_width() / tile_size.x
    var tex_height= texture.get_height() / tile_size.y
    var ts = TileSet.new()
    for x in range(tex_width):
        for y in range(tex_height):
            var region = Rect2(x * tile_size.x, y * tile_size.y,
                               tile_size.x, tile_size.y)
            var id = x + y * 10
            ts.create_tile(id)
            ts.tile_set_texture(id, texture)
            ts.tile_set_region(id, region)
    ResourceSaver.save("res://terrain/terrain_tiles.tres", ts)
This script starts by getting the pixel size of the image and dividing by the tile size, so that we know how many tiles we have. Then it’s a matter of looping through the tiles one by one and creating a tile in the new TileSet object. Note that tiles need to have a unique id, so we’re generating one using x + y * 10. Then we add the texture and region for the tile.
Finally, using ResourceSaver you can save a given resource to disk.
You can use this script for any tilesheet arranged into a grid - just set the appropriate tile_size value. Run the scene and the resulting TileSet is saved in the “terrain” folder and ready to use.
Level structure
Eventually we will probably want to have multiple maps, but their functionality will probably be the same - display the tiles and spawn any map objects we need. For now, we’ll just make a generic map and get that working.
Make a new scene with a Node2D called “Map01” and give it a TileMap child. Drag res://terrain/terrain_tiles.tres into the Tile Set property. Set the Cell/Size property to (128, 128) to match the size of the tiles. Save the map in a “maps” folder.
Draw the map by choosing a tile from the window on the left and left-clicking in the editor window to place it. Right-click removes a tile. Draw the level as large as you like - we’ll add a scrolling camera soon.
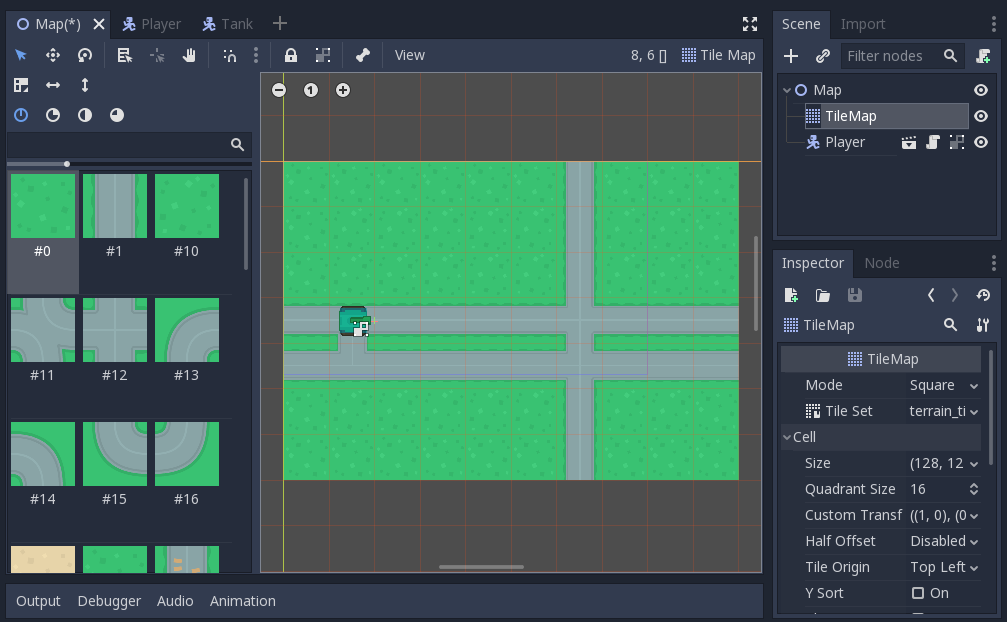
One note: I’m naming the TileMap “Ground” because one of the nice things you can do with TileMaps is layer them. You can then have different types of objects in each layer.
When you’re finished drawing your level, add an instance of the Player to the scene. Run the scene and you’ll see that we really need to have a scrolling camera!
Scrolling Camera
Go back to your player scene and add a Camera2D node. Set its Current property to “On” and then run your map scene again.
Much better, but there’s still a problem when we reach the edge of the map. We don’t want to see that grey area “past” the edge of the map:
Camera limits
Camera2D has properties that define its maximum and minimum allowed x/y values. You can find them under Limit in the Inspector.
However, we want those limits set dynamically based on the size of the map we’re on. Attach a new script to the map scene. Important: Name this script “Map.gd” because even if we make more than one map, they’re all going to use this same script.
extends Node2D

func _ready():
    set_camera_limits()

func set_camera_limits():
    var map_limits = $Ground.get_used_rect()
    var map_cellsize = $Ground.cell_size
    $Player/Camera2D.limit_left = map_limits.position.x * map_cellsize.x
    $Player/Camera2D.limit_right = map_limits.end.x * map_cellsize.x
    $Player/Camera2D.limit_top = map_limits.position.y * map_cellsize.y
    $Player/Camera2D.limit_bottom = map_limits.end.y * map_cellsize.y
At runtime, we call the camera limit function. It uses the camera’s get_used_rect()
method to find a rectangle enclosing the used cells in the map. We also need the
cell size so we can convert to pixels. Then, it’s a matter of setting each camera
limit to the corresponding map’s edge coordinate.
Run your map scene again and you should see the camera scrolling stop when you reach the edge of the map.
Conclusion
That’ll do it for Part 2 of this series. Next time, we’ll add an enemy tank and make it drive around the map too!
Please comment below with your questions and suggestions.